Backup EDB, live Exchange/Office 365 mailbox or Outlook profile
Backup EDB, live Exchange/Office 365 mailbox or Outlook profile to PST (new/existing) or Outlook profile
The Exchange Recovery Manager helps you export mailbox data from EDB files, Live Exchange (on-premises)/ Office 365, or Outlook profile to a new/existing PST file, or Outlook profile. The steps are:
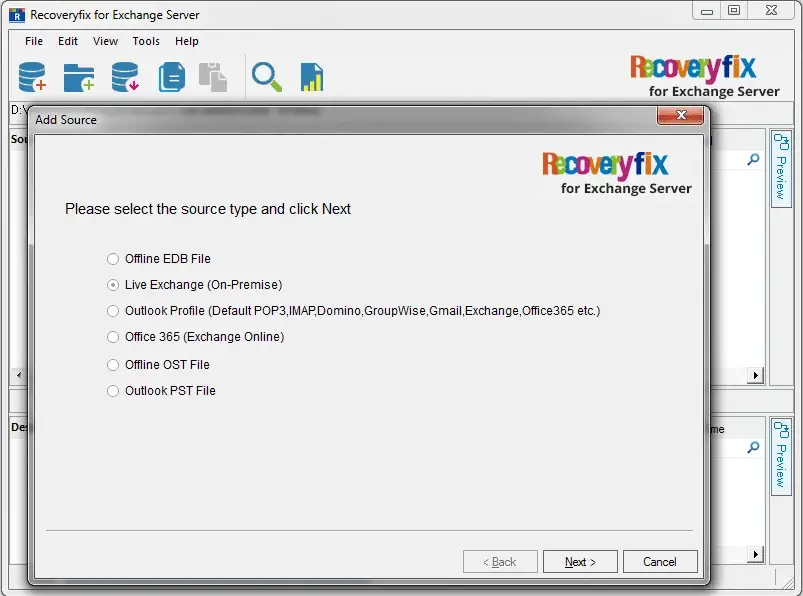
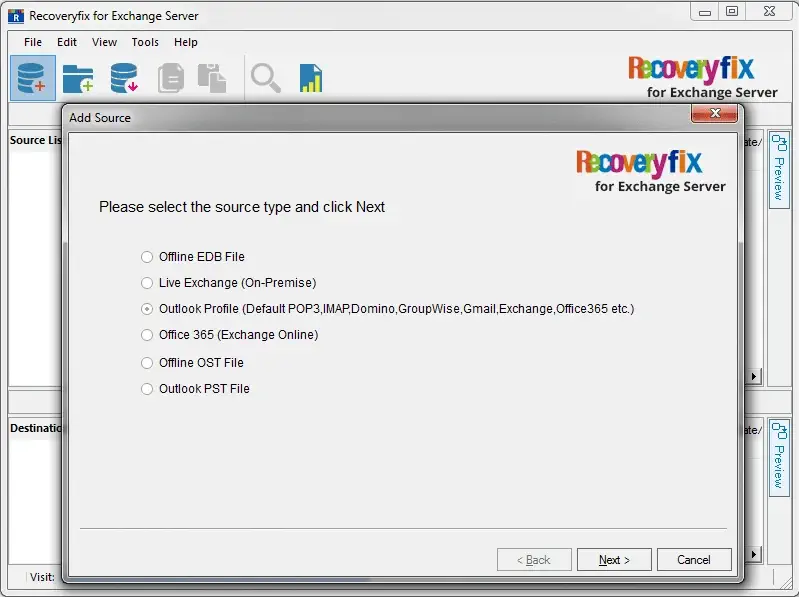
To migrate data from EDB files, live Exchange (on-premises)/Office 365, or Outlook profile, add them as the source. When you launch the Recoveryfix for Exchange Server Recovery, the Welcome screen will appear. Here, you can add an Offline EDB file, Live Exchange (on-premises), Office 365, or Outlook profile as the source.
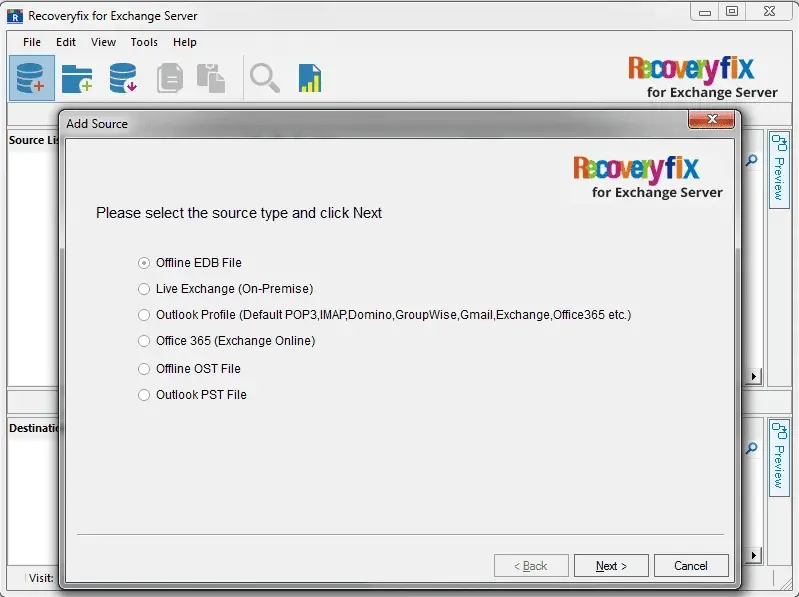
To add EDB files as the source:
In the Add Source dialogue box, select Offline EDB File and then click Next.
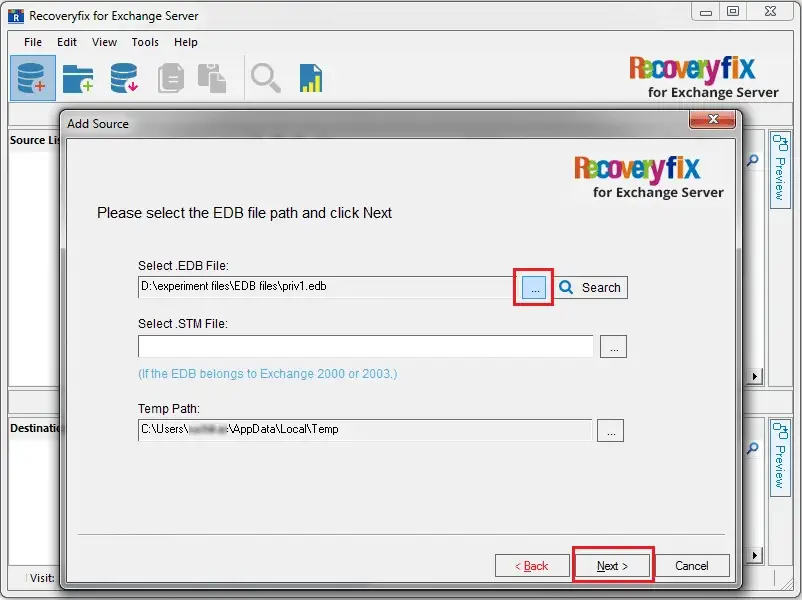
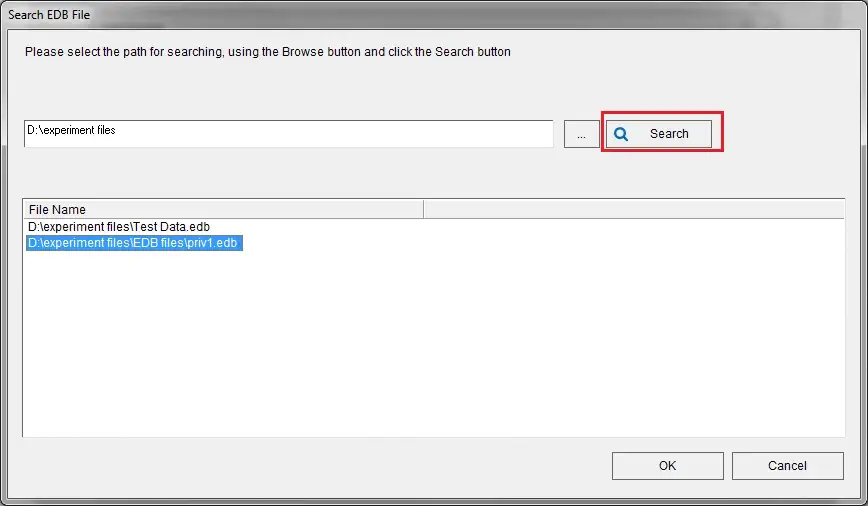
Click (…) to Browse and select your EDB file. Click Next.
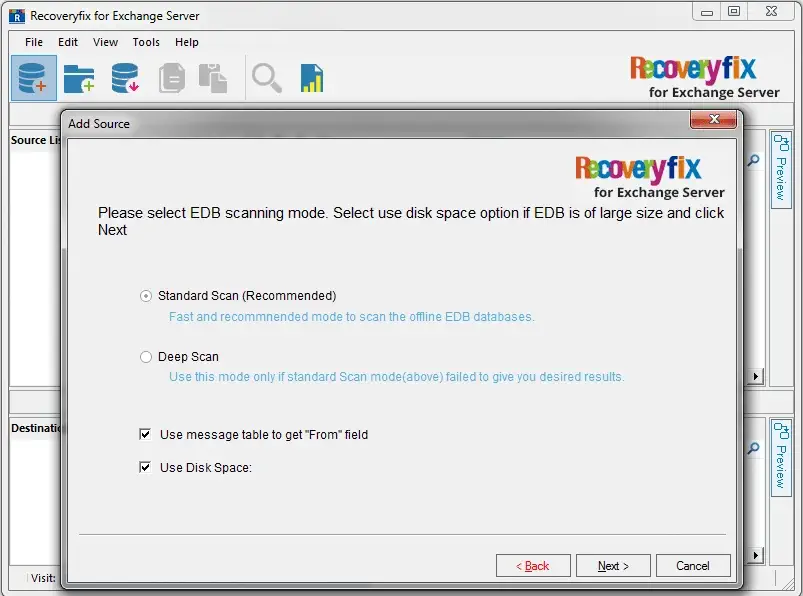
You have two options to scan the EDB file (Standard Scan or Deep Scan). Select the required option and click Next.
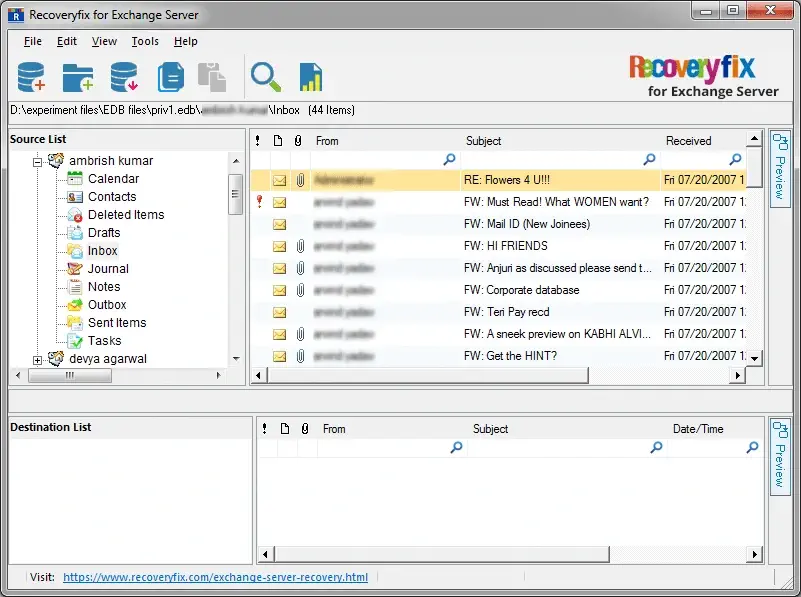
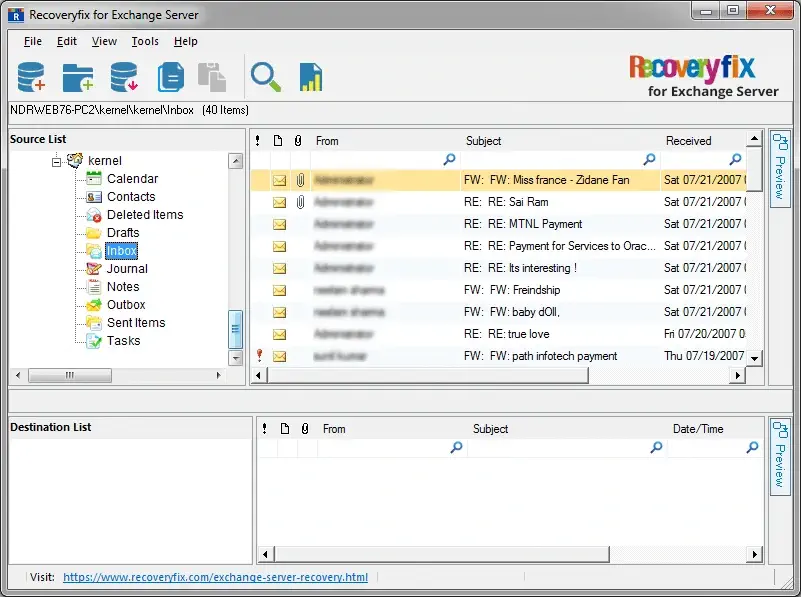
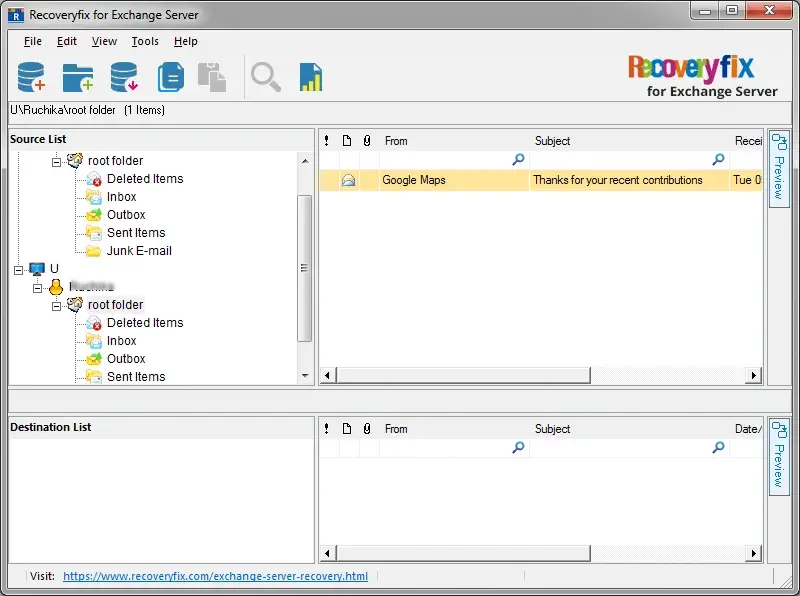
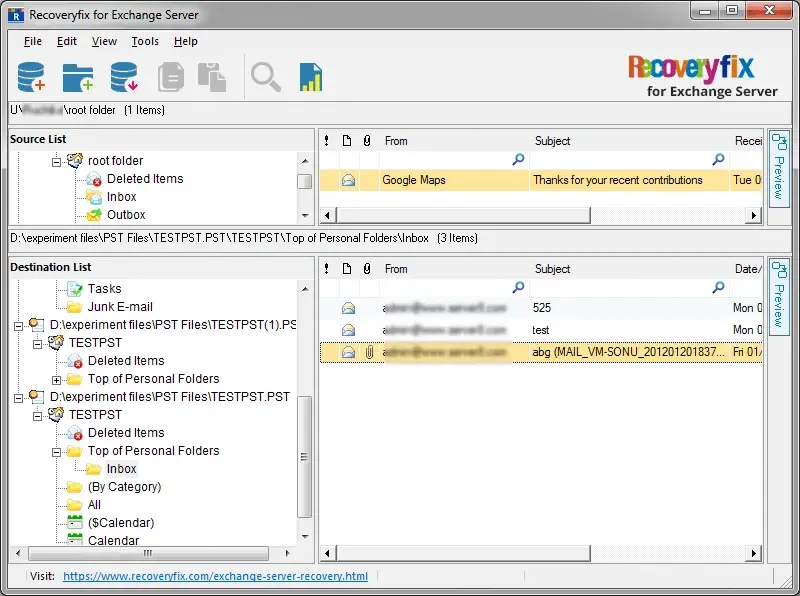
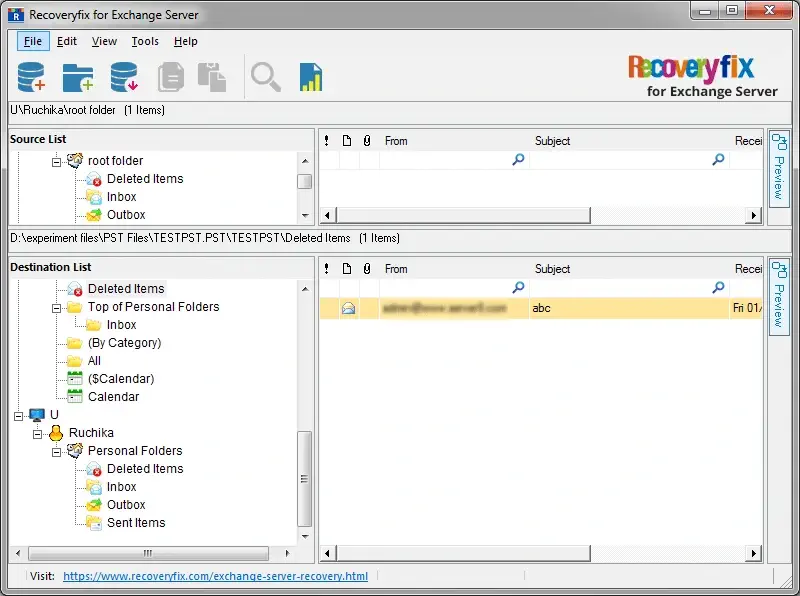
The EDB files will be added as the source showing all of its mailboxes get displayed. You can preview its content.
In the Add Source dialogue box, select Live Exchange (On-Premises) and click Next.
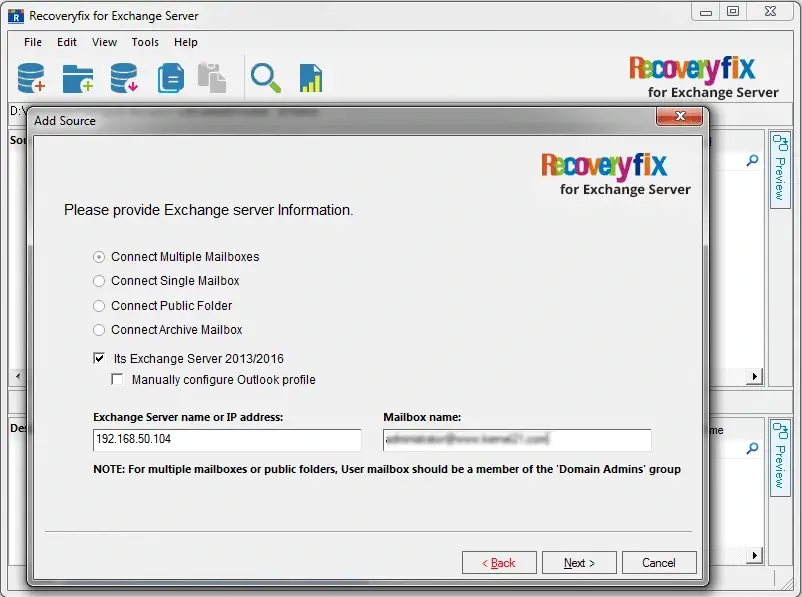
A dialogue box asking for the Exchange Server information will open.
- Select the required option (Multiple Mailboxes, Single Mailbox, Public Folder, or Archive Mailbox)
- Mark the checkbox Its Exchange Server 2013/2016, if you are using Exchange 2016/2013 (also, you can opt to configure Outlook profile manually).
- Provide Exchange Server name or IP address and the Mailbox name.
Click Next to continue.
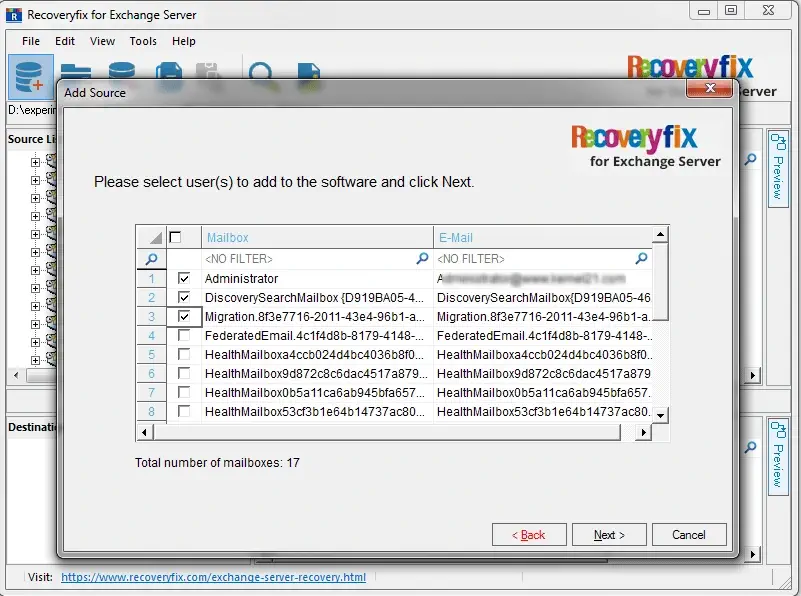
Select the user mailboxes for migration. Click Next.
The Live Exchange Server is added as the Source, and all its mailboxes are displayed. You can preview its content.
You can add an Outlook profile as the source by selecting the Outlook Profile (Default POP3, IMAP, Domino, GroupWise, Gmail, Exchange, Office 365) option in the Add Source dialogue box.
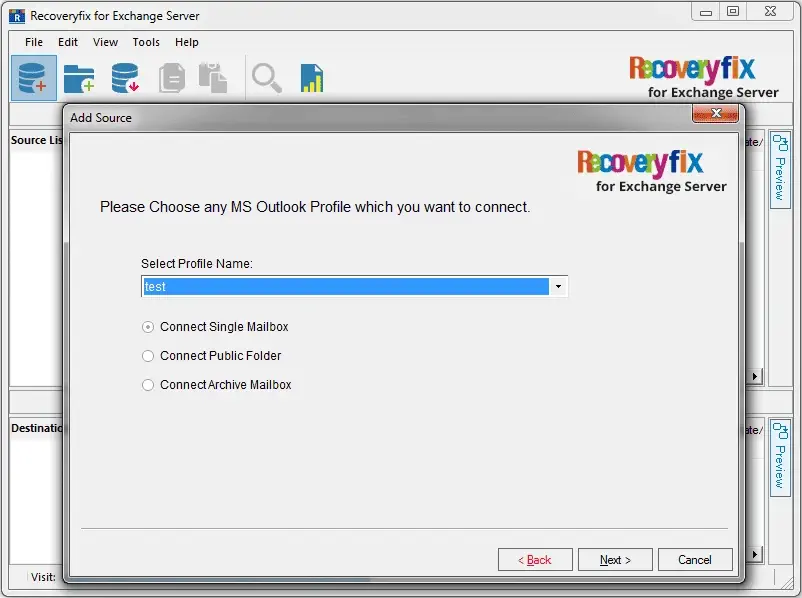
Select an Outlook profile from the list and then select an option—Single Mailbox, Public Folder, or Archive Mailbox; click Next.
After successful addition, a completion message is displayed. Click Finish to continue.
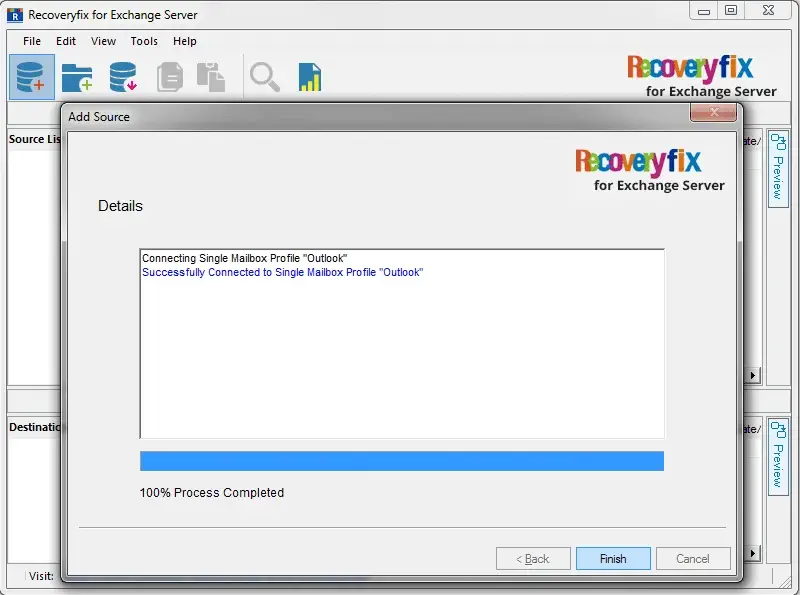
The Outlook profile gets added as the source. You can preview its content.
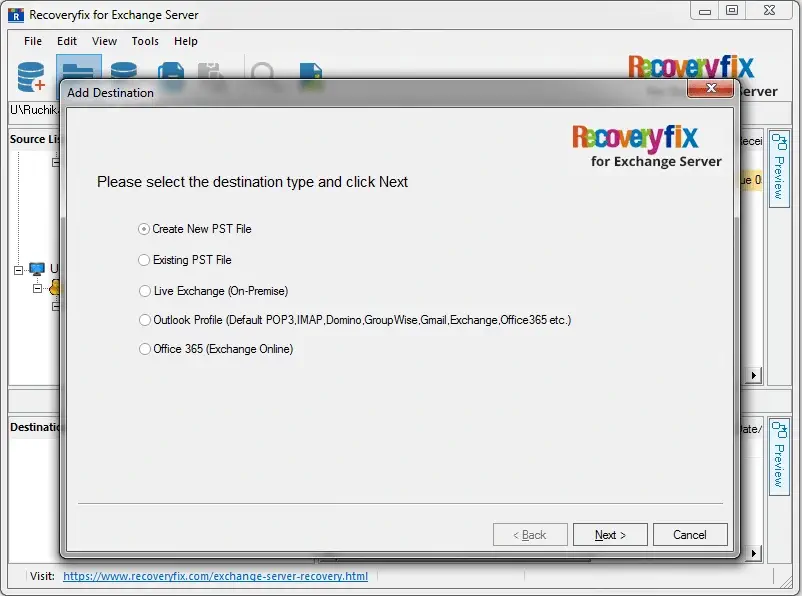
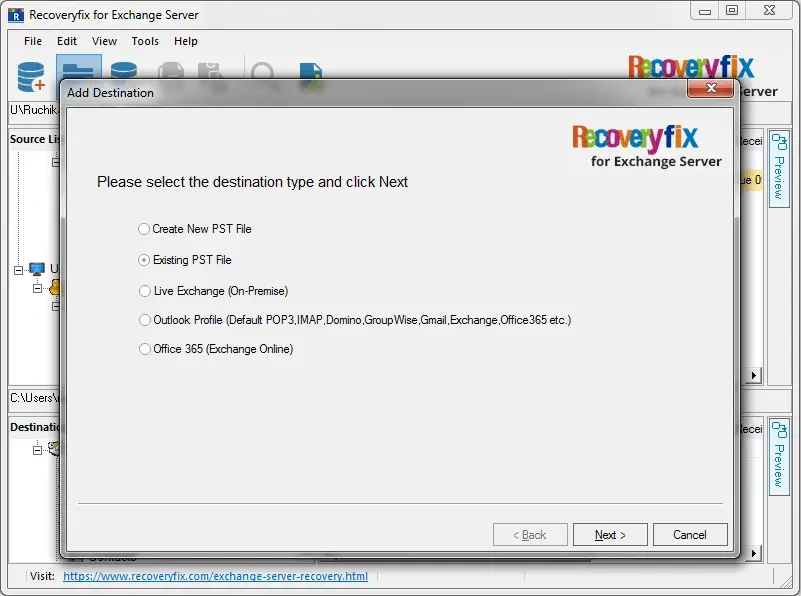
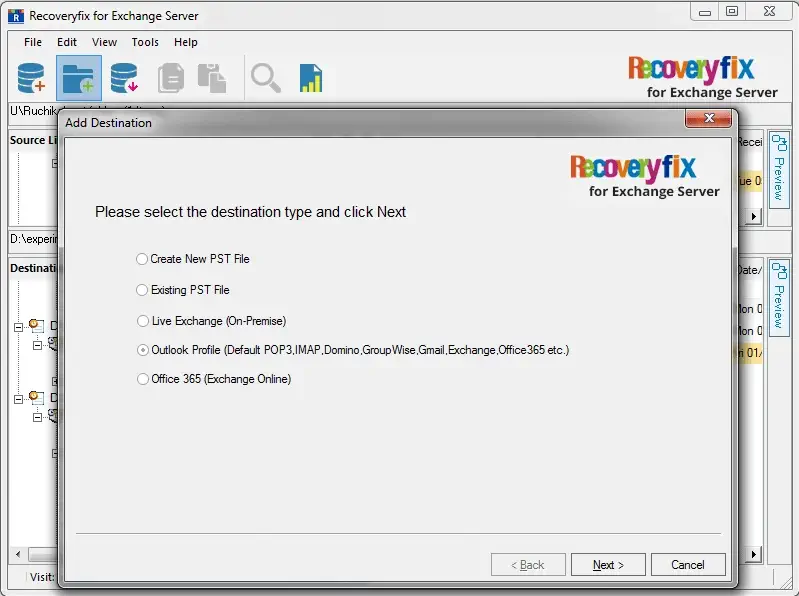
You have different options in the destination:
If you want to save the source mailbox items to a new PST file, select Create New PST File as a destination from the Add Destination dialogue box. Click Next to move further.
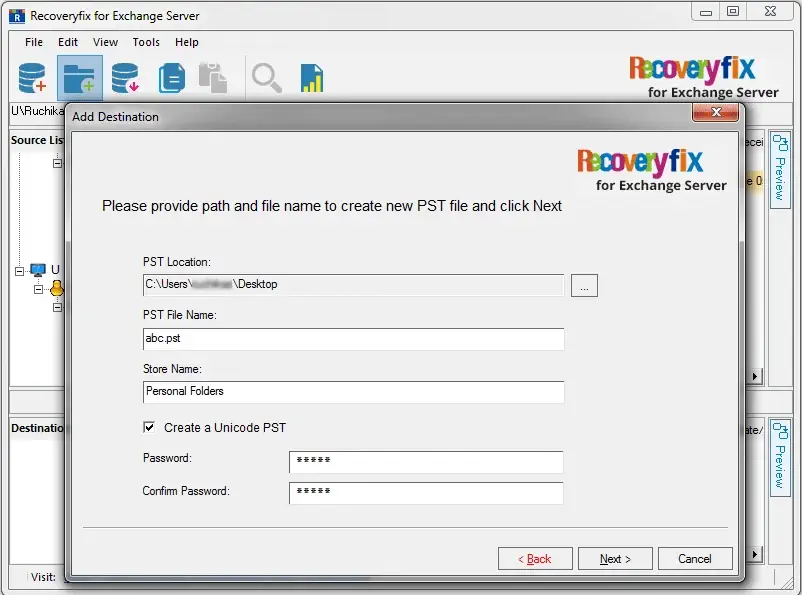
In the opened dialogue box, provide a new PST File location, PST File Name, and Store Name. You can also apply a password to your PST file by entering and confirming it. Click Next to continue.
You will get a dialogue box after process completion.
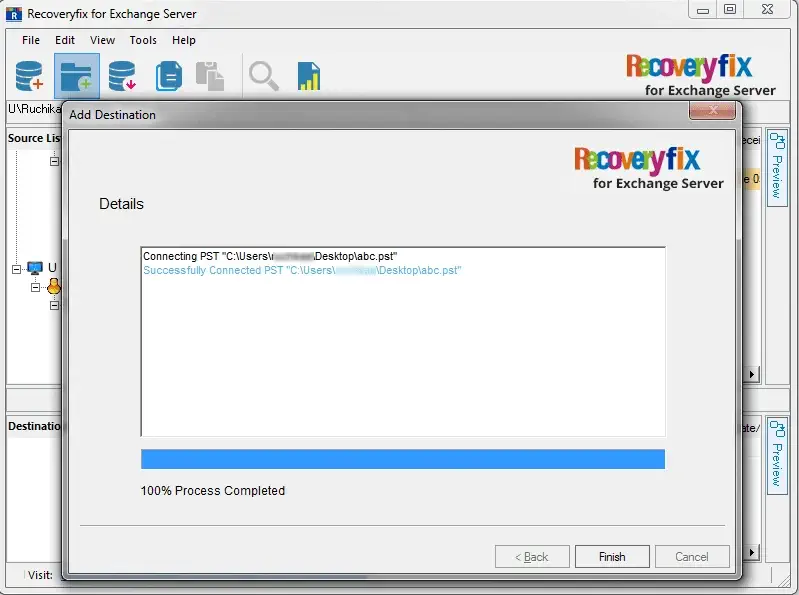
Your new PST file is created and added as a destination with the mailbox hierarchy.

You can add your existing Outlook PST file as a destination by selecting Existing PST File option from Add Destination dialogue box. After selecting, click Next.
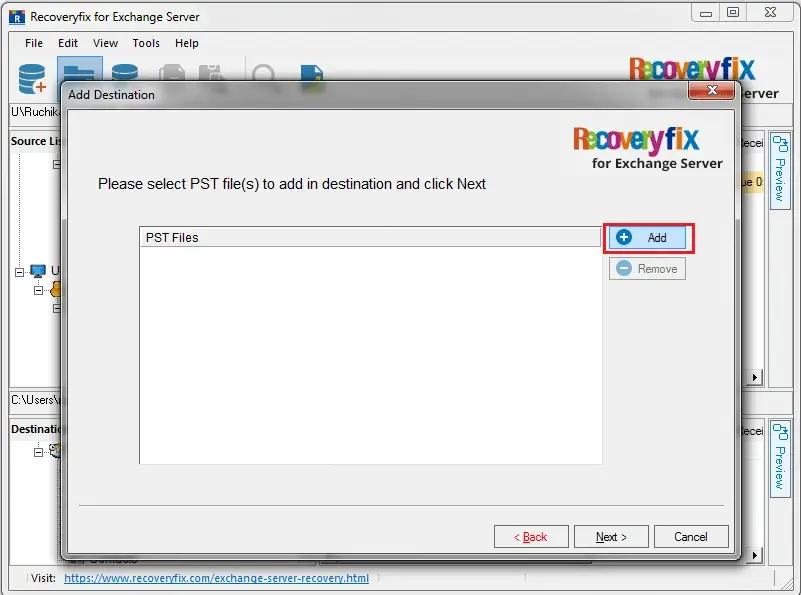
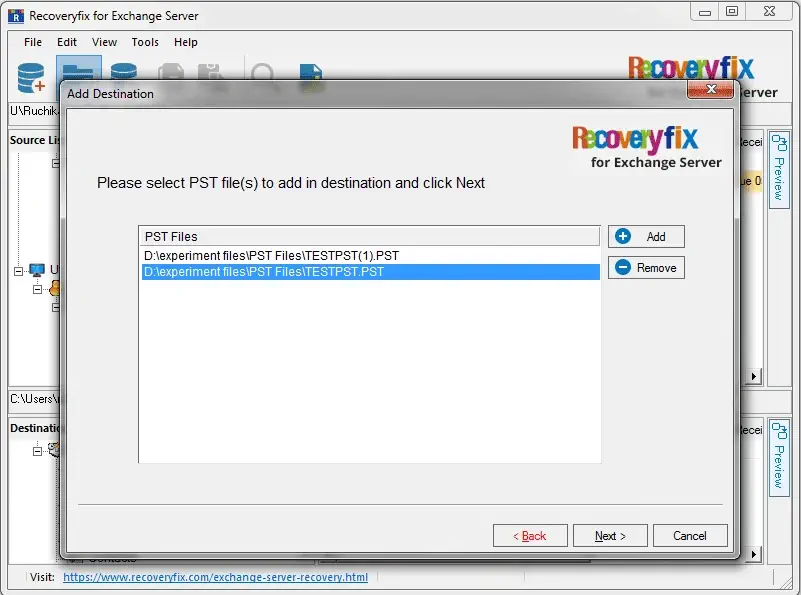
Use Add button to add your PST file(s) as your destination. Click Next after making the required selection.
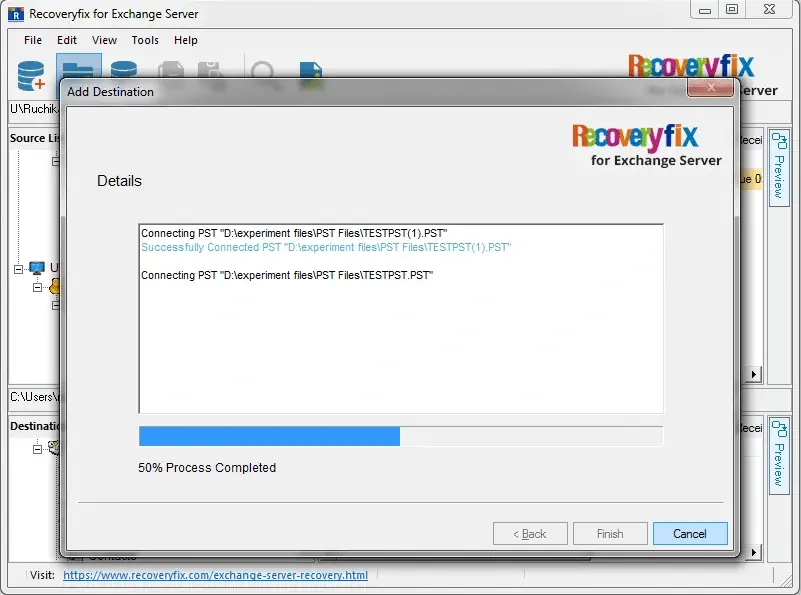
You will receive a dialogue box with the process completion report. Now, click Finish.
Your selected PST file(s) is added as a destination with mailbox hierarchy.
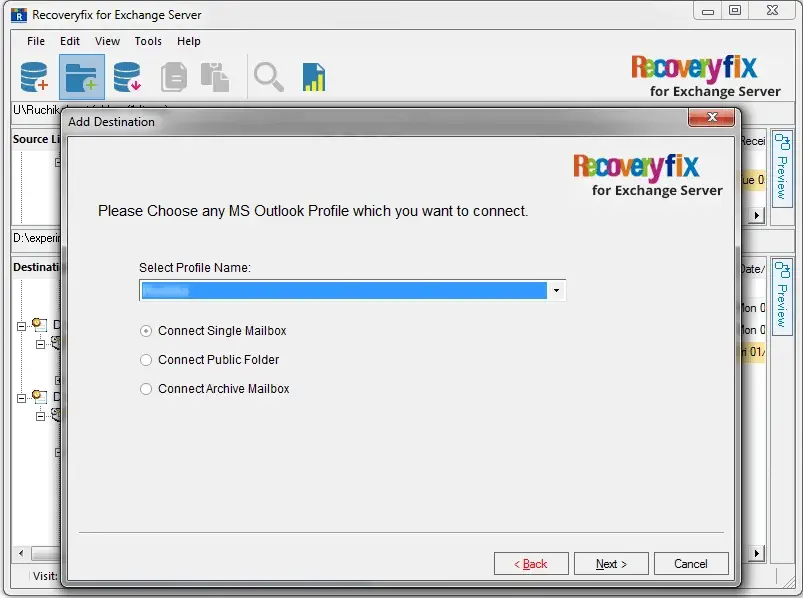
You can add an Outlook profile as the destination by selecting the Outlook Profile (Default POP3, IMAP, Domino, GroupWise, Gmail, Exchange, Office 365) option in the Add Destination dialogue box.
Select an Outlook profile and then select an option – Single Mailbox, Public Folder, or Archive Mailbox; click Next.
A process completion message appears. Click Finish to continue.
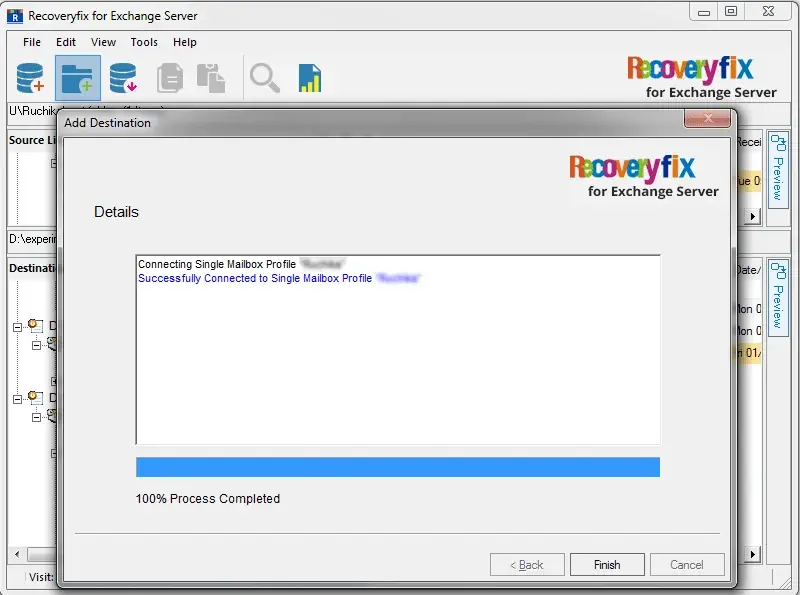
The Outlook profile gets added as the destination.
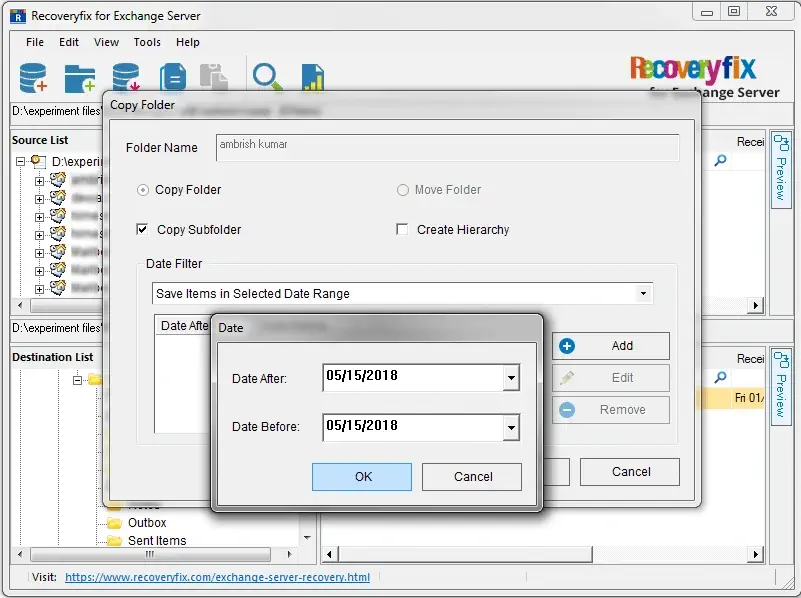
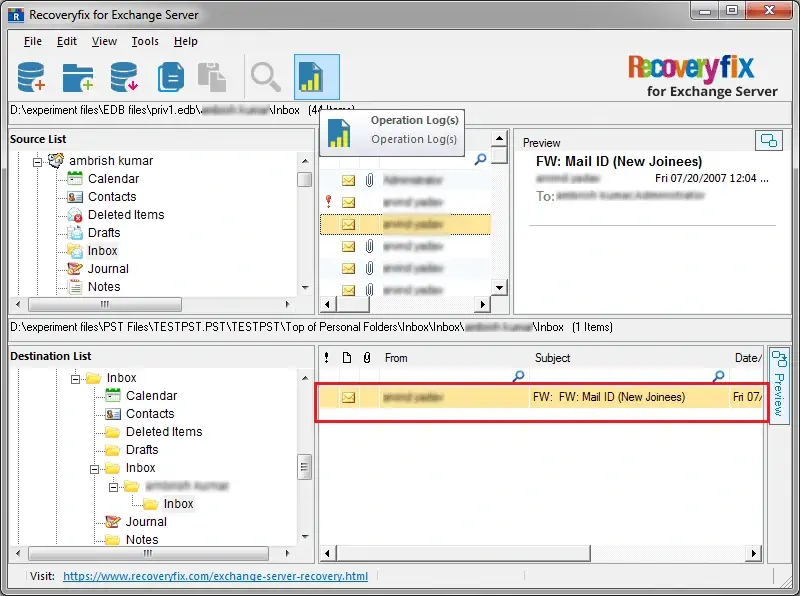
The software allows you to copy a mailbox or folder from the source directly to the destination location. To perform this, right-click on the added mailbox or mailbox folder. Then, select the Copy Folder.
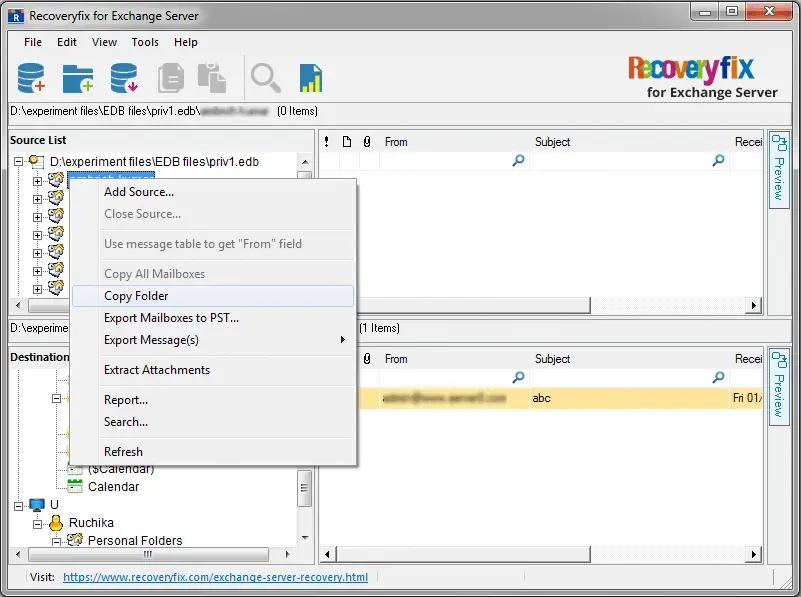
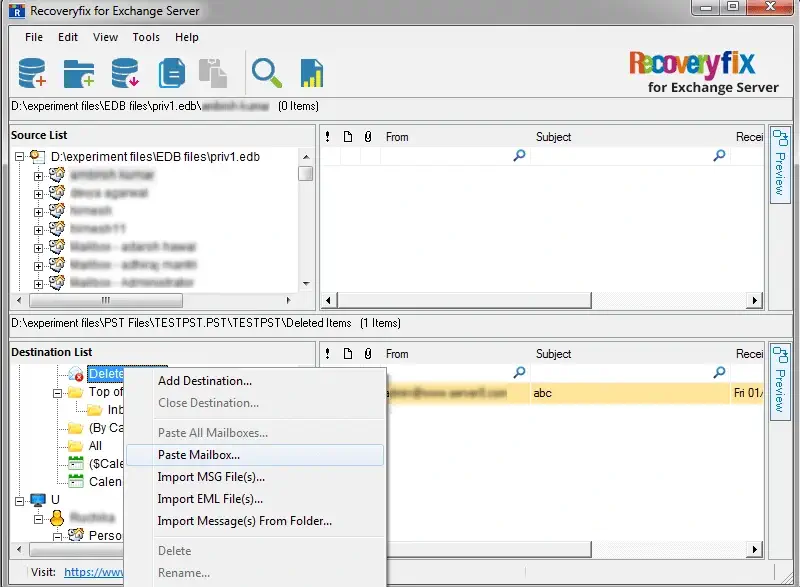
Now, right-click on the destination and select the Paste Mailbox option.
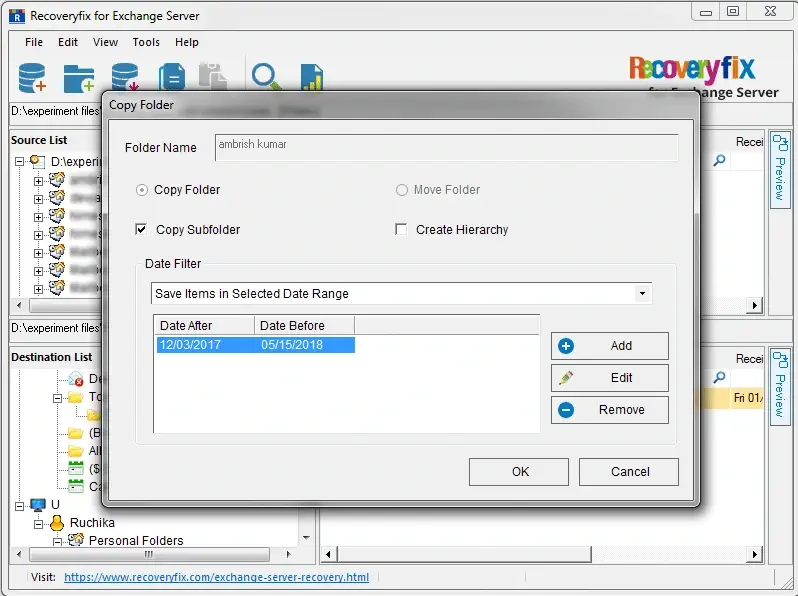
In the Copy Folder dialogue box,
- Select the desired options (Copy Subfolder & Create Hierarchy)
- Provide details for the Date Filter (if required)
Click OK.
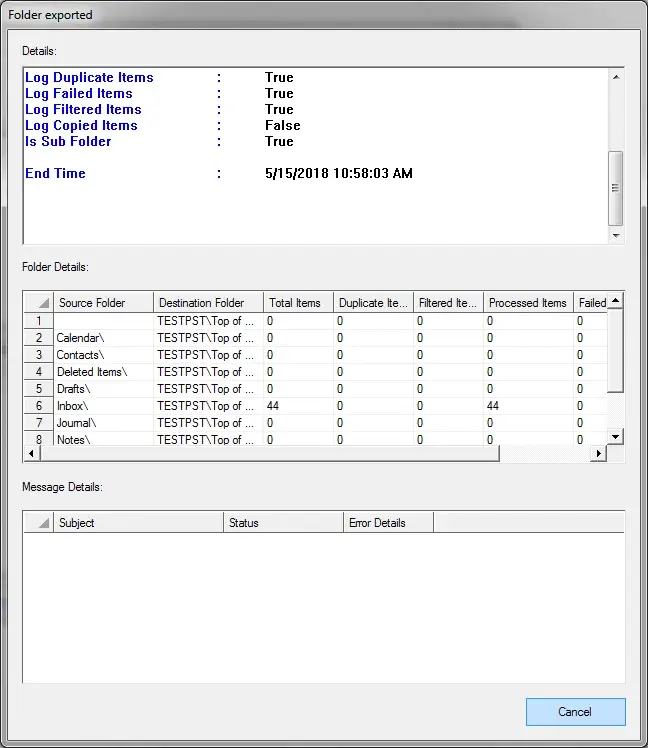
A dialogue box Folder exported is displayed with all the details with this, you have got backup of your mailbox folder at the new destination location.
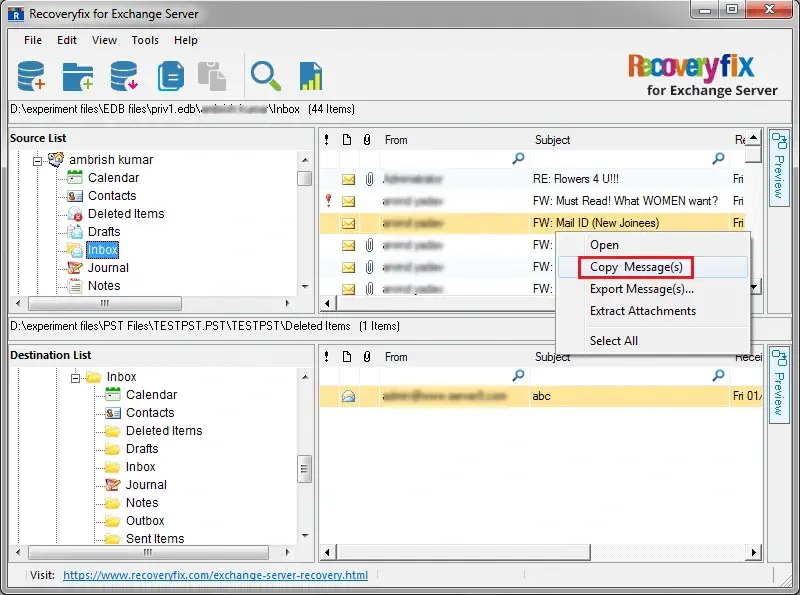
You can use Copy Message(s) and Paste Message options to copy email(s) from a source mailbox folder to a destination mailbox folder. The steps are:
Select email(s) and then Copy Message(s) from the right-click menu.
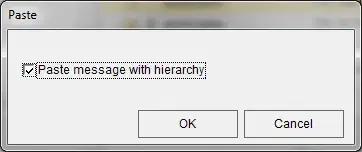
Select the target folder, right-click the mouse button, and select the Paste Message option.
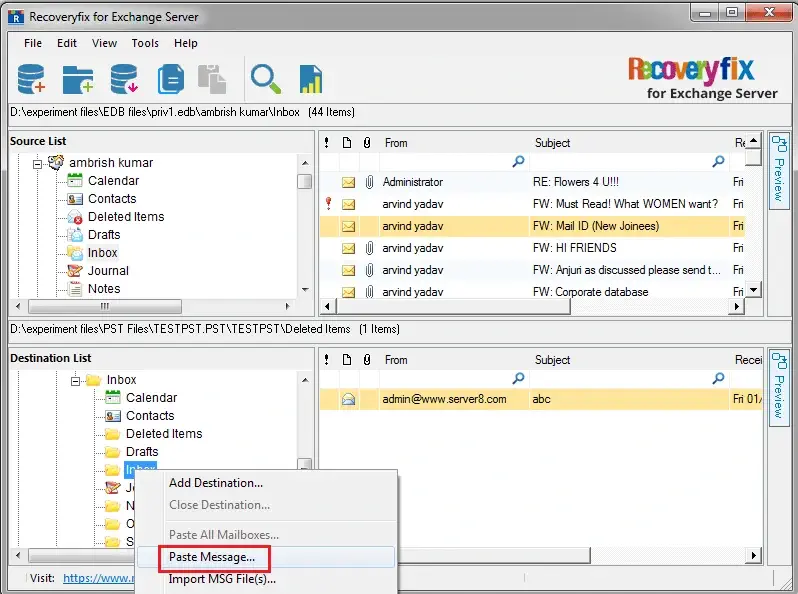
A dialogue box will appear asking if you want to Paste Message With Hierarchy. Confirm by selecting the checkbox and click OK.
A dialogue box with the processed item details will be displayed like this.
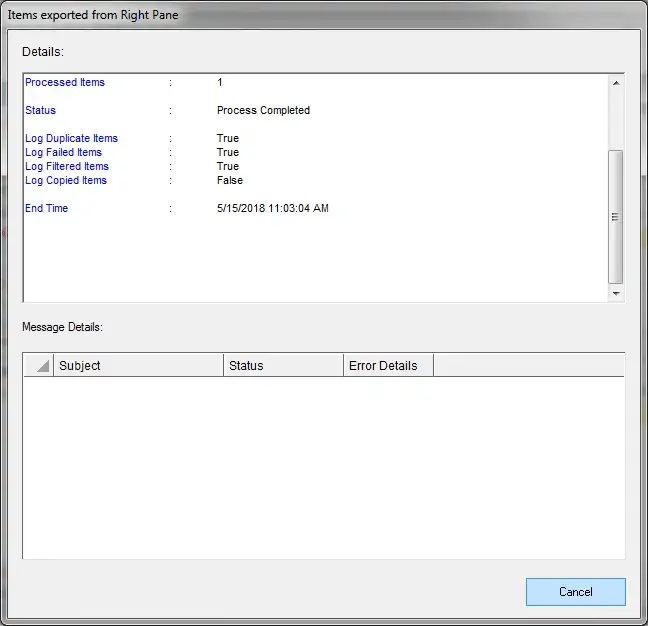
Finally, your emails get pasted in the desired destination mailbox folder.
You can simply drag emails from the desired mailbox folder and drop them in the destination mailbox folder.
First, select the emails and drag them to the preferred destination folder. A dialogue box with the details of items will be displayed like this.

And the dragged emails will be seen on the destination like this.
