How to set up a POP3 settings for Office 365?
Microsoft 365 is one of the most powerful suites, which offers several integrated apps for better collaboration. Outlook is one of them, and it supports email protocols like IMAP, POP3, SMTP, and many more. Each email protocol has its own advantages that users can avail of as per their requirements. POP3 protocol allows users to access their email messages offline since they are already downloaded. It is one of the leading causes that motivates users to configure their accounts via POP3 configuration. Here, we will provide a step-by-step guide to set up pop3 settings for Office 365 accounts. But first, explore the other benefits of configuring your account via POP3 in the upcoming section.
What are the benefits that users can avail of with Outlook 365 POP3 settings?
O365 POP3 settings offer several benefits to the users. Here, we have listed some of them.
- Offline email accessibility: POP3 configuration settings download emails to the system's local drive, allowing users to access them offline.
- Reduced server load: Since it downloads the email messages and stores them on the local drive, it helps reduce server loads by removing the emails after they are successfully downloaded.
- Multiple device support: Users can access their email messages across multiple devices with its multiple device support.
- Easy configuration settings: Setting up emails using POP3 configuration is easy, which makes it even more convenient for users.
- Flexible email management: Emails are stored on a local drive, which allows users to organize their emails in folders, archive them, or perform backups without depending on cloud or server-based storage.
- Less bandwidth usage: POP3 downloads emails in bulk instead of continuously synchronizing them with the server, which ultimately reduces bandwidth utilization.
- Data security: As emails are stored locally, server-side breaches are avoided, enhancing the protection level.
How to set up Microsoft Office 365 pop3 settings manually?
POP3 settings for Office 365 can be easily configured with the help of the following mentioned steps.
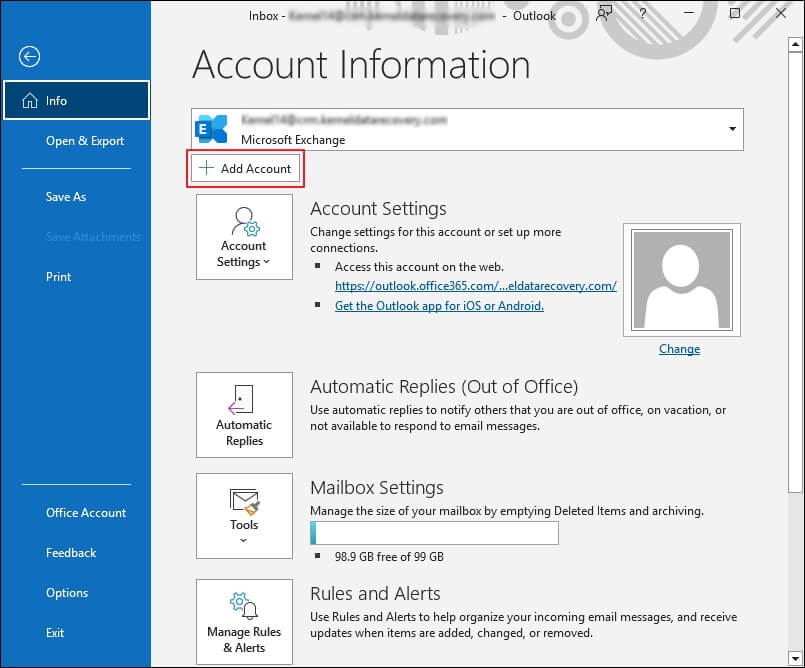
Launch the Outlook application and access the File tab.
Click on the Add Account option to proceed.
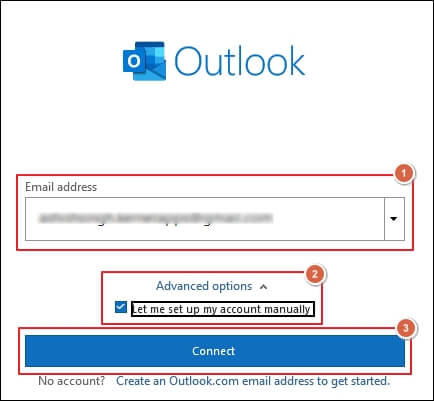
Enter your email address, then choose Let me set up my account manually option using the drop-down menu and tap on Connect.
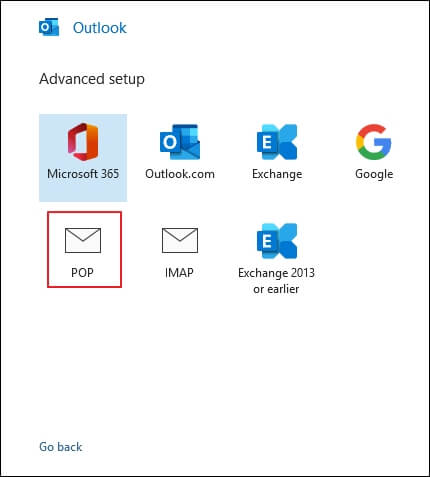
Click on POP option under the Advanced setup.
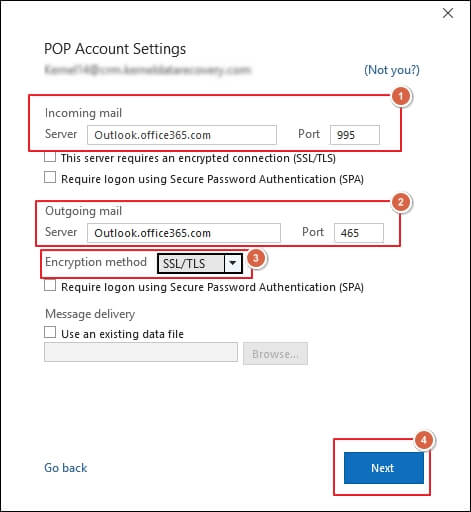
Enter the following details in their respective columns.
- Incoming mail Server - Outlook.office365.com
- Port - 995
- Outlook mail Server - Outlook.office365.com
- Port- 465
- Encryption method - SSL/TLS
Click Next once all the details are filled in.
Type your account password and proceed to Connect option.
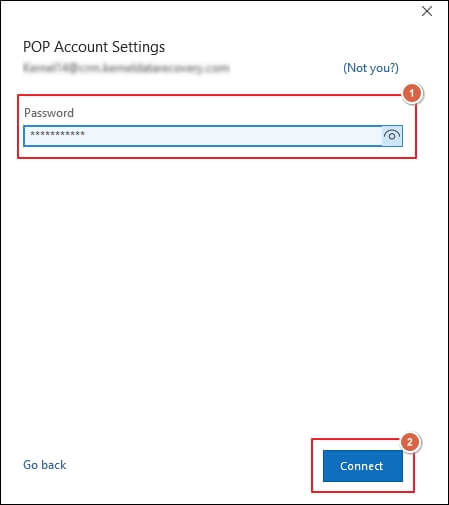
You have successfully configured your account with POP3 settings in the Outlook 365 applications.
What is the best way to preserve my emails for a longer period?
The above-mentioned solution will help you easily set up Microsoft 365 POP3 settings. But taking a backup of their emails is also recommended for users who utilize cloud-based services to manage their mailboxes. It provides additional security from unwanted situations such as data loss. However, performing backup operations in these cloud-based services seems hectic for users. Therefore, you should take assistance from automated solutions like Recoveryfix Backup for Microsoft 365. Microsoft 365 Backup software not only backs up your data but also gives you complete control over the operation for precise data backup.
Final Thoughts
The blog has provided a detailed guide on how to configure an account using O365 POP3 settings in Outlook. By following the above-mentioned approach, you will be able to set up Microsoft Office 365 POP3 settings. Besides that, if you want to take microsoft 365 email backup for future purposes, utilize the recommended solution. It will assist you in taking a backup of your Microsoft 365 data without any difficulties.