Recoveryfix File Shredder Tool – How it Works?
Working of Recoveryfix File Shredder Tool
Follow the given steps to remove system files permanently using the software.
File and Folder
Step 1. Launch the Software and go to the File and Folder Section.
Step 2. Click on Add Files\Folders to select the required data.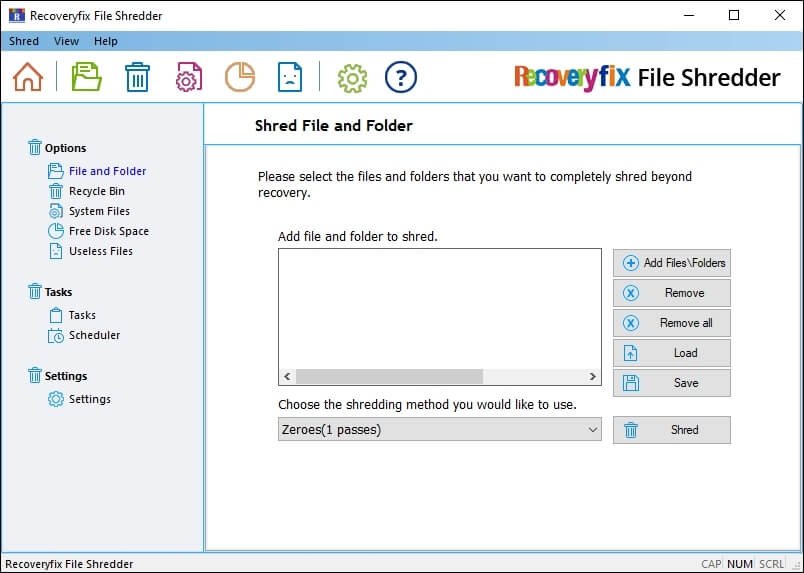
Step 3. Choose the files that you wish to erase and click Select.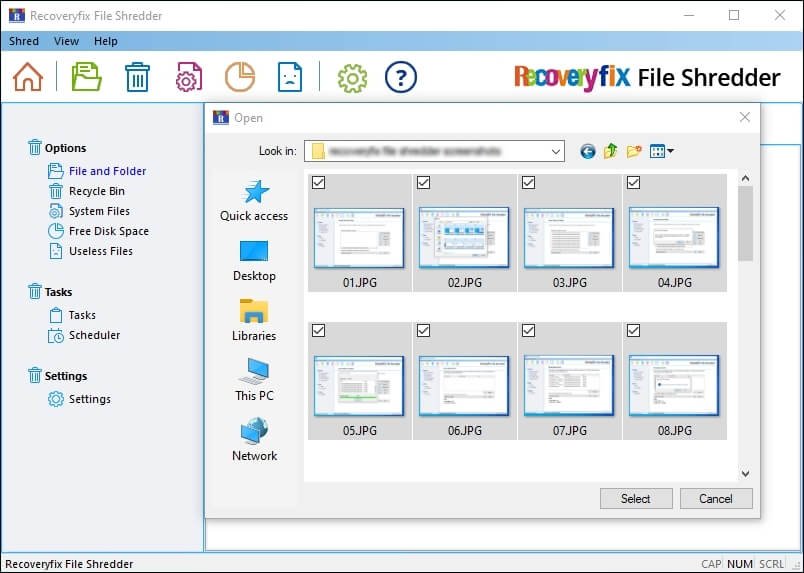
Step 4. Choose the appropriate shredding method from the drop-down list once data is added. Then, click on Shred.
Step 5. Tap on Yes in the confirmation message to proceed.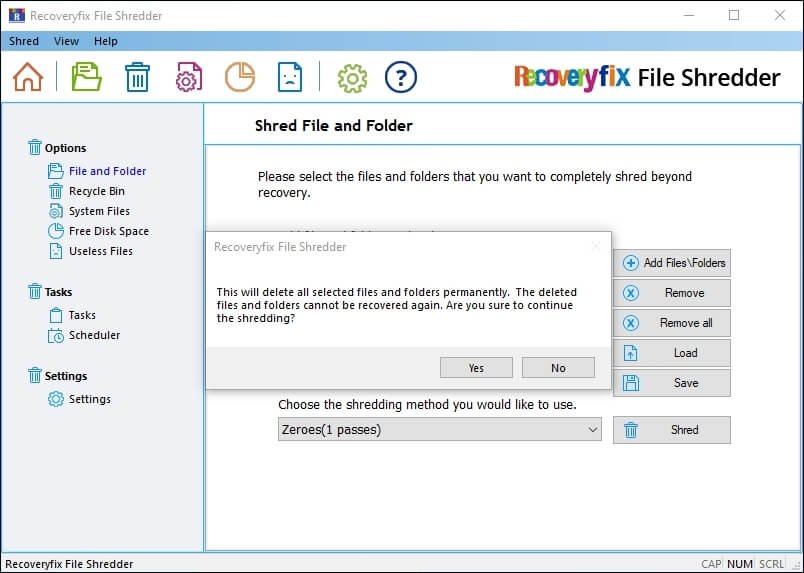
Step 6. It will start shredding the selected files. Monitor the live progress on your screen and click OK once done.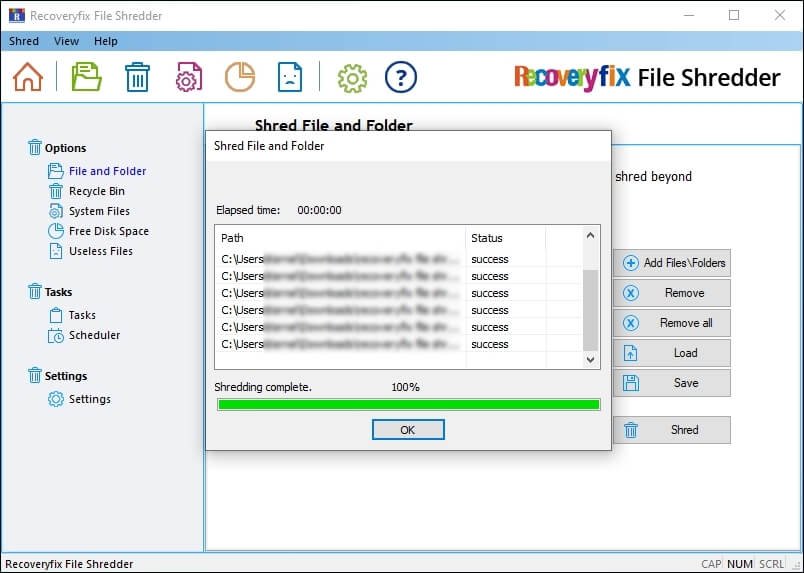
Recycle Bin Data
Step 1. Navigate to the Recycle Bin section to shred trash files.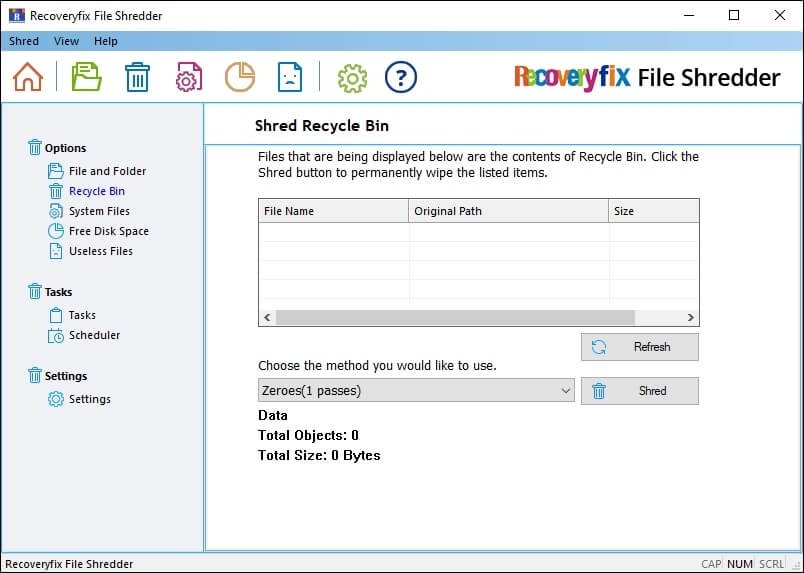
Step 2. Click on Refresh to get the list of Recycle Bin items.
Step 3. Once the list appears, choose the suitable shredding method. Then, proceed to Shred. 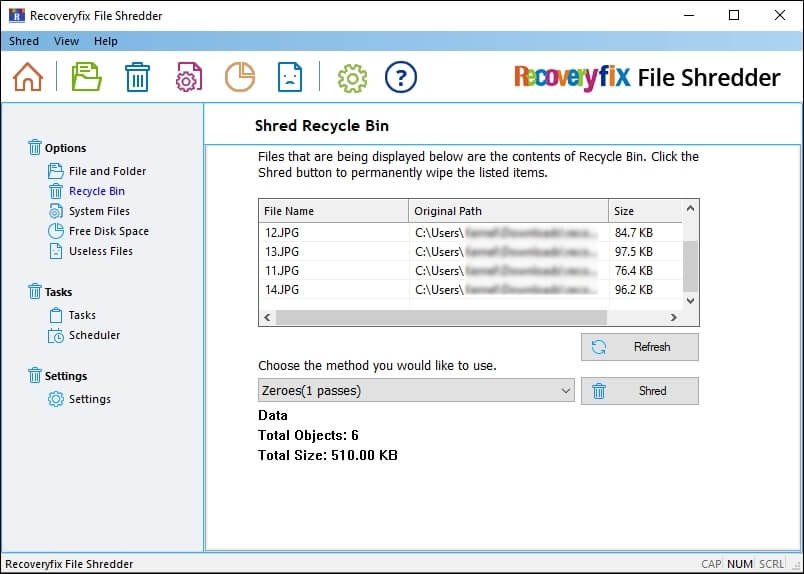
Step 4. Click Yes in the confirmation pop-up.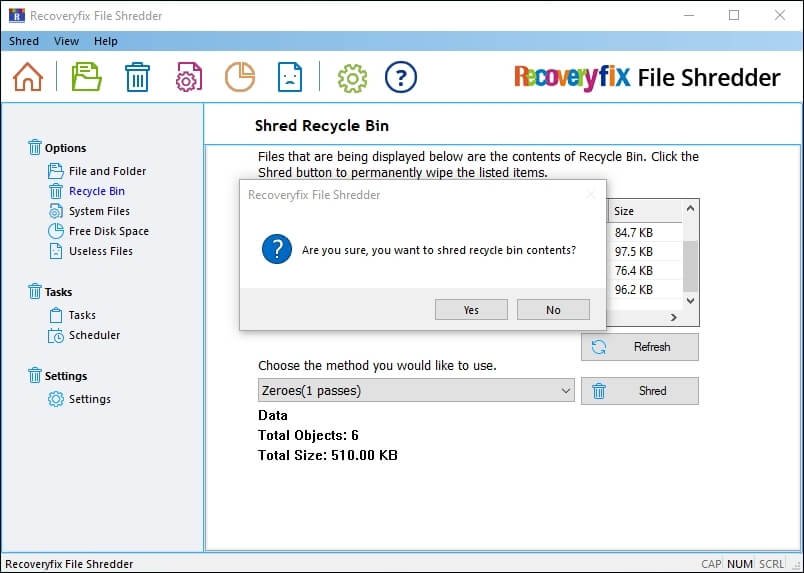
Step 5. Tap on OK after the process is finished.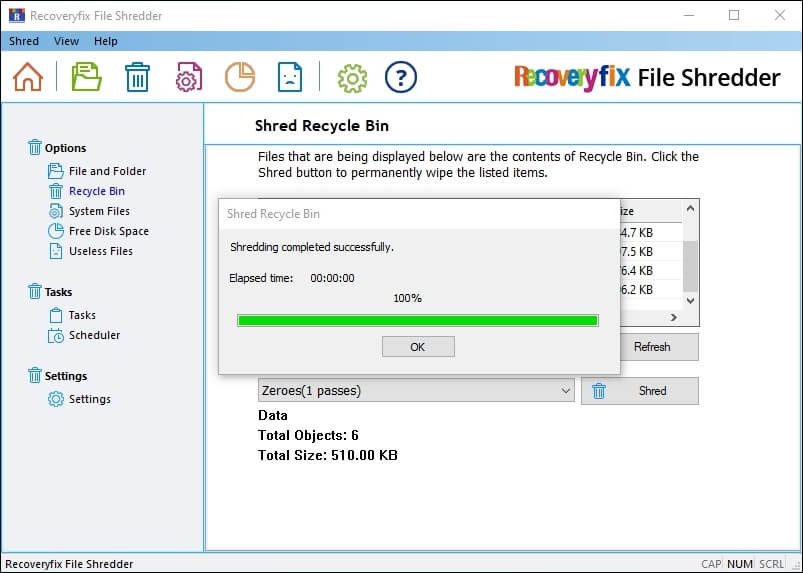
System Files
Step 1. Locate the System Files to shred Window and Internet Objects.
Step 2. Check the required files that you wish to delete and proceed with the appropriate shredding method.
Step 3. Click on Shred to begin the process. 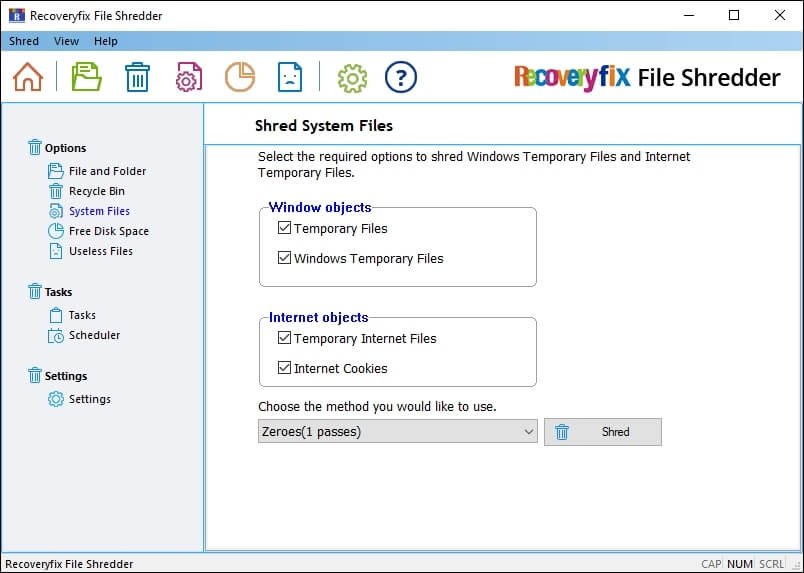
Free Disk Space
Step 1. Go to the Free Disk Space section to wipe data from system drives.
Step 2. Check the Drives that you wish to empty and select from the available shredding methods.
Step 3. Click on Shred to start the data wiping process from system drives.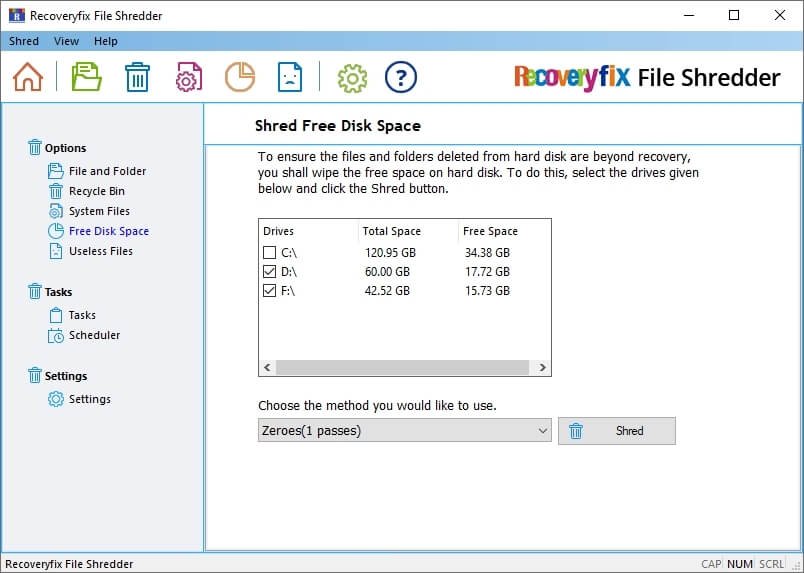
Useless Files
Step 1. Locate the Useless Files section to delete obsolete data. 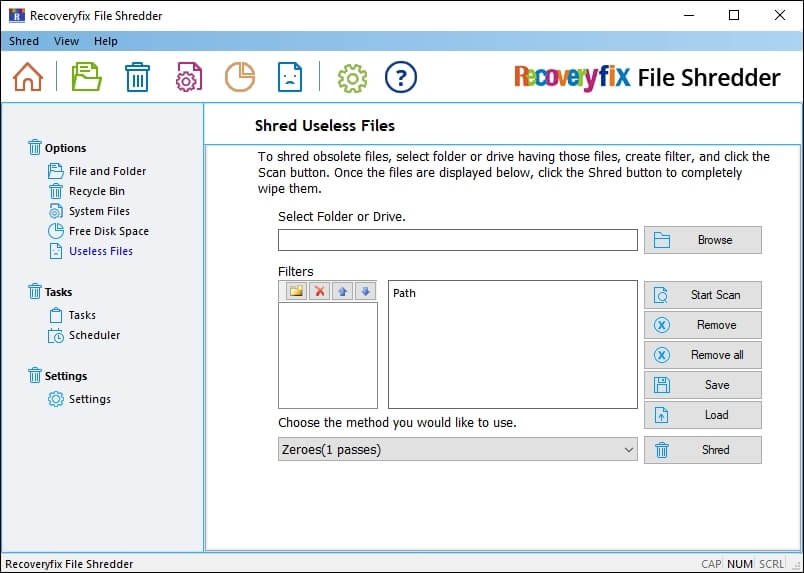
Step 2. Click on Browse to select the folder or drive containing those files and proceed to OK.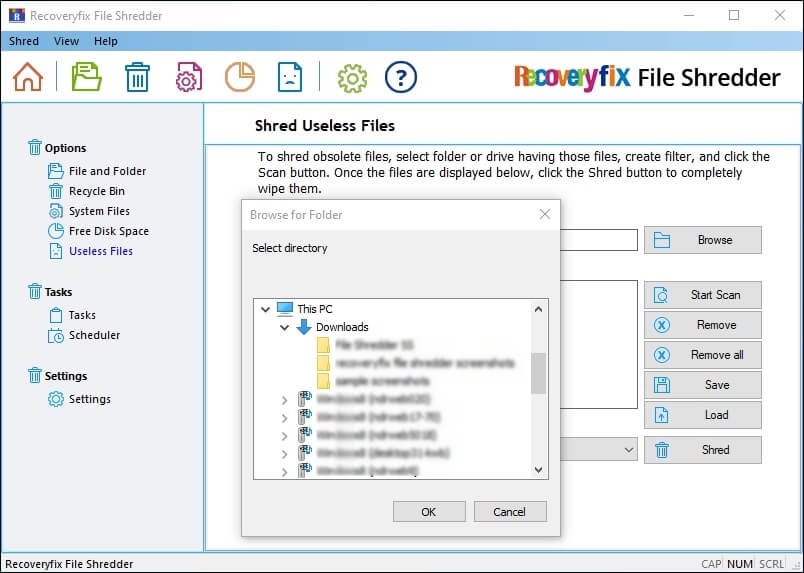
Step 3. Once a folder or drive is added, tap on Start Scan to load objects.
Step 4. Choose the suitable shredding method and click on the Shred option.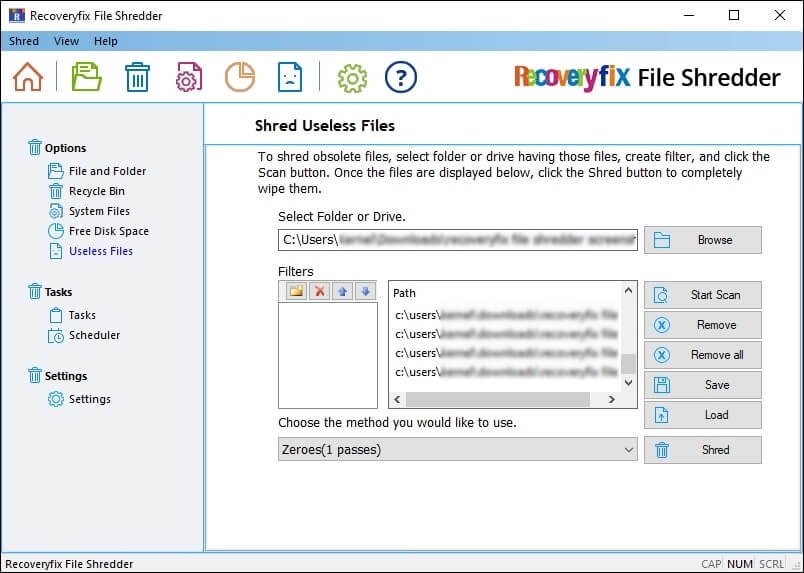
Step 5. Tap on Yes in the confirmation pop-up to proceed. 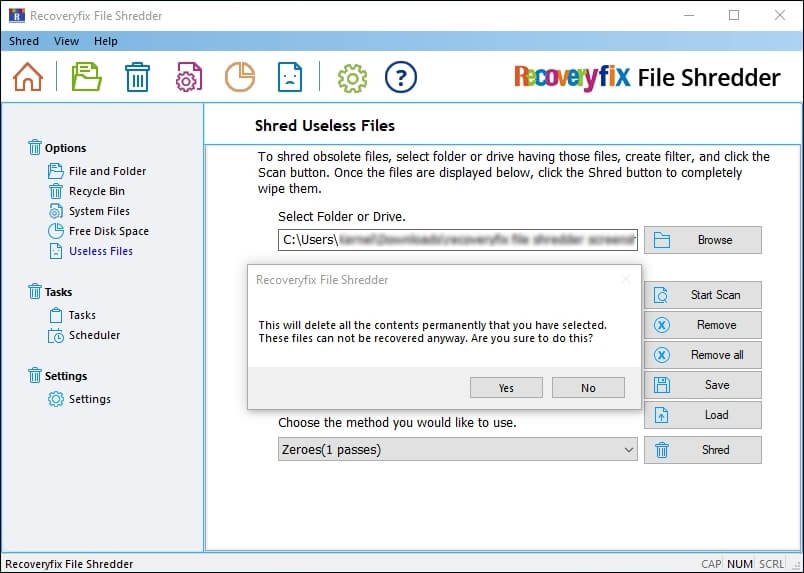
Step 6. It will begin the shredding process. Click on OK once the process is completed. 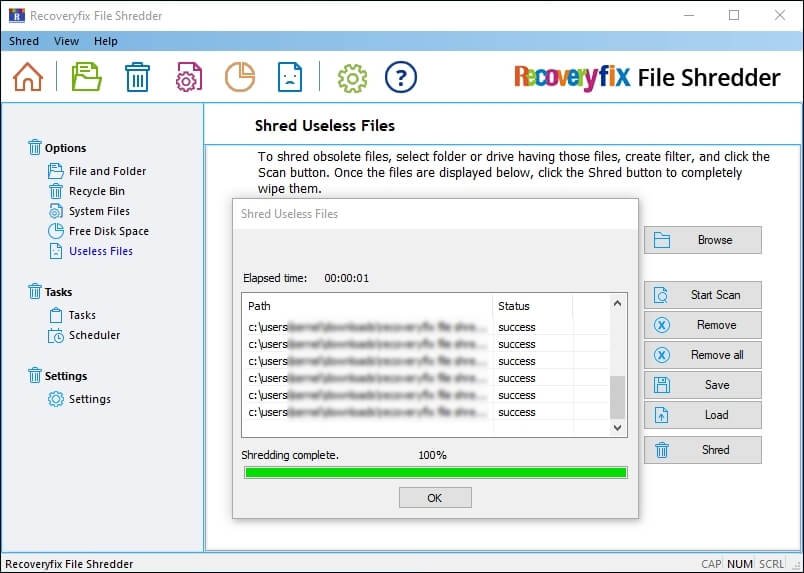
Task
A. Create New Task
Step 1. Go to the Tasks section to create, modify, and remove tasks as per your convenience.
Step 2. Click on the Add/Modify Task option to proceed.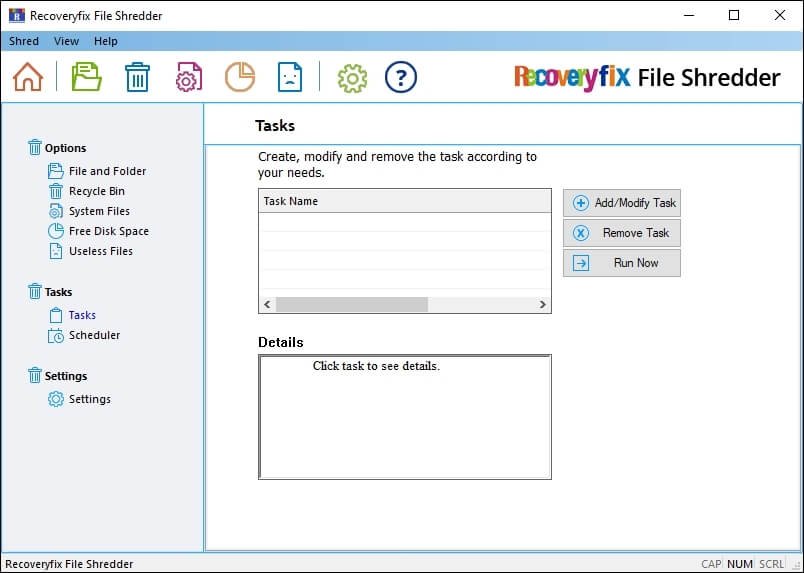
Step 3. Select Add Task to create a new task and click Next.
Step 4. Browse File\Folder to add them to the task and proceed to Next.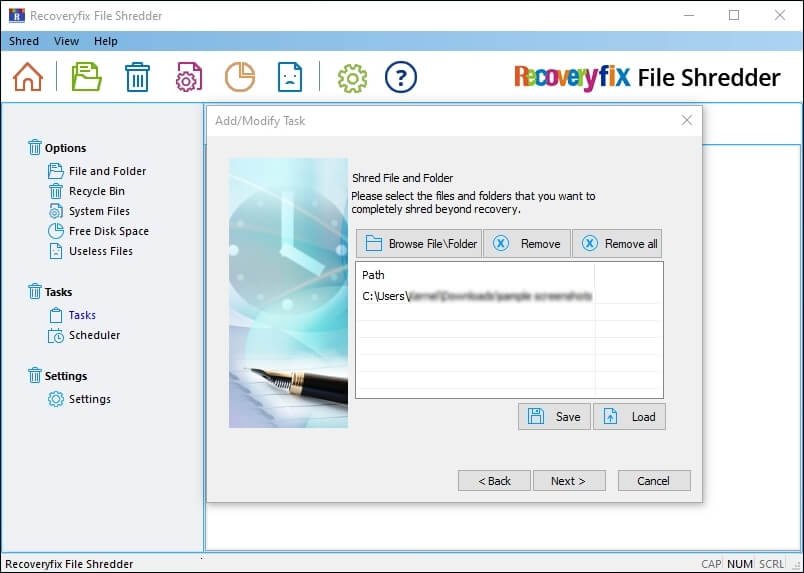
Step 5. Choose the required System Files and Recycle Bin to add them to the task and click Next.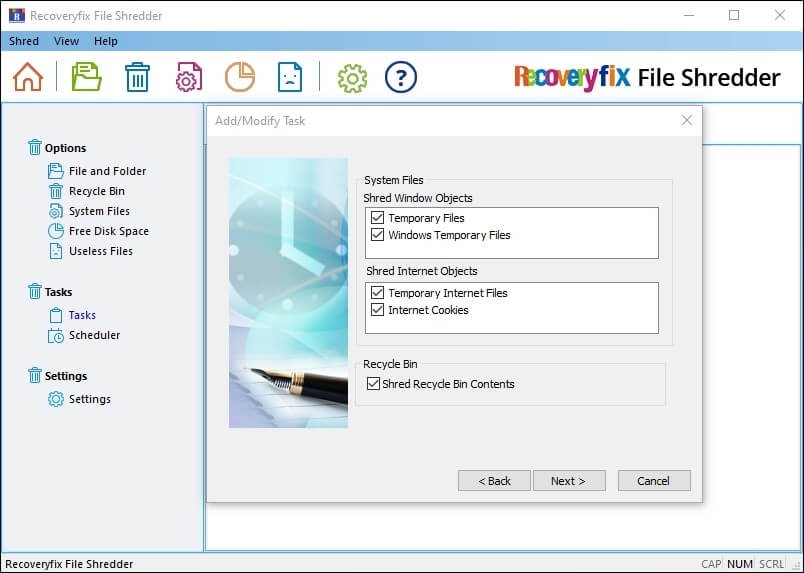
Step 6. Browse to select the Useless Files to add them to the task and proceed to Finish.
Step 7. Added Task Name and Details will appear on your screen. Use the Run Now option to start the created task.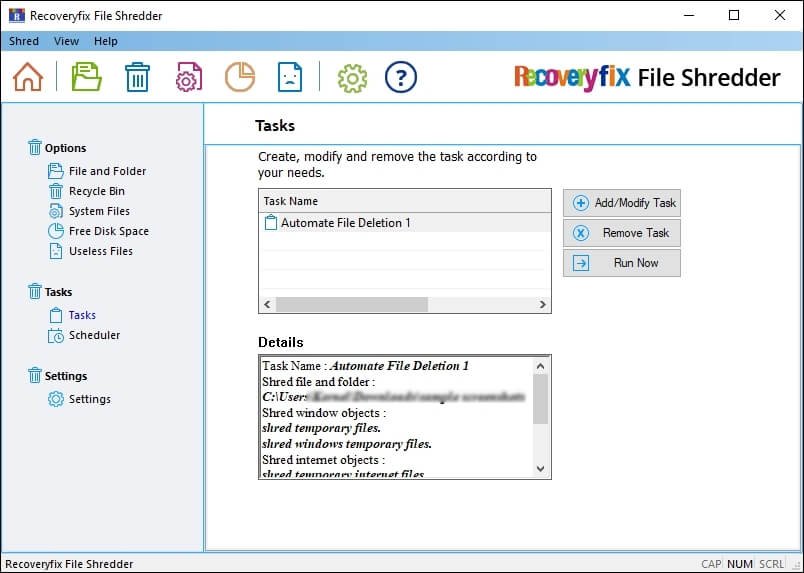
B. Modify Existing Task
Step 1. Choose the Modify Task option and click Next. 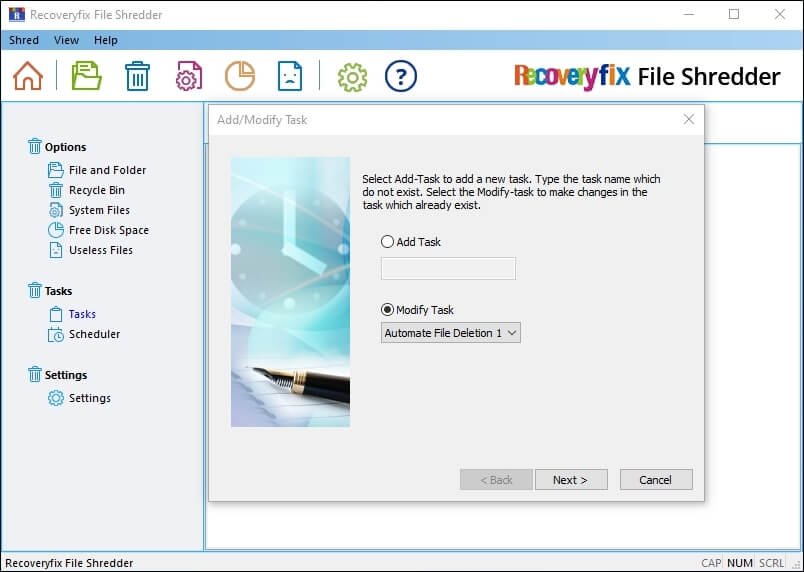
Step 2. Change the added File\Folder and proceed to Next.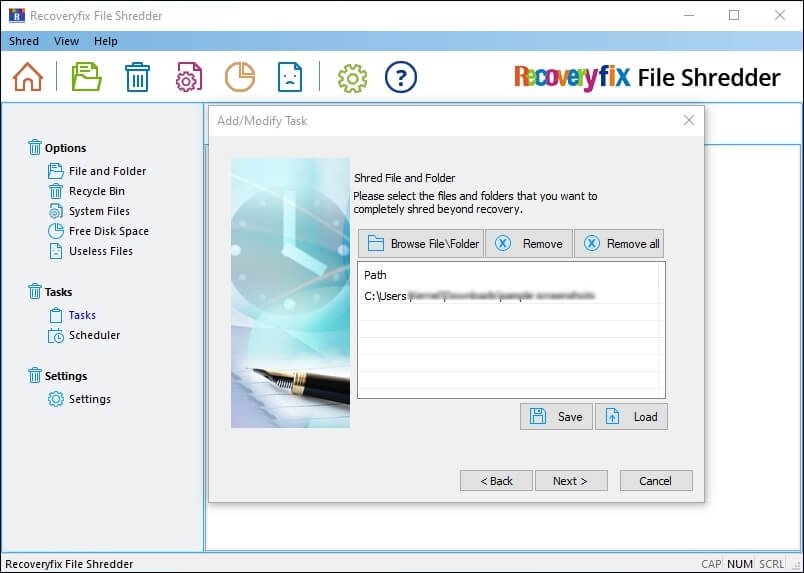
Step 3. Check or uncheck the System Files and Recycle Bin and click Next.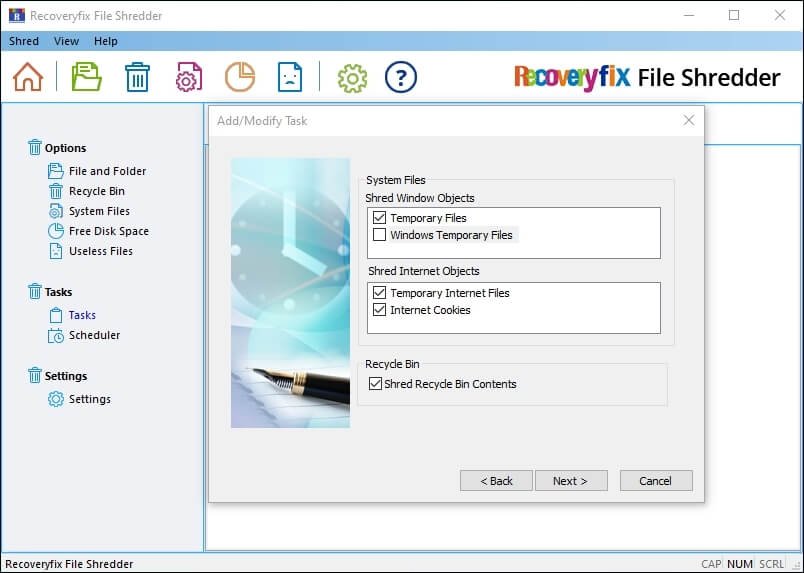
Step 4. Browse to change the selected folder or drive and proceed to Finish.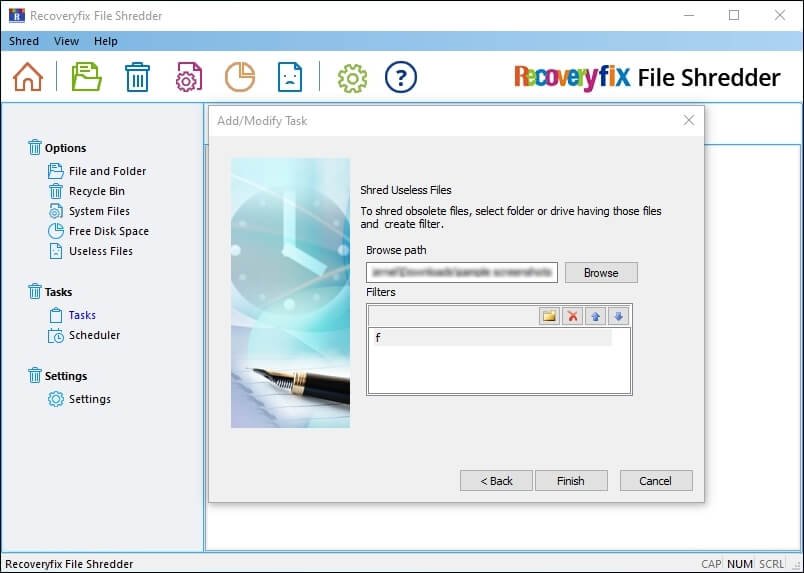
Scheduler
Step 1. Navigate to the Scheduler section to automate the process.
Step 2. Added Task Name and Details will appear on your screen.
Step 3. Click on the Schedule option to plan the shredding procedure. 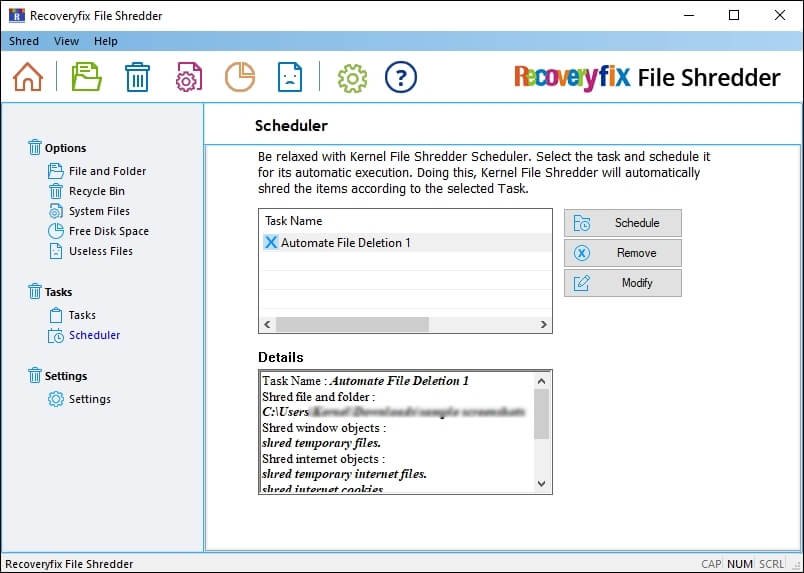
Step 4. Verify the selected Task Name and proceed to Next. 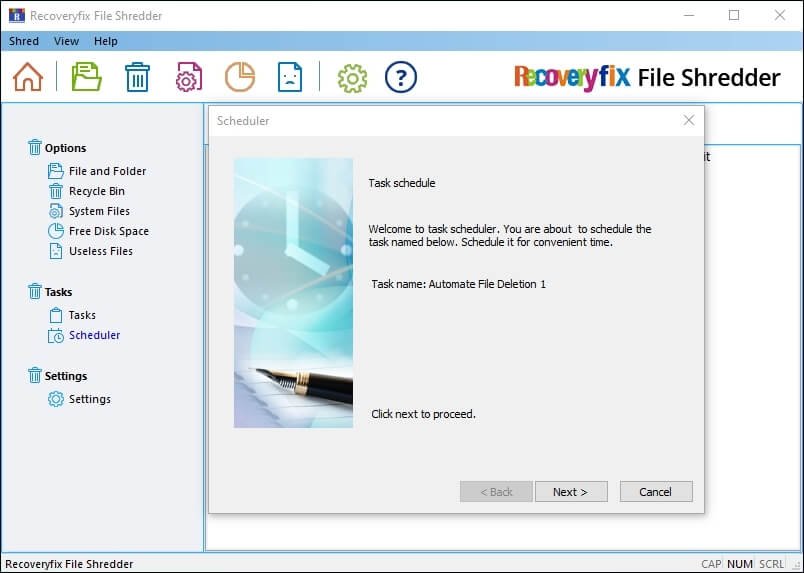
Step 5. Set the appropriate frequency of the task and click Next. 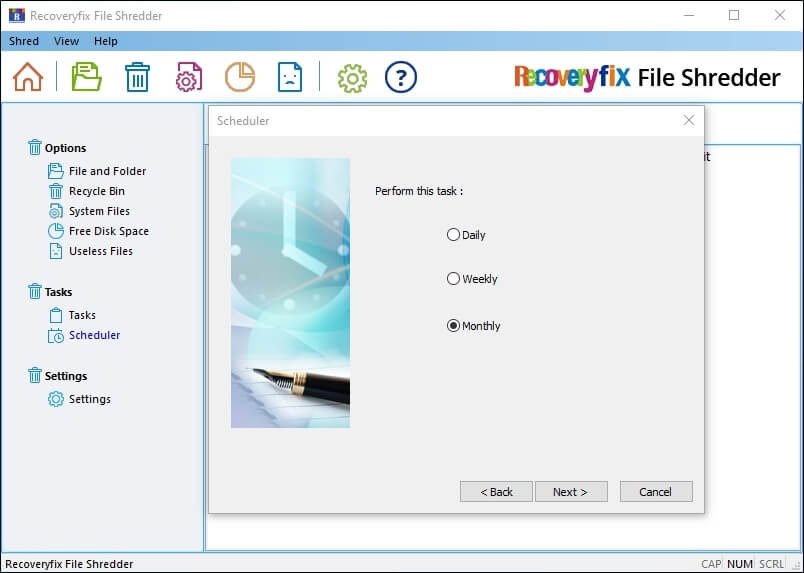
Step 6. Enter the Start Time, Day, and Months for the task and proceed to Next. 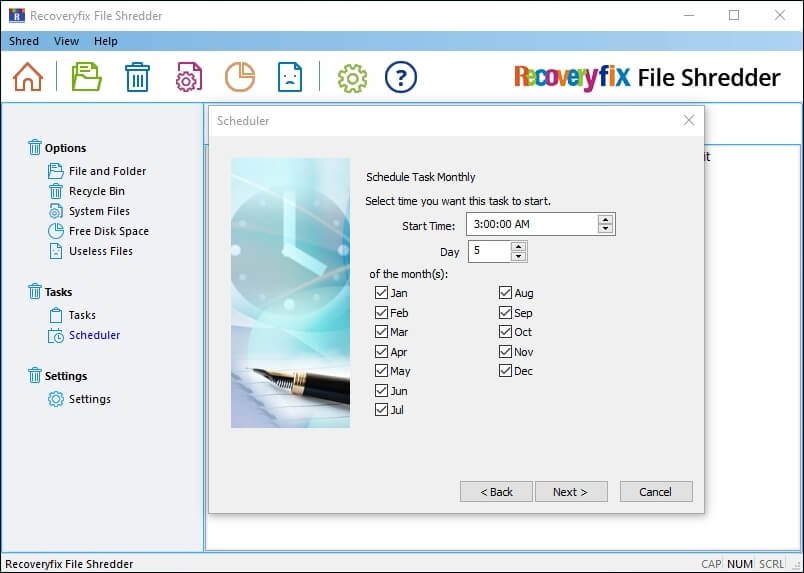
Step 7. Choose the suitable Shredding Method and click Finish. 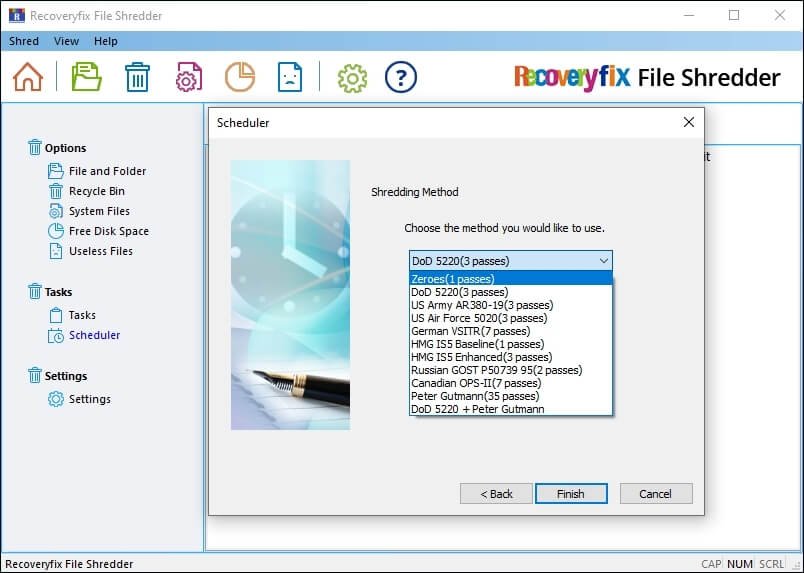
Settings
Go to Settings to specify the default shredding method, create log files, set the software access password, and remove the password. Here's how:
A. Set Default Shredding Method
Step 1. In Settings, you can find different shredding methods. 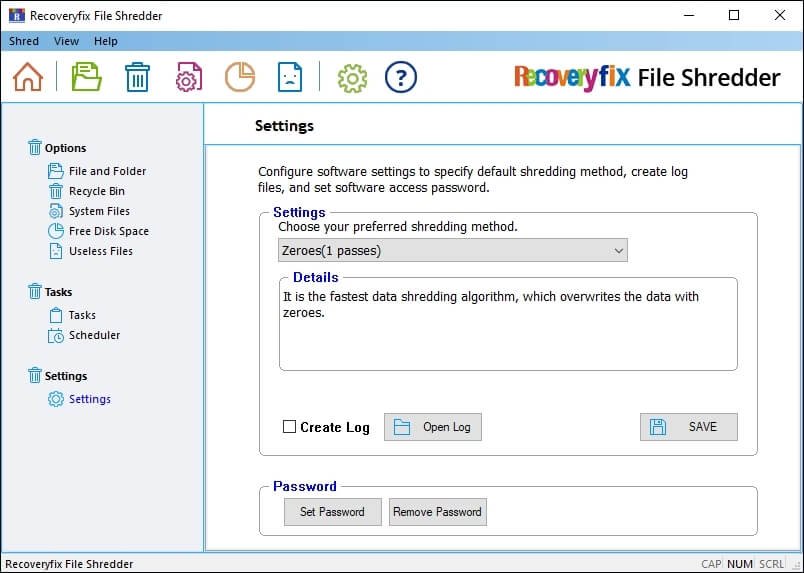
Step 2. Choose the preferred shredding method using the drop-down list.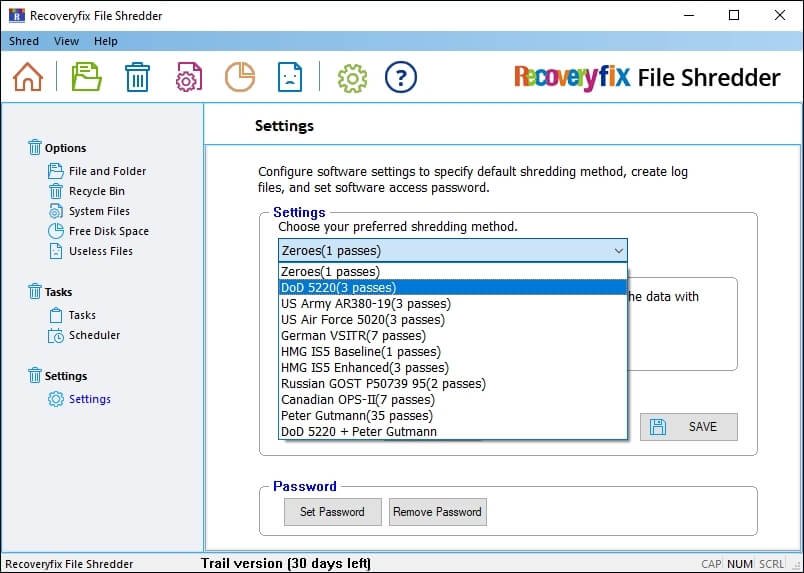
B. Create Log Files
Step 1. Enable the Create Log option from Settings.
Step 2. Click on the Save option to keep the changes.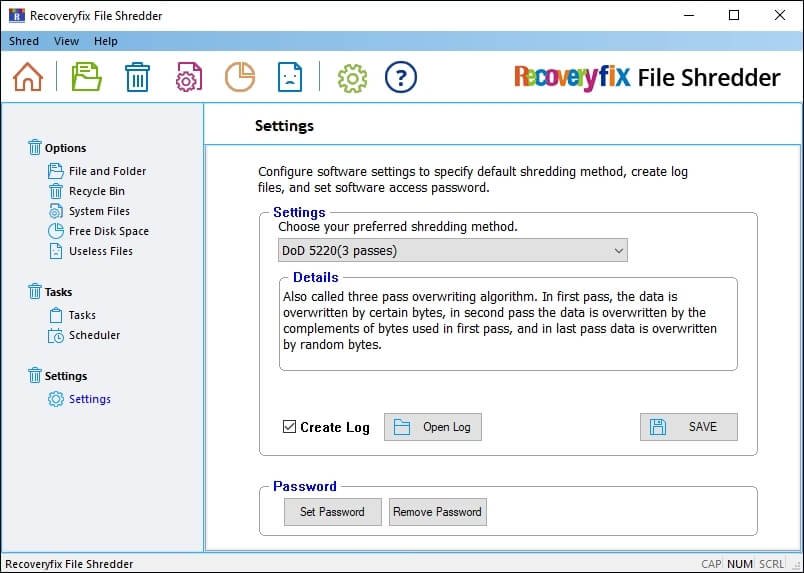
Step 3. A pop-up message will appear once the settings are saved successfully. Then, click OK.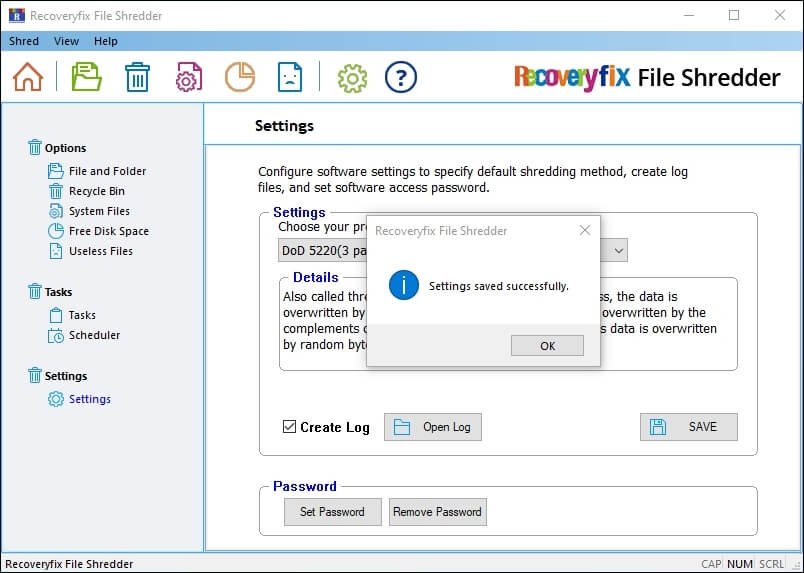
C. Set Software Access Password
Step 1. Click on the Set Password option to create a new one. 
Step 2. Enter Password that you want to create and proceed to OK.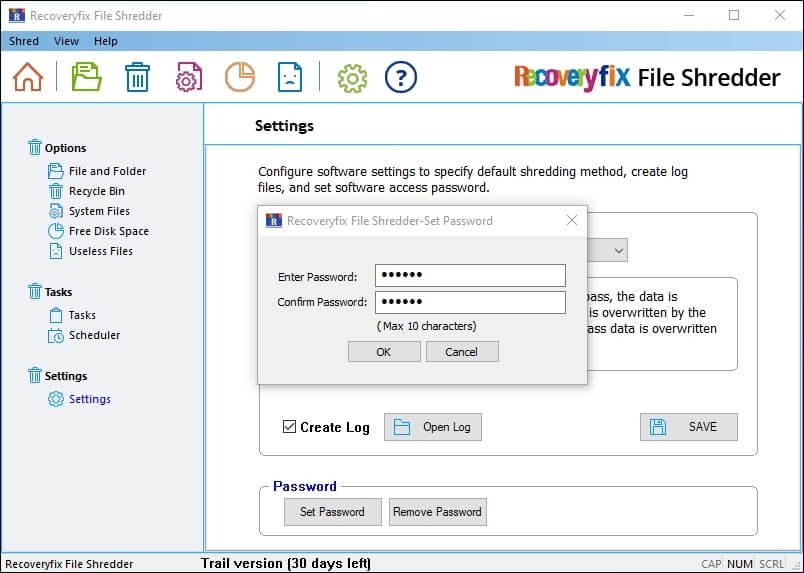
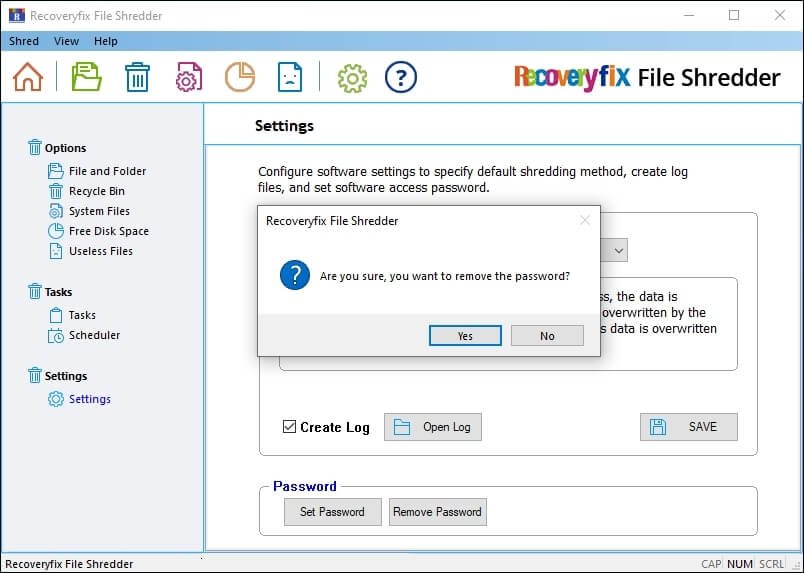
D. Remove Access Password
Step 1. Click on Remove Password to delete the created password. 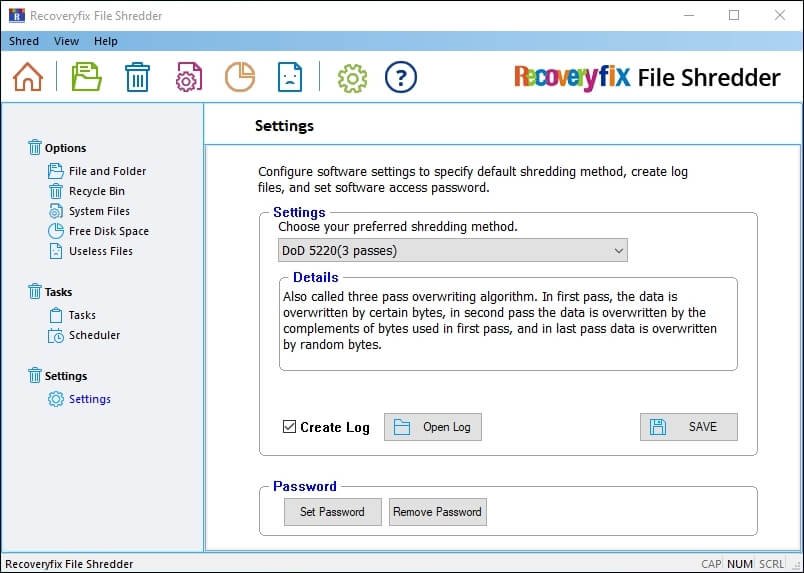
Step 2. Tap on Yes in the confirmation pop-up to proceed.