Recoveryfix Excel Splitter: How it works?
Check out the step-by-step guide to know how the Excel splitter can break the Excel files by row, size, or sheets.
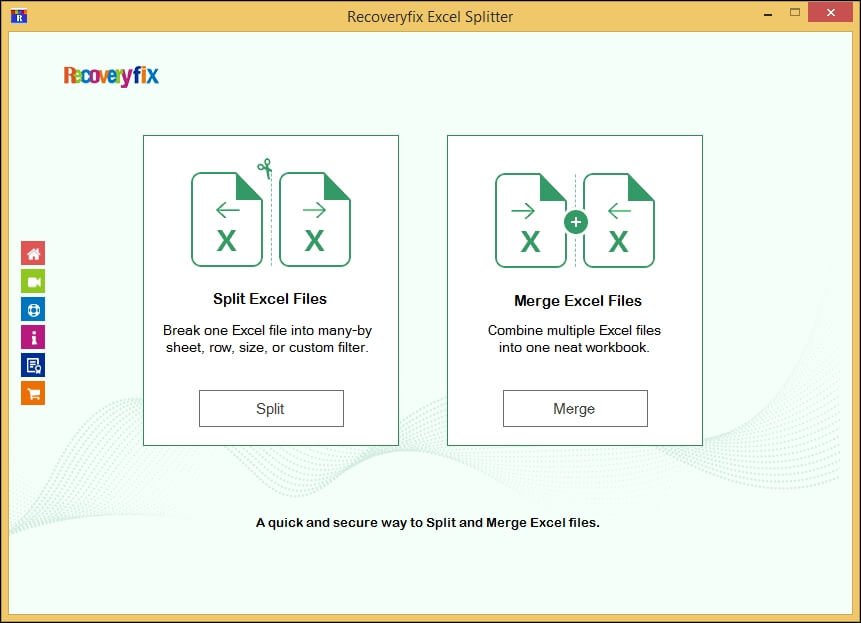
Step 1: Launch the Recoveryfix Excel Splitter tool.
Step 2: Tap on the Split option in the home tab.
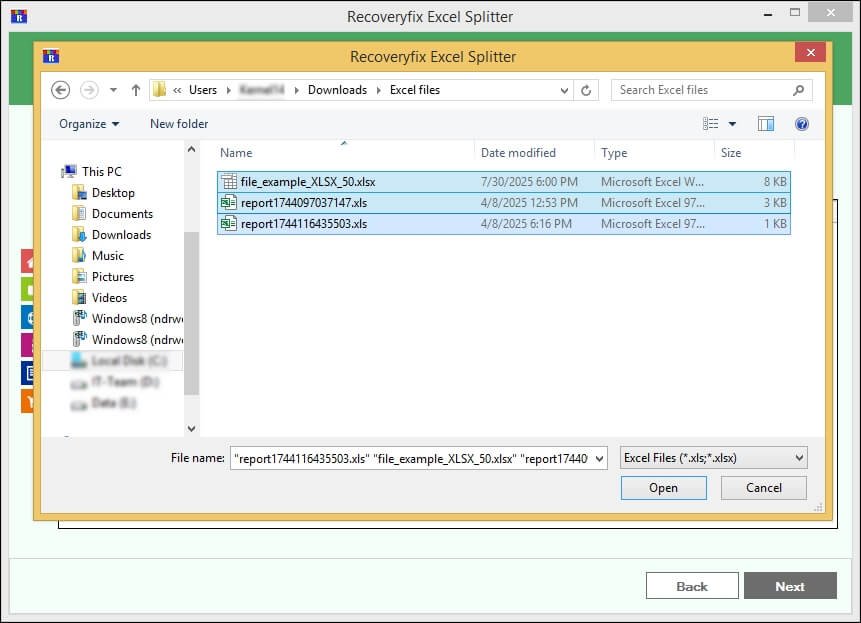
Step 3: Select Add File to add the desired Excel files. Choose the Excel files & click Open.
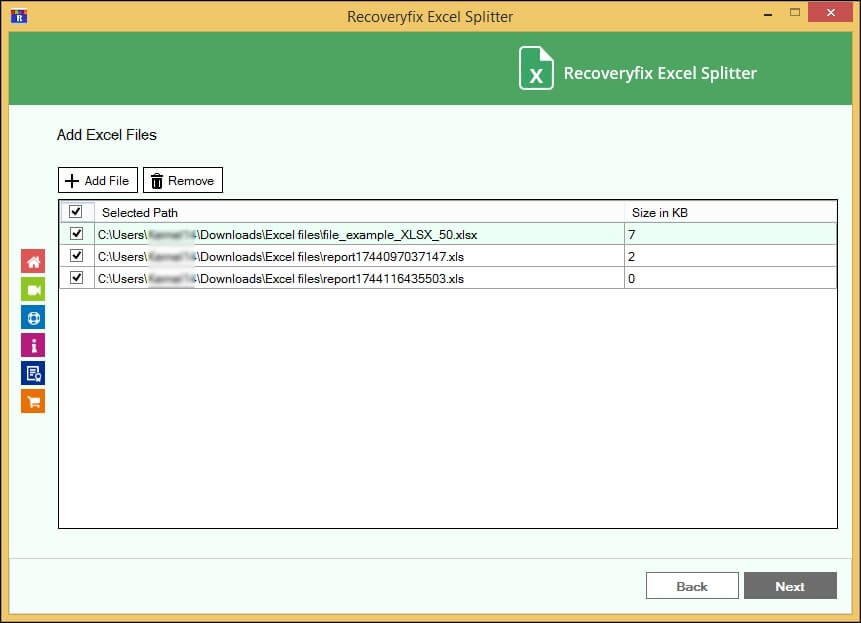
Step 4: Checkmark the needed files & tap Next.
Choose Suitable Split Options!
The tool comes with three options for splitting. Choose accordingly:
Split Excel Files by Rows
Beneficial for those who want to split the Excel files by a set of selected rows.
Step 5: Tap on Split by Row & select the desired filters. Browse the location to save the resultant file.
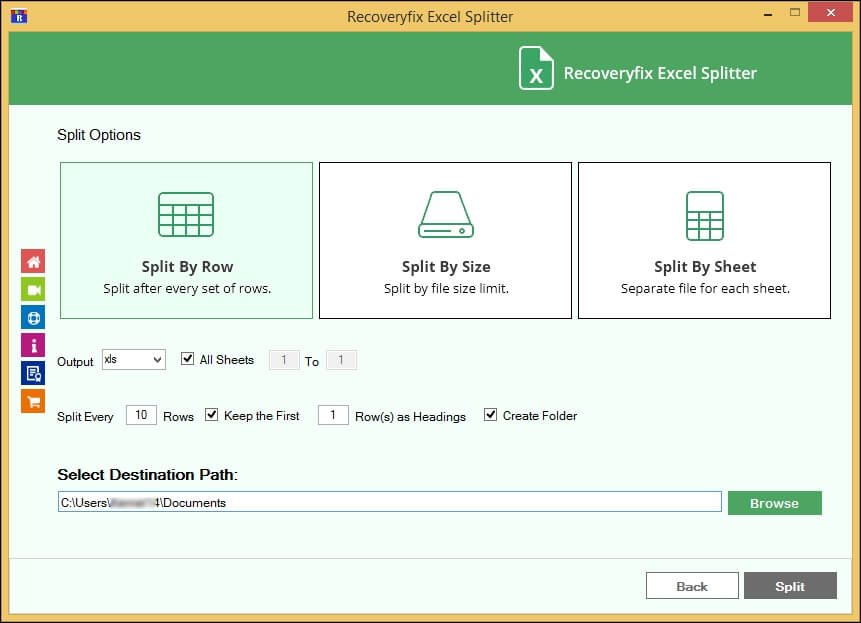
Output: Get different saving options such as XLSX, XLS, CSV, XML, & ODS.
All Sheets: Set a range of sheets in which splitting is needed.
Split Every: Offers to split the Excel files as per the desired rows.
Keep the First: Provide an option to set specific rows as headings for the resultant Excel file.
Create Folder: Name the saved file as per the requirement once it is unchecked.
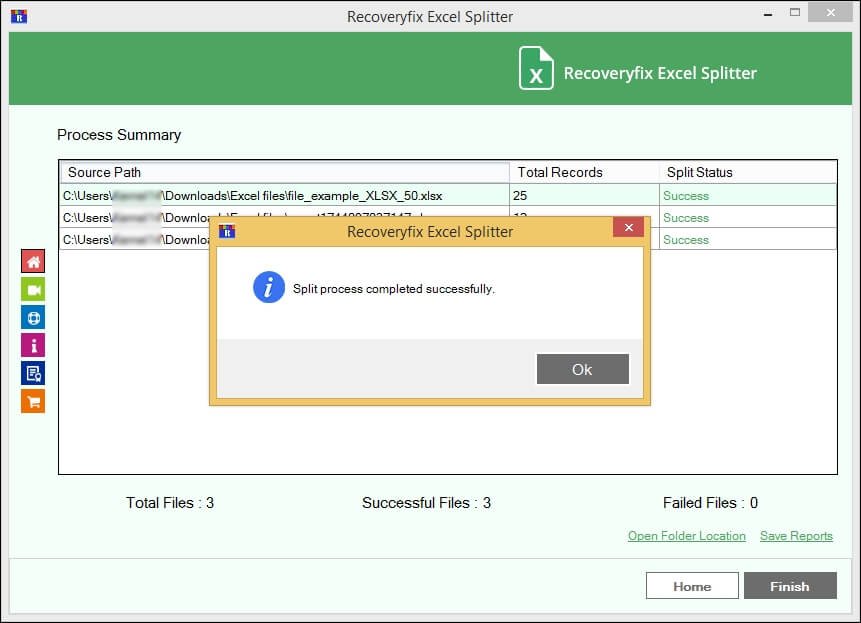
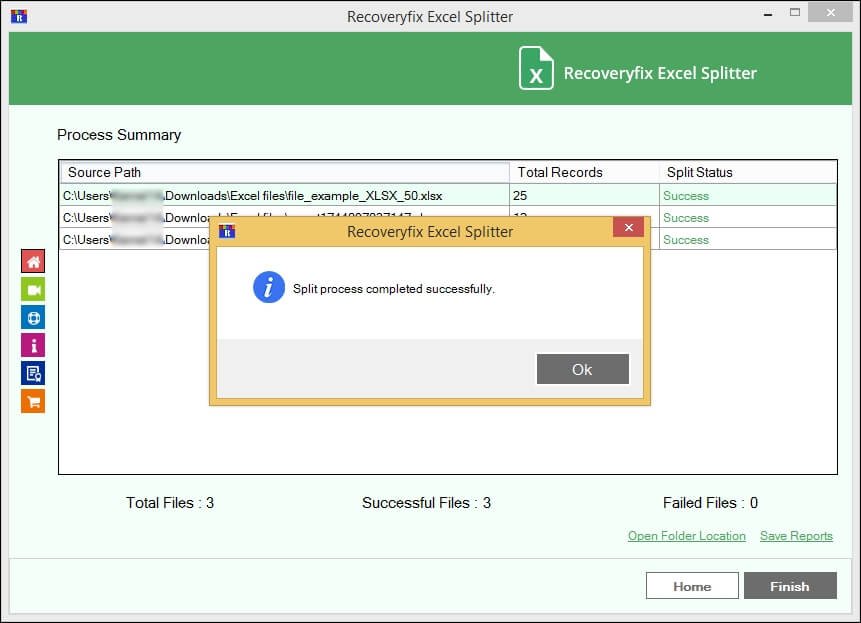
Step 6: Hit the Split tab. It will start the process of splitting Excel files.
Step 7: After the Split process completed successfully message is prompted; click OK.

- Use the Open Folder location to access the saving path directly.
- For a complete summary of splitting an Excel file in CSV format, tap on the Save Reports option.
Split Excel Files by Size
Free yourself from the oversized Excel datasets with the "Split By Size" option.
Step 5: Tap on the Split By Size option & check suitable filters. Browse the Excel file saving location.
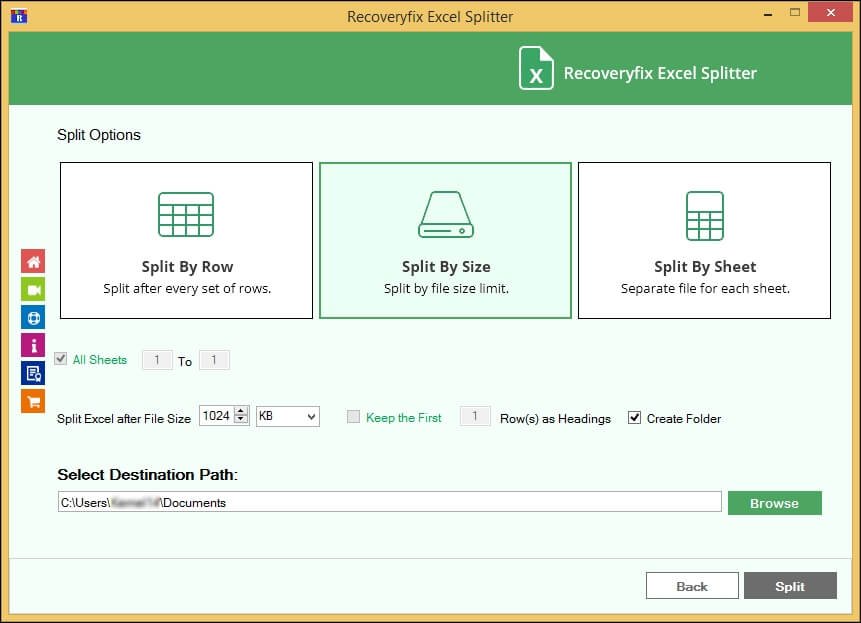
Here are the filters with their applications
- Split Excel after file size: Get the output based on the needed size, such as KB, MB, & GB.
- Create Folder: Name the saved file as per the requirement once it is unchecked.
Step 6: Hit the Split tab. It will start the process of splitting Excel files.
Step 7: After the Split process completed successfully message is prompted; click OK.
- Use the Open Folder location to access the saving path directly.
- For a complete summary of splitting an Excel file in CSV format, tap on the Save Reports option.
Split Excel Files by Sheet
Break complex Excel datasets with the sheets by using "Split by Sheet.”
Step 5: Click on Split By Sheets, apply filters & then Browse the location to save the resultant file. Tap OK.

Here are the filters with their explanation
- Output: Get different saving options such as XLSX, XLS, CSV, XML, & ODS.
- All Sheets: Set a range of sheets in which splitting is needed.
- Create Folder: Name the saved file as per the requirement once it is unchecked.
Step 6: Hit the Split tab. It will start the process of splitting Excel files.
Step 7: After the Split process completed successfully message is prompted; click OK.
- Use the Open Folder location to access the saving path directly.
- For a complete summary of splitting an Excel file in CSV format, tap on the Save Reports option.