How to migrate EDB to Live Exchange Server?

Updated On - April 17, 2026
EDB is the file extension for Exchange Server database files. Sometimes, users need to migrate an offline EDB file to a Live Exchange Server to access its data in the Exchange environment.
However, in many instances, EDB files may be corrupted or inaccessible which needs to be reloaded to the desired Exchange Server to access its crucial data.
However there is no manual method to export EDB data to a Live Exchange directly. That’s why we need to rely on third-party software to migrate EDB mailboxes efficiently. So, here in this blog, we are going to discuss Recoveryfix for the Exchange Server tool, which helps you migrate your EDB data to Live Exchange Server securely.
So, you’ll either have to convert the EDB file to PST or use a third-party tool to migrate EDB data to live Exchange.
Before that, let’s discuss why we need to migrate to Live Exchange Server.
Why migrate from EDB to Live Exchange
- Improved reliability and availability: Migrating from EDB to Live Exchange helps to reduce the repetition and minimize downtime in case of failures.
- Better security: It provides better security and authorization; however, it supervises regularly and complies with the server upgradation with high security.
- Scalability: It helps to increase the server capacity according to the requirements and supervise the performance to identify the obstacles and analyze the cloud amalgamation for flexible resources based on the demand.
- Access from anywhere: With the help of an internet connection, you can recover and store your data from any system or device.
- Collaboration: Live Exchange permits cooperation with each other easily and enhances the performance of individuals and group members to achieve their target.
Use a professional tool to migrate EDB to Live Exchange
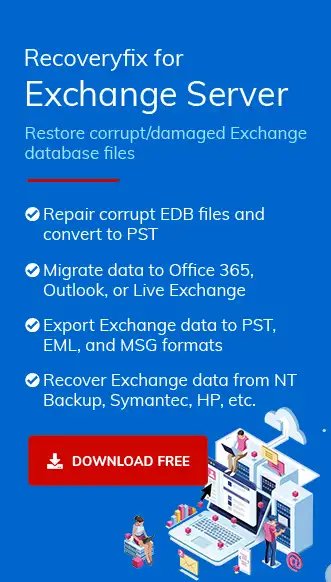
When it comes to the third-party tool, there is no better software than Recoveryfix for Exchange Server. It is an effective Exchange recovery tool that helps users migrate mailbox items to Office 365 or live Exchange directly. It is empowered with some advanced features, which include:
- Recovering entire mailboxes from an EDB file.
- Selective migration with intelligent filter options.
- Support to all Exchange Server and Outlook versions.
- Migrating data from EDB to Live Exchange/Office 365.
- Migrating data with the complete data integrity and original folder hierarchy.
- Drag-&-Drop and Copy-Paste features to migrate data easily.
Steps to migrate EDB File to Live Exchange with RecoveryFix for Exchange Server
The EDB to live Exchange migration process of the software consists of three major steps. Adding Source, Adding Destination, and Migrating Mailboxes from Source to Destination. Here, we’ll go through each category step-by-step.
Step 1. Download RecoveryFix for Exchange Server Recovery tool and install it on your system.
Step 2. click the “Add Source” button. A dialog box will appear on the screen, select “Offline EDB File” to add EDB file as source.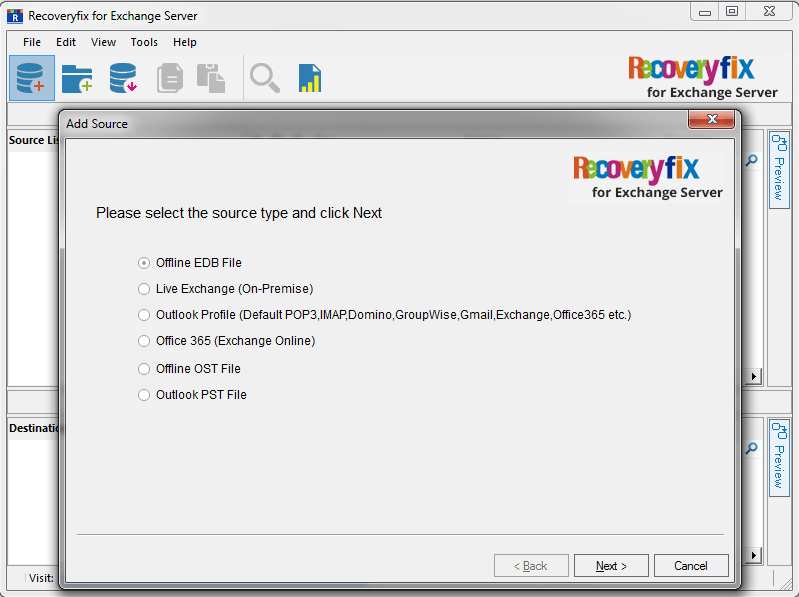
Step 3. Now, click the “Browse” button to select the EDB file, and then click “Next.”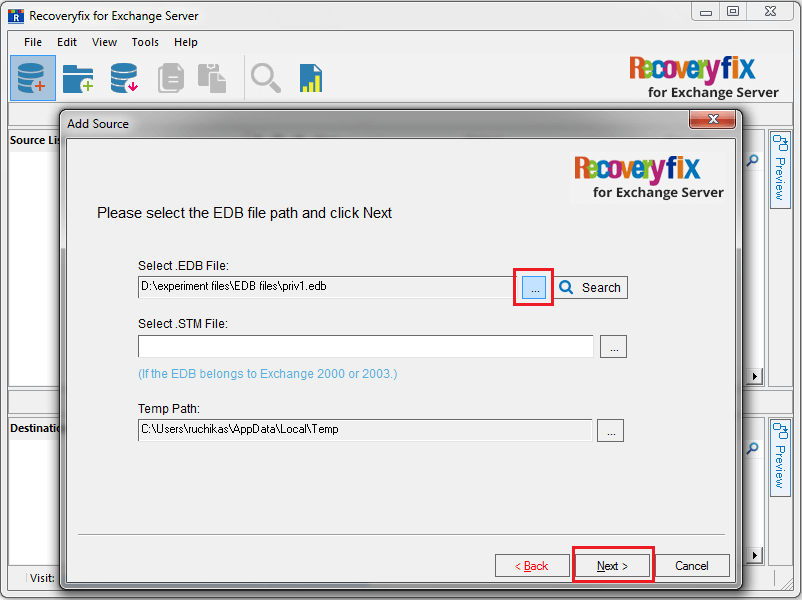
Note: If you don’t know the location of EDB file, you can search for it with the “Search” option.
Step 4. Now, select the mode to scan the EDB file and click “Next” to continue.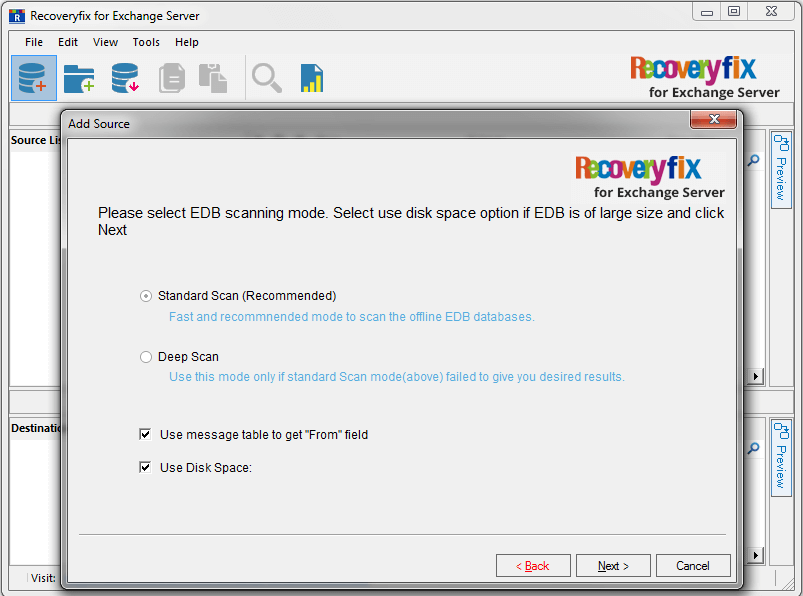
Step 5. The EDB file will be added to the tool; you can check all its mailboxes and view their content.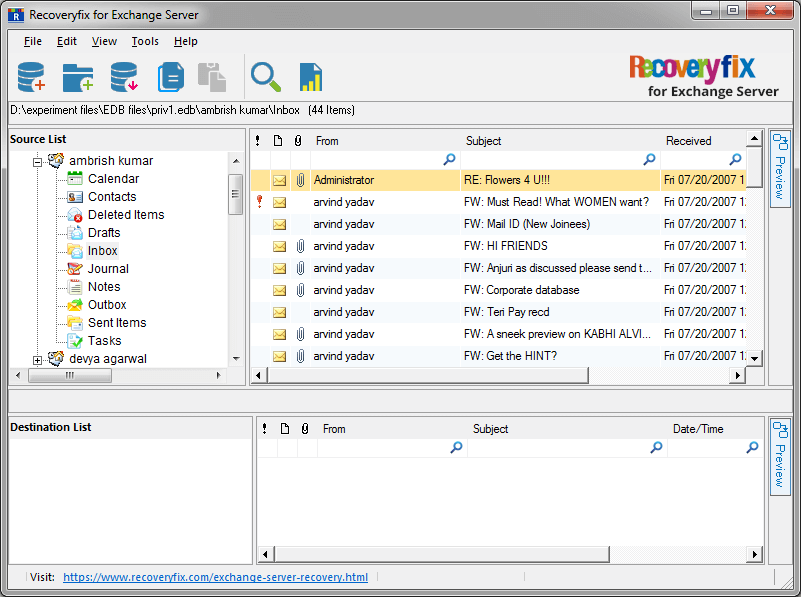
Step 6. Click “Add Destination” and select “Live Exchange (On-premises)” from the dialog box and click “Next.”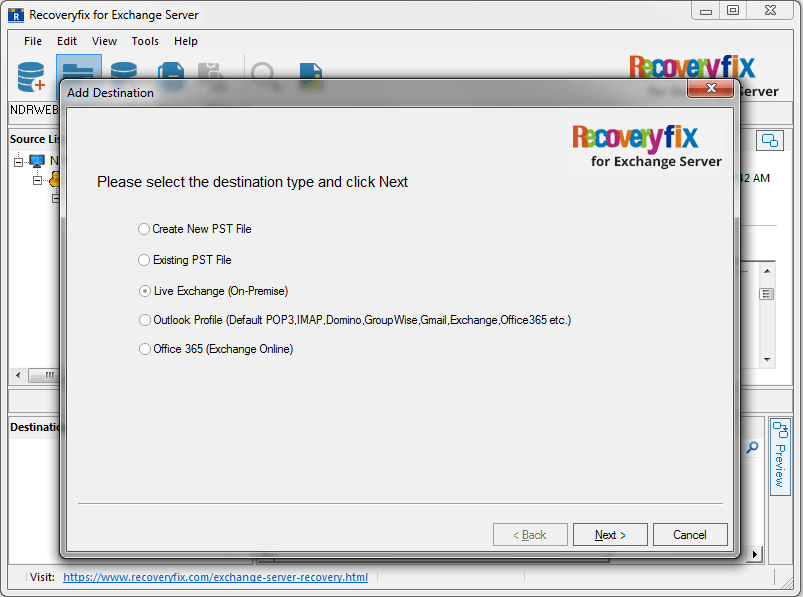
Step 7. In the next step, the tool will ask for Live Exchange Server information, such as connection preference, Exchange Server name, Mailbox name, or Exchange Server version, etc.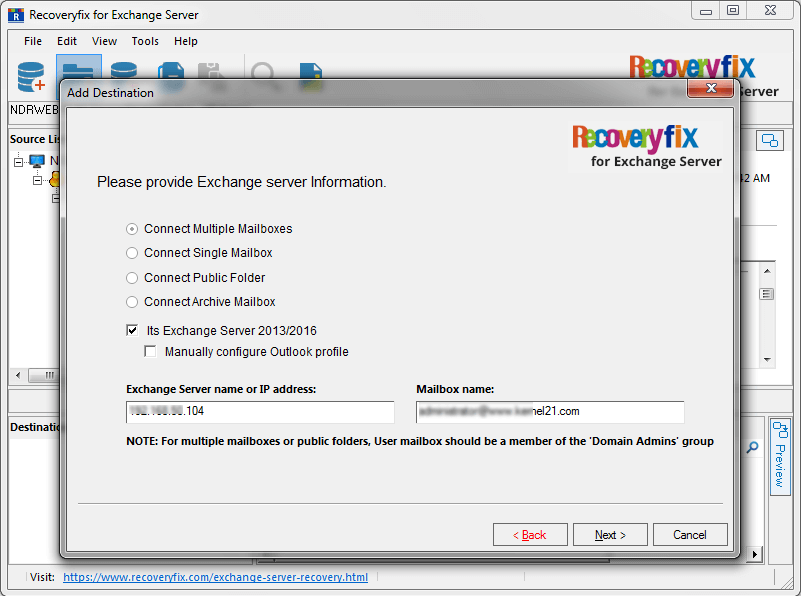
Note: Select the checkbox “It’s Exchange Server 2013/2016” if you’re using Exchange 2013/2016.
Step 8. Select the mailboxes to which you want to migrate the data. Click “Next”.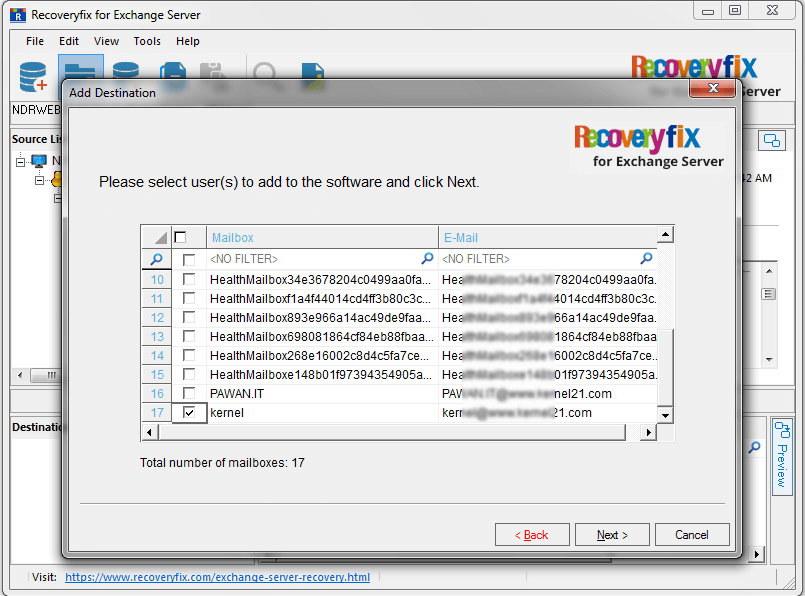
Step 9. You can see mailboxes of both source and destination in the software.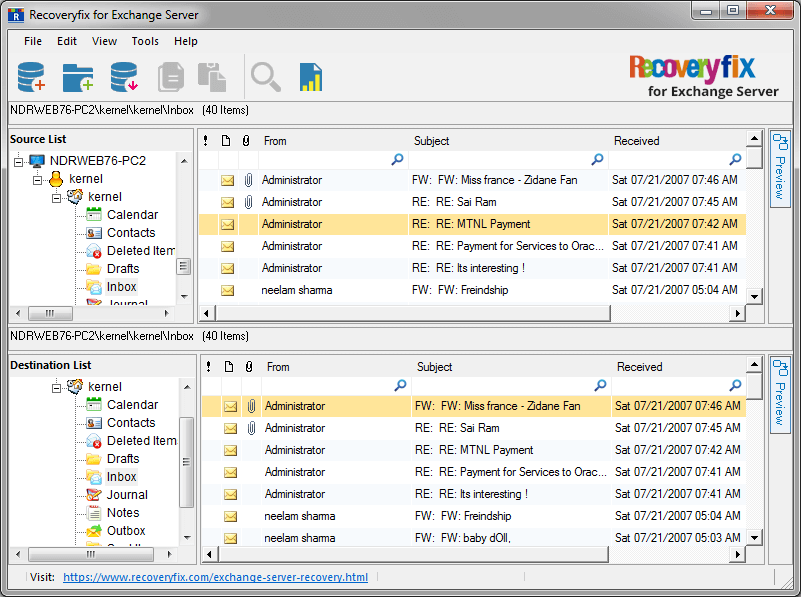
Step 10. Now, if you want to migrate all mailboxes from EDB file to Live Exchange, then right-click on the root folder in the source pane and select “Copy All Mailboxes.”.”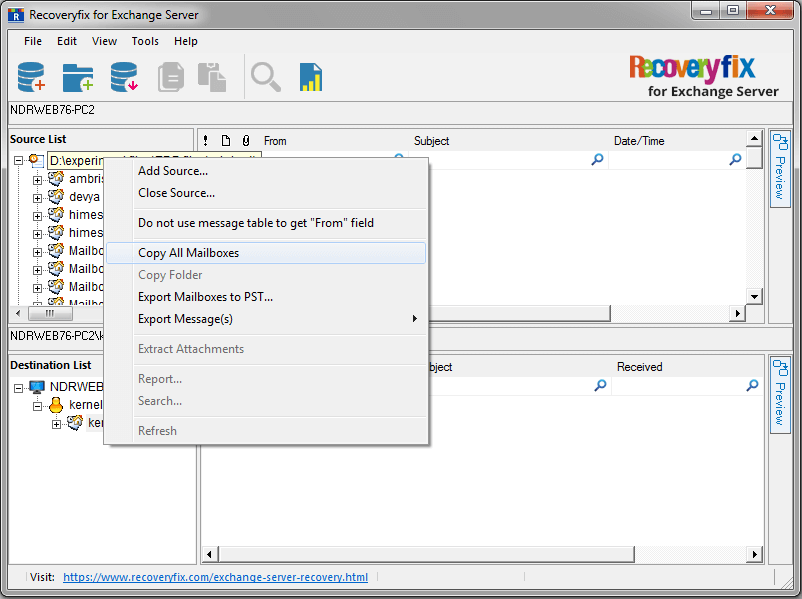
Step 11. Go to the destination and right-click on the root folder and click “Paste all mailboxes.”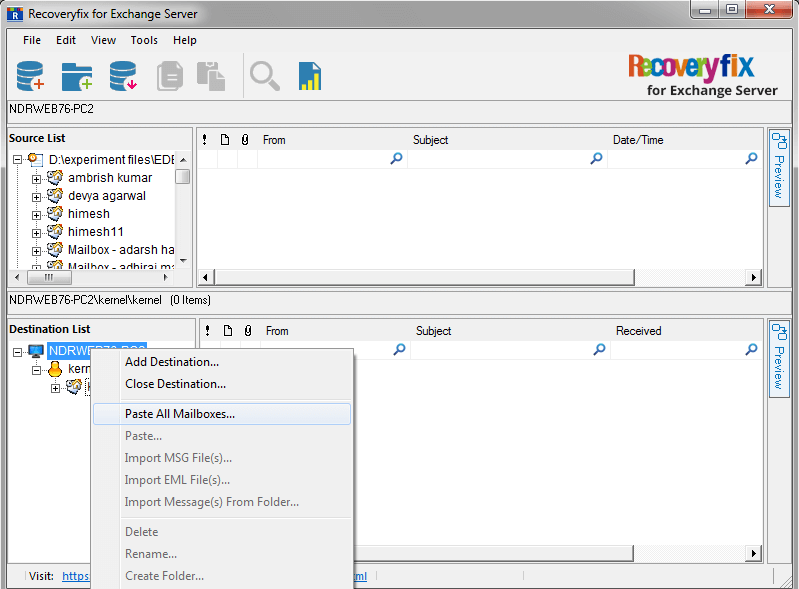
Step 12. Select mailboxes before migrating. Click Next.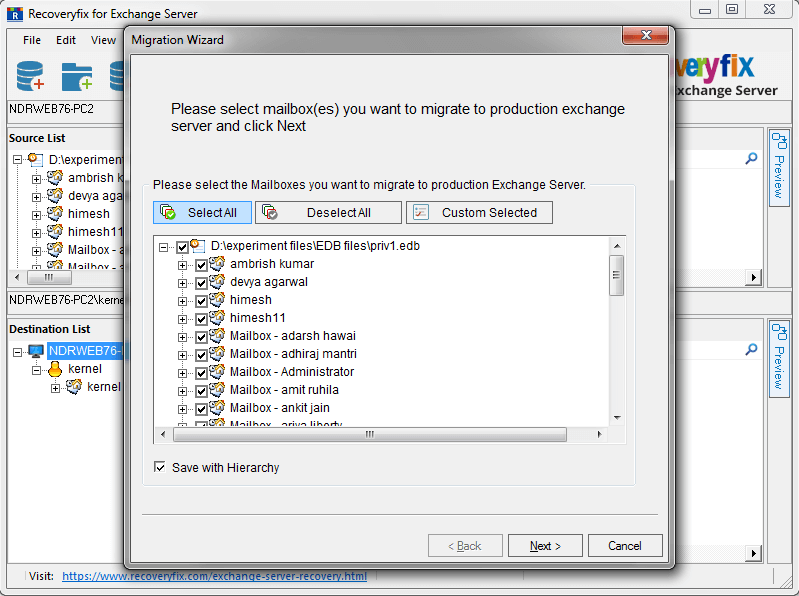
Note: You can apply a custom selection of folders to all the mailboxes with ‘Custom Selected’ option. Choose Select All/Deselect All to select or deselect all mailboxes. Then, select “Save with Hierarchy” to migrate mailboxes in the same hierarchy.
Step 13. Select the filters for the mailboxes, such as item type, date range, including/excluding folders, etc. and click “Next.”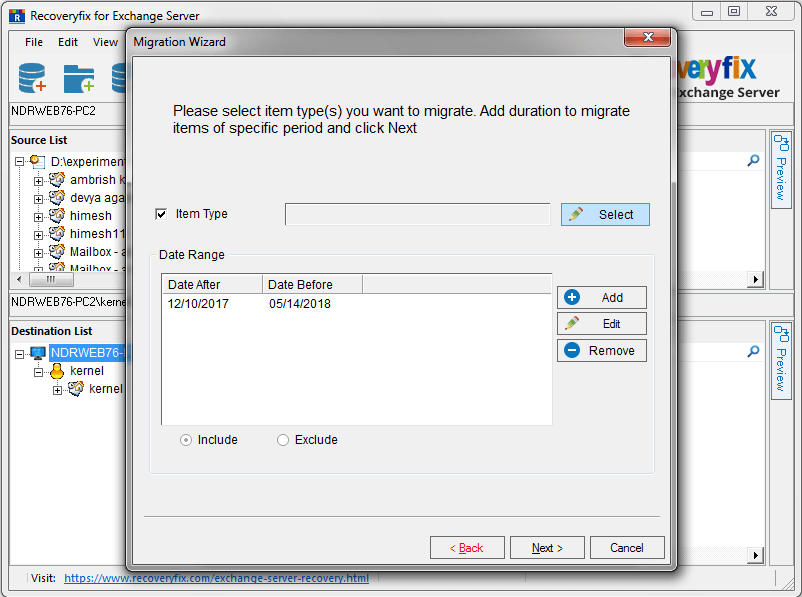
Step 14. The migration wizard will appear on the screen. Here, you can map the source mailboxes with the destination mailboxes. Click “Next” after mapping.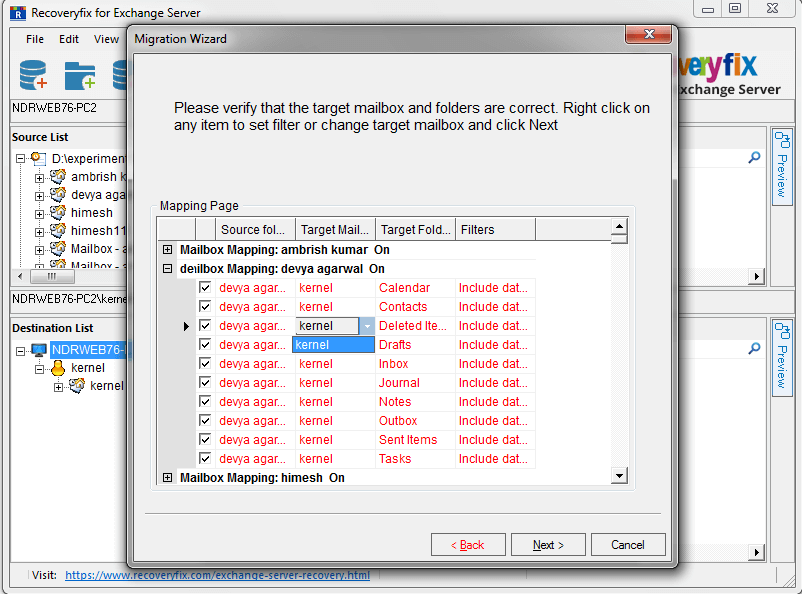
Step 15. The migration process will start. after completing this process screen show “Migration Successful.” 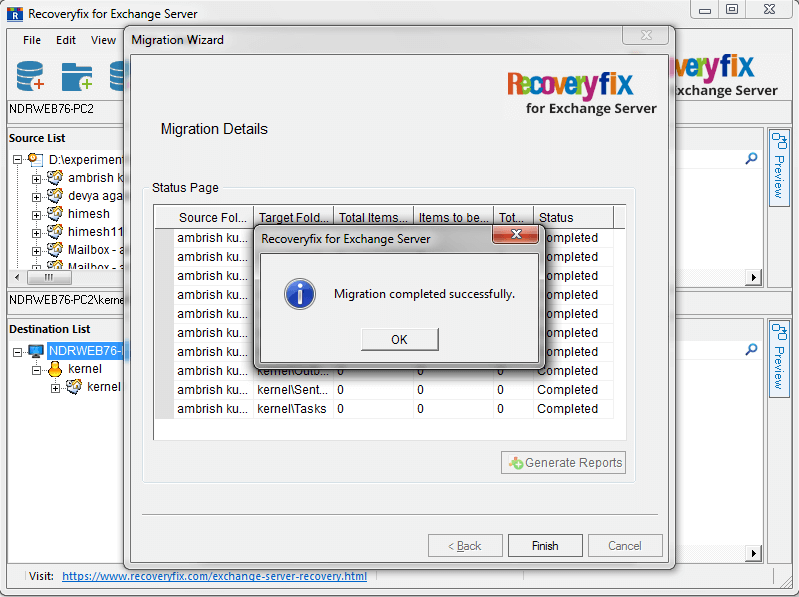
Thus, EDB file mailboxes have been migrated to Live Exchange mailboxes. Similarly, you can also a copy folder, and then paste it to a destination mailbox.
Step 16. Click “OK and then click “Finish” to end the process.
Conclusion
Migrating EDB file data to live Exchange with manual methods is a long process and also time-consuming. But, with the help of RecoveryFix for Exchange Server Recovery, you can directly migrate EDB data to live Exchange. This software makes the migration quick and easier, even for non-technical users.