How to recover Exchange data without log files?

Updated On - February 18, 2026
Exchange database stores a great number of user mailboxes which contain emails, contacts, calendar events, attachments, etc. Transaction log files play an essential role in the Exchange database. All the changes made to the databases are written in transaction log file first, and then it is written to the Exchange database. However, in some conditions, log files get damaged or deleted leading to Exchange data losses. Some common reasons behind corrupted Exchange log files are sudden termination of system (interrupted power supply), inconsistent database (dirty shutdown state), virus contamination, etc.
Ways to recover Exchange data without log files
There are two ways to retrieve the corrupted or lost log files in the Exchange database:
- Soft Recovery
- Hard Recovery
Soft Recovery
Soft recovery process automatically reads the checkpoint points when administrators try to remount a database. However, if it is not automatically mounted, you can perform software recovery using the Eseutil utility. Run the below-mentioned command in Eseutil:
Norms of replay in transaction log files
There are some norms for replaying in transaction Log files which cause restriction:
- Checkpoints point to a wrong Log file.
- Database files from the storage group are removed.
- The path of the log file is changed.
- Log files are in different database.
Hard Recovery
In hard recovery process, you need to restore the backup ,which generates a file in the temporary folder with the name restore.env. Now, you must replay log files in restore.env against the Exchange database as below:
Here, you can see that C:\Program Files\ Exchsrvr \bin is the location of Eseutil and C:\Temp\First Storage Group is the location of the restore.env file. It shows the valid backup of database files.
If log files are damaged or missing, then it is impossible to recover the data. When your log files are damaged or missing, Exchange will display some errors like JET-Error -501 (0xfffffe0b), JET-Error -515 (0xfffffdfd), JET-Error -514 (0xfffffdfe), or JET-Error -533 (0xfffffdeb). Now, you need to apply the mentioned Eseutil command to repair the files.
Advanced Solution: Recover Exchange Data Without Log files
Both soft and hard recovery works only when log files are available, and sometimes, they may result in errors. As a result, it may be difficult to recover lost files using these methods.
In such cases, we recommend using advanced third-party tools like Recoveryfix for Exchange Server for quick and smooth data recovery. The Exchange Server Recovery is an exceptional software designed to repair severely damaged databases instantly.
Its easy-to-use interface allows users to save the retrieved data directly to Exchange Server or Office 365.
Let’s go through the working procedure of the Recoveryfix for the software to recover Exchange data without Log files.
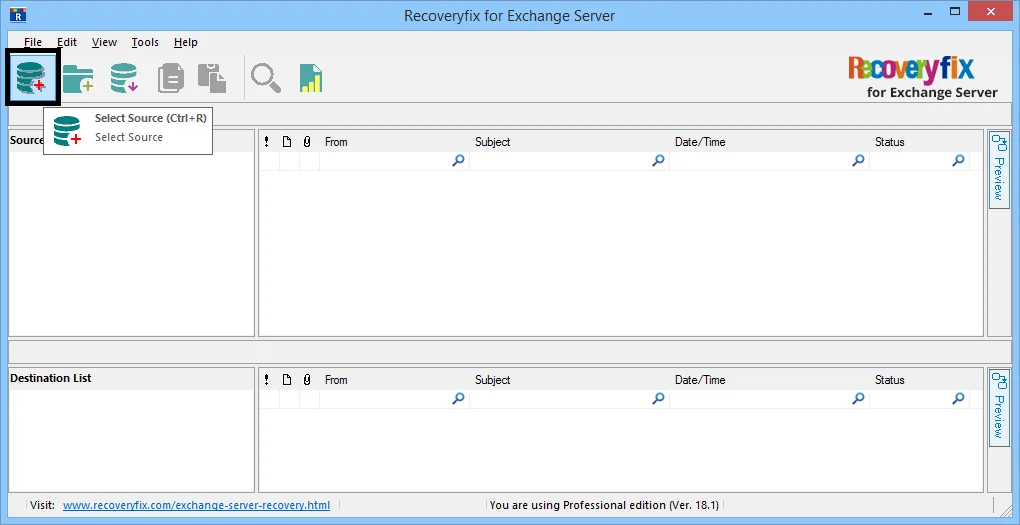
- Launch the software and click on the Add Source icon.
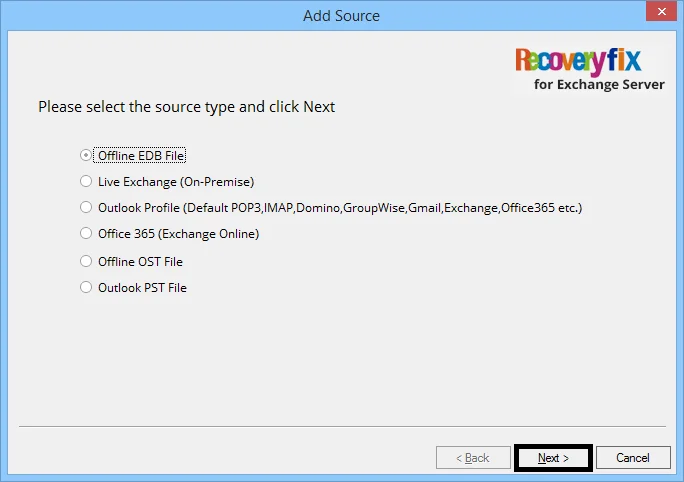
- Choose Offline EDB file as the source option and click Next.
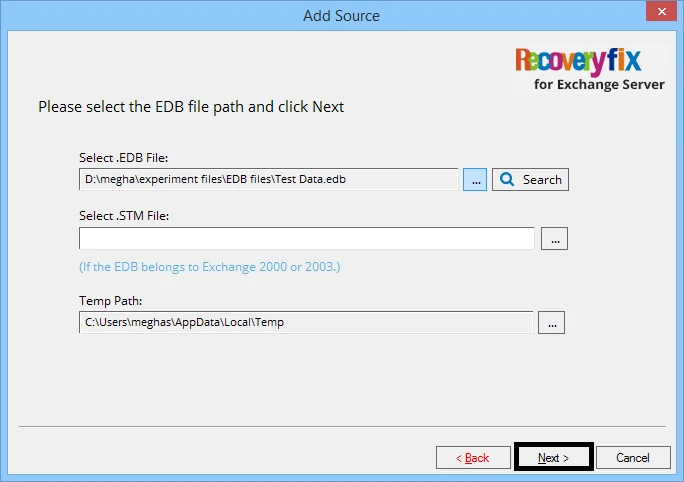
- Click on three dots to browse and add the EDB file for recovery; click Next.
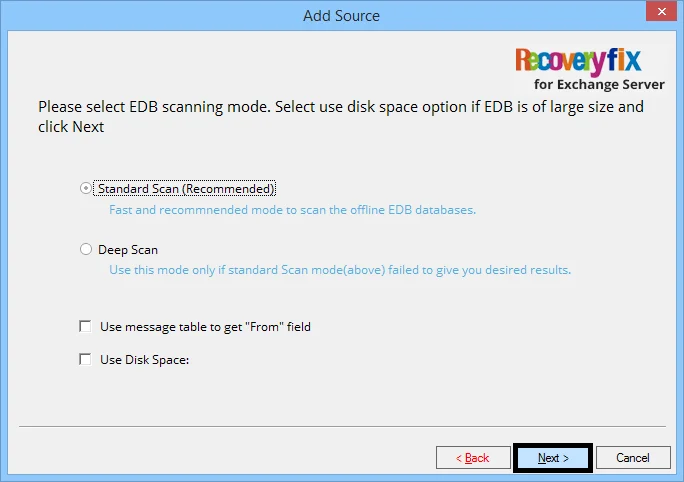
- Next, choose the scanning mode and click Next.
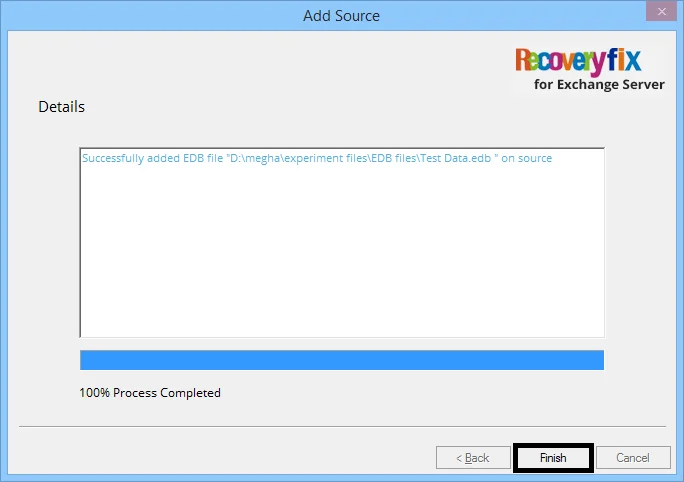
- The EDB file is scanned and repaired. Click Finish.
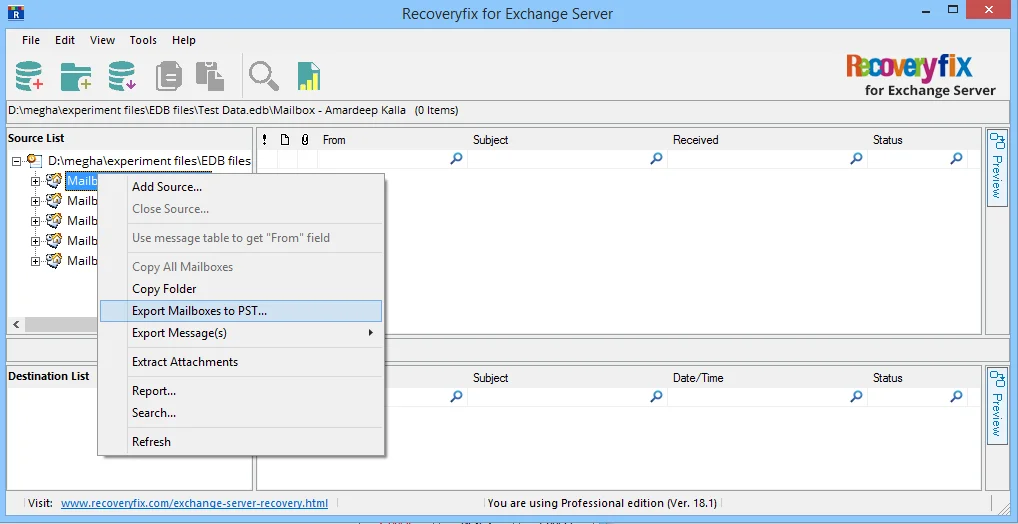
- The EDB mailboxes will be retrieved successfully. You can preview the selected mailbox items. Right-click on the source mailbox and choose the desired option for exporting EDB data. Here, we are selecting Export mailboxes to PST.
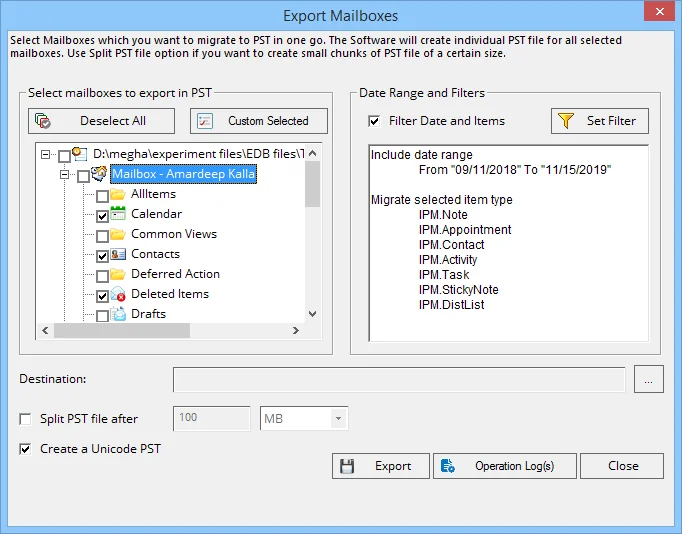
- Select the desired mailbox folders and apply filters and other options. Add the destination location and click Export. The migration process will be completed.
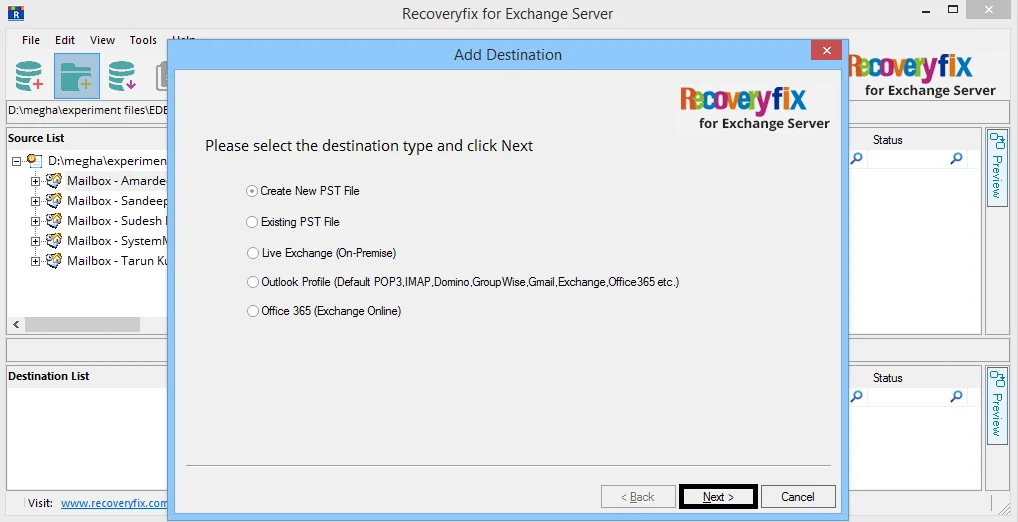
Note: Select the desired file items and click the Add destination button. Choose the Create New PST option and click Next. Then, enter the destination location to save the PST file. Once the PST file is added, you can simply copy the data from the source to the destination.
Hence, corrupted Exchange data is successfully repaired and recovered with this advanced tool.
Conclusion
Damaged or lost transaction log files often lead to the damage of Exchange data and recovering them becomes a tedious task with manual solutions like Soft and Hard Recovery. That’s why a full-proof automatic Exchange Server Recovery solution is recommended which simplifies the recovery of corrupted or lost database files.