VLC Won’t Play MP4 Video Files– How to Solve?

Updated On - April 14, 2026
- Enable Auto-repair in VLC: Fix minor video file corruptions.
- Install the required codecs: H.264 (AVC) or H.265 (HEVC).
- Disable the hardware decoding: Smooth rendering of video files.
- Set the Preferred Video Resolution: Select as per the accessed video file.
- Change Video Output Settings in VLC: Modify the default settings of the player.
Nothing is more frustrating than an MP4 video that stops playing in the middle, especially when you are using VLC Media Player. It happens due to mismatched codecs, outdated versions, output settings, or file corruption.
However, users can easily fix them with the help of simple and tested methods. Let’s explore different ways to fix VLC not playing MP4 video files issue in the blog.
VLC Media Player Common Errors That You May Face
Sometimes, VLC struggles to play even healthy MP4 files. Here are some reasons why:
- Codec issue: You might face this error if the codec required to play the video file isn’t available.
- Freezing: This error occurs when your video files get corrupted while downloading it.
- Playback error: It generally occurs when the video file you’re trying to play isn’t compatible with your current media player.
Quick Solutions: Try Before the Advanced Ones
Apply these basic solutions to fix VLC not playing MP4 files. Here they are:
- Fix Outdated Graphic Drivers.
- Update the VLC Media Player.
- Resolve inaccessible location drives.
- Install the H.264 or H.265 video codecs.
- Try to play the video file in another player.
Manual Methods to Resolve “VLC Not Playing MP4 File” Issue [Detailed Steps]
Check out this section to find the most relevant solutions to fix MP4video not playing on VLC Player issue. Try them now one by one to identify the best one.
Method 1. Turn Off Hardware Decoding
You can bypass the driver bugs and compatibility issues by disabling the hardware decoding. Here’s how to do so:
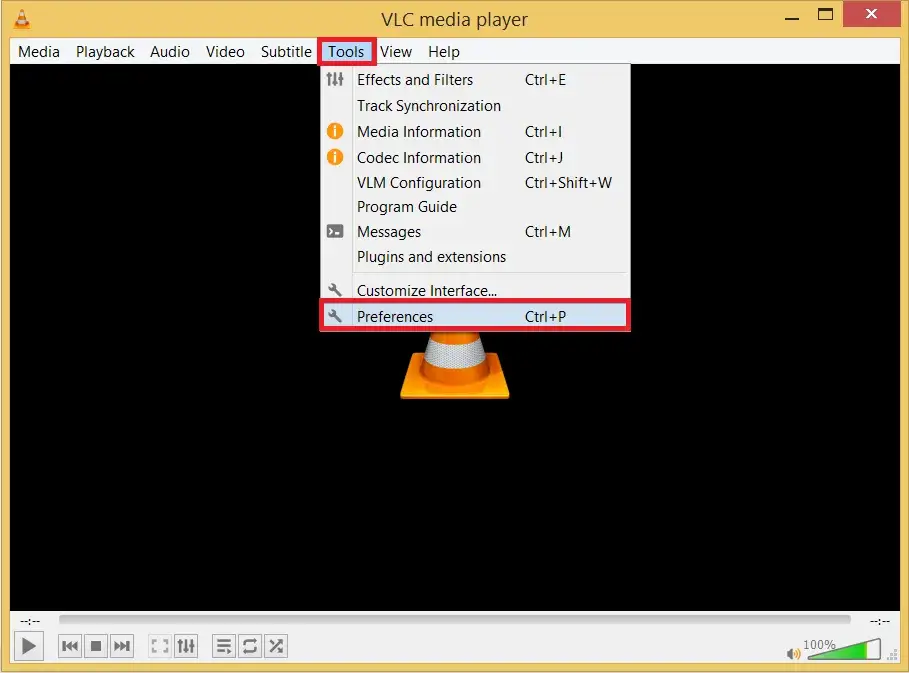
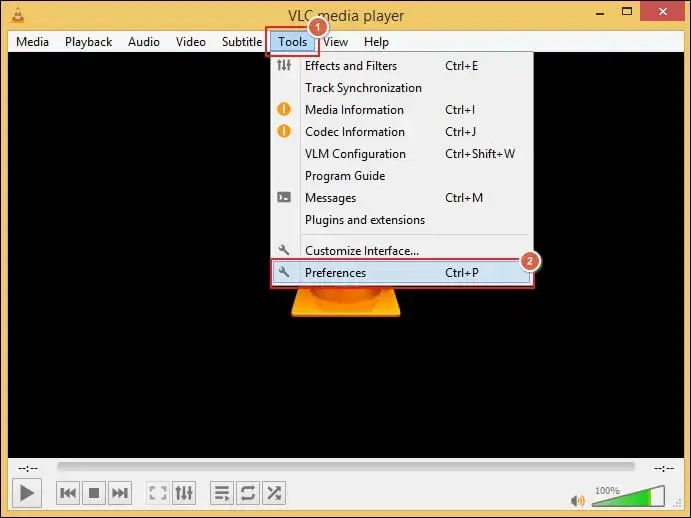
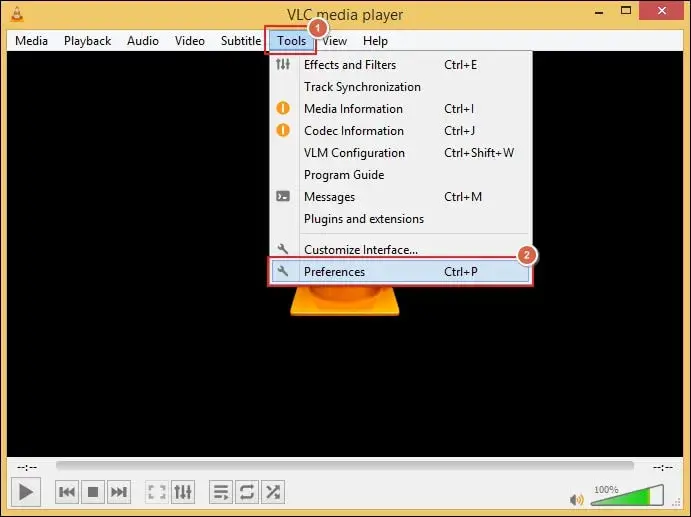
- Start VLC media player and go to the Tools tab. After opening the drop-down, choose Preferences.
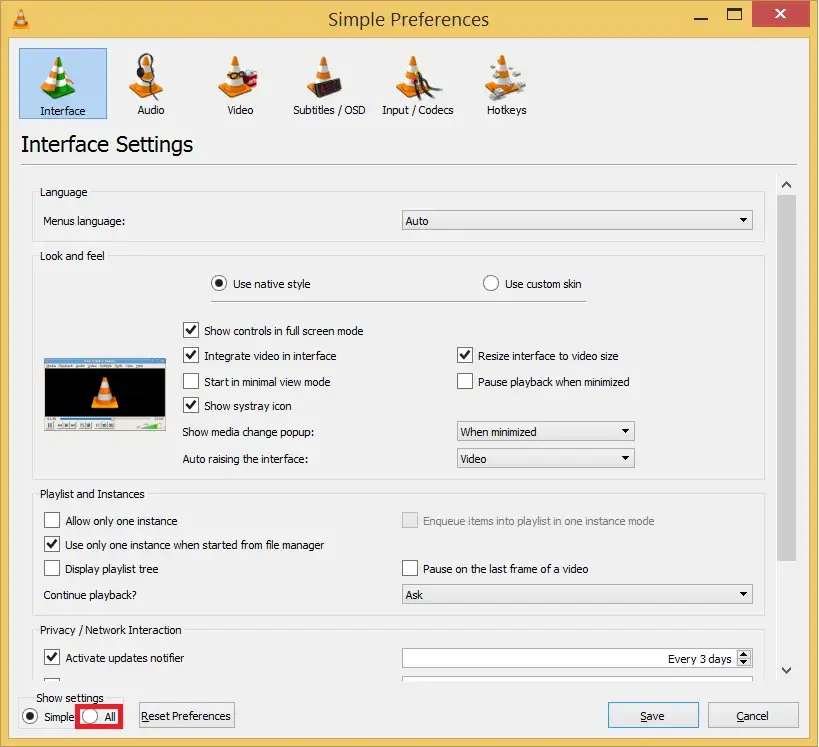
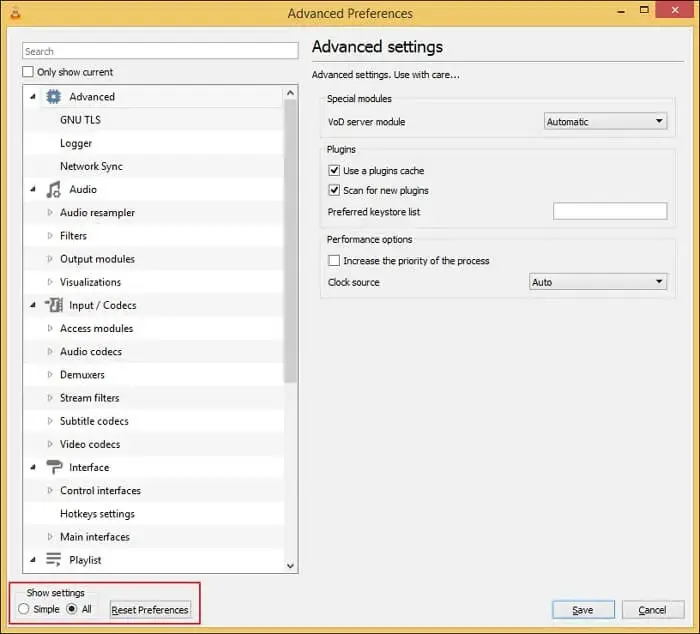
- In the Simple Preferences wizard, there is a Show settings section at the bottom. Click the All button.
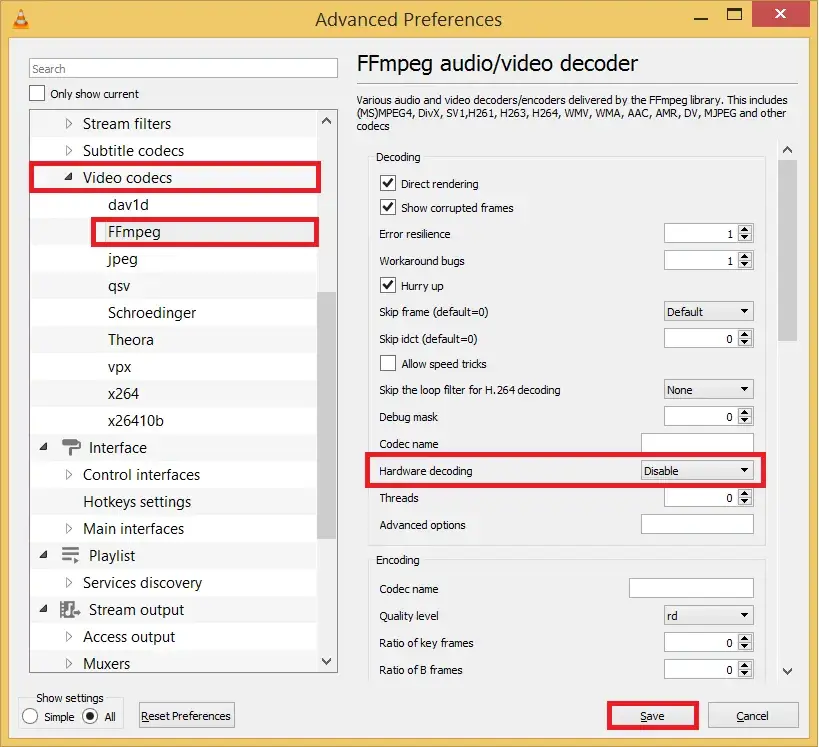
- In the Video Codecs category, click FFmpeg and choose the Disable option in the Hardware Decoding. Click the Save button.
Important to Know: Now restart the VLC Player and play the MP4 Video file. The change in the hardware decoding will not affect the rendering of the video. But it’s a possibility that a high-definition video may not work well after disabling the hardware0020decoding
Method 2- Modify the Video Output Settings
Sometimes, the properties of a video are not supported by the default video settings of the VLC Player. Change them to fix VLC not playing certain MP4 files errors using these steps.
- In the VLC Player, go to Tools and choose Preferences.
- Click the Video option.
- If the Enable Video is unchecked, then check it.
- In the Output drop-down, choose ‘DirectX (DirectDraw) video output.’
- Restart VLC Player and try to run the Video.
Method 3- Fix Unsupported or Mismatched Codecs
Use this method to convert the video files into another format. Follow the given steps to fix VLC not playing certain MP4 files error.
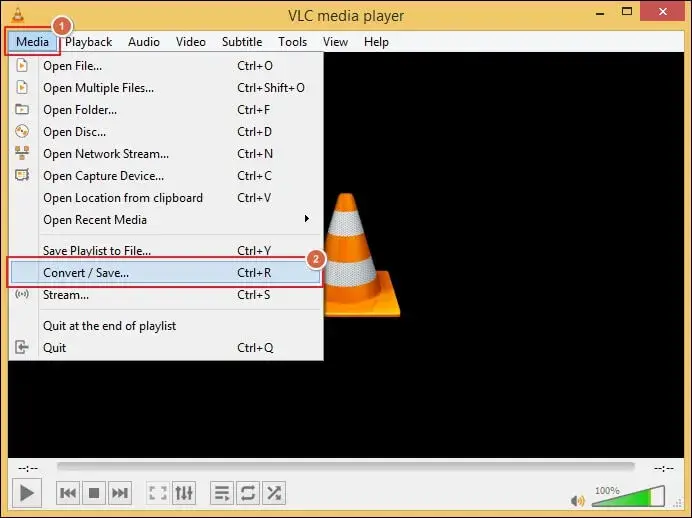
Step 1. Go to Media and select the Convert/Save option.
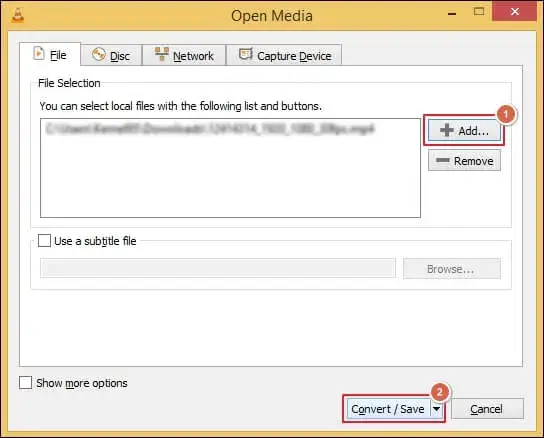
Step 2. Click on +Add to select the video file and proceed to Convert/Save.
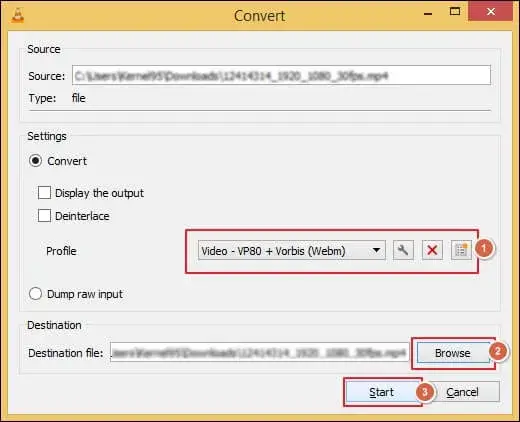
Step 3. Use the drop-down menu to choose the preferred video output format.
Step 4. Then, Browse to select the Destination file and Start the process.
Step 5. VLC will start converting the added video file.
Method 4- Enable the Auto Repair Feature in VLC
VLC media player comes with built-in features to repair video files automatically. Enable the settings if disabled in your VLC using the following steps:
Note: Change the file extension to AVI format before using this method.
Step 1. Click on Tool and go to Preferences option.
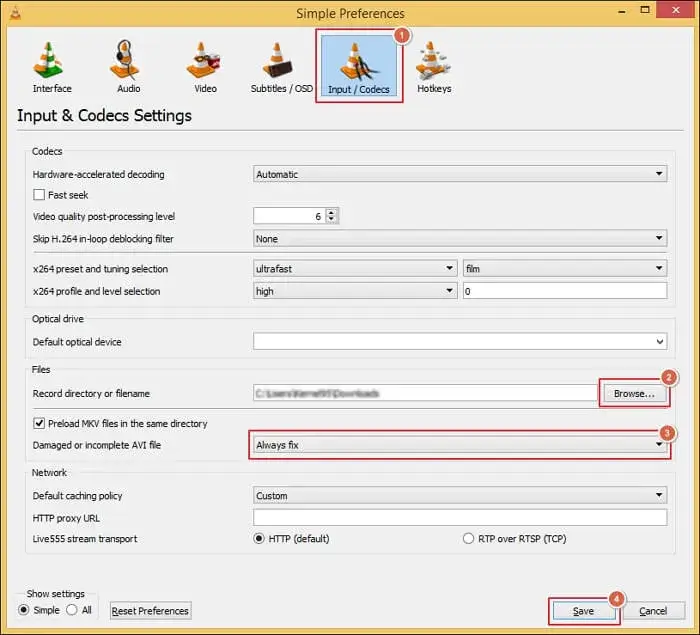
Step 2. Navigate to Input/Codecs and Browse to add the video file.
Step 3. Select Always fix under the Damaged or incomplete AVI file section. Then, click Save.
Step 4. It will fix minor inconsistencies in the added video file.
Method 5. Set Preferred Video Resolution
Sometimes, video resolution doesn’t match the source file or system, which causes playback issues. Fix it now with the help of the given steps:
Step 1. Go to Tools and click on the Preferences tab.
Step 2. Navigate to Input/Codecs and click All in the Show settings section. Then, proceed to Save.
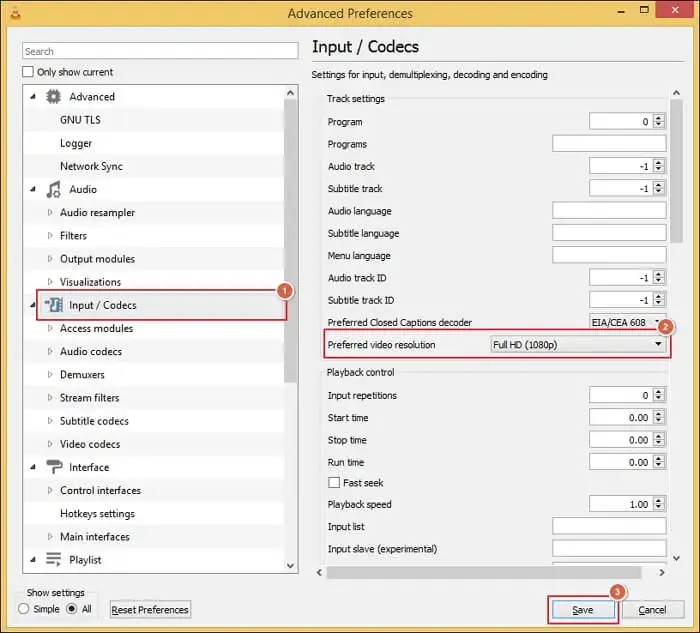
Step 3. Under the Advanced section, choose the Input/Codecs option.
Step 4. Change the Preferred video resolution to Full HD (1080) and click Save.
What If the Video File Is Corrupted? – Try the Direct Approach
If the video file does not play on the VLC player as well as on other media players, then it means the file is corrupted. The reasons may be an improper transfer, bad codecs, synchronization issues in audio-video streaming, bad compression, or abrupt stopping.
You need to repair corrupt MP4 video files otherwise, it will not play in any media player. For this, you can rely on advanced solutions like Recoveryfix for instant results. The Video Repair Tool allows you to repair multiple files at the same time without any performance lag.
Final Verdict
We have covered the detailed solutions to fix VLC not playing MP4 video files issue. You can use the step-by-step illustrations to resolve the error without any further assistance. If you are still facing the error, then the file is severely corrupted. As per our advice, you should go with the recommended solution to eliminate corruption or video file damage. The software repairs all video files regardless of their source.
FAQs: User Queries Answered
Q. What are the possible reasons behind VLC won’t play MP4 video files issue?
A. It happens due to several reasons. Here they are:
- Unsupported codecs.
- Damaged video file.
- Outdated VLC version.
- Incorrect video output settings.
- Large or incomplete downloaded files.
Q. Which codecs do I need to install for MP4 videos?
A. You need to install 2.64 or 2.65 codecs for MP4 video files.
Q. Why does VLC play only sound, not video?
A. This issue occurs due to the following reasons:
- Outdated graphic drivers.
- Faulty hardware acceleration.
- Misconfigured output settings.
Q. How can I repair MP4 video files in VLC Media Player?
A. You have to first convert the file into AVI format. Then, follow the given steps:
- Open VLC> Tools > Preferences.
- Input Codecs > Always fix > Save
- This will fix minor issues.