Ways to Create a New PST File in Microsoft Outlook

Updated On - May 13, 2026
Why is Outlook asking me to create a new PST file again?
It is one of the most common questions that users usually face. Outlook starts slowing down, mailbox storage management becomes difficult, or older emails suddenly become harder to access are the signs of it.
But when you create a separate PST file, it will reduce the mailbox load & improve accessibility. This easy walkthrough will provide you with complete information about the reasons & ways to create a new PST file in Microsoft Outlook.
Why Do Users Create a New PST File? [Scenarios & Purpose]
Here, we have provided some scenarios along with the purpose of creating a PST file.
| Scenario | Purpose |
|---|---|
|
Oversized mailbox |
Improve Outlook performance |
|
Backup requirement |
Store mailbox locally |
|
Archive old emails |
Reduce active mailbox load |
|
Migration process |
Transfer Outlook data |
Know Different Uses of PST Files
Check out the uses of PST files that can bring you more clarity about them.
- Backup: To preserve important mailbox data separately from active Outlook profiles.
- Archiving: Older emails are moved into PST files to reduce mailbox clutter.
- Migration: PST files simplify Outlook data transfer between systems & profiles.
- Mailbox management: Separating mailbox data into multiple PST files can help you to improve Outlook responsiveness.
Top Methods to Create a New PST File in Outlook
There are several methods to create an Outlook data file [PST]. We’ve explained below the most suitable & workable solution that can help you with a high success rate.
Method 1. Using Account Settings
To create a new PST file in Outlook using Account Settings, follow the steps mentioned below:
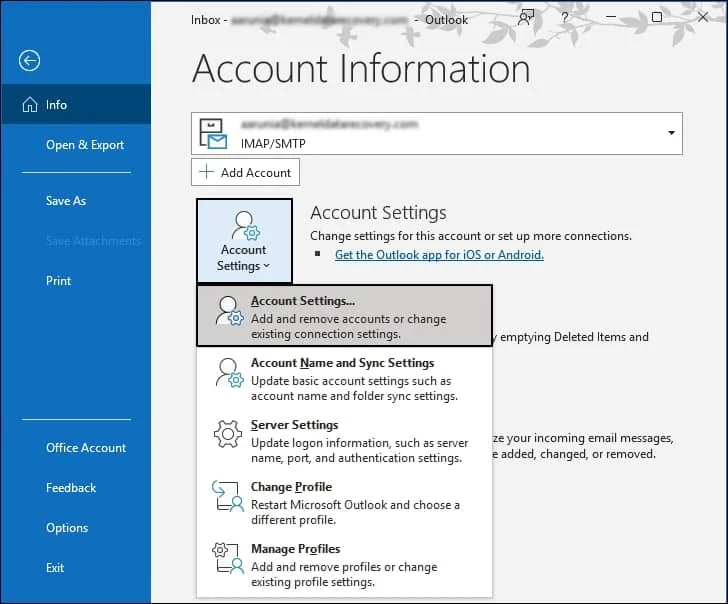
- Open the Microsoft Outlook application.
- Click on the File tab, go to Account Settings, and from the drop-down menu, choose Account Settings.
- Choose the Data Files tab and click on the Add button.
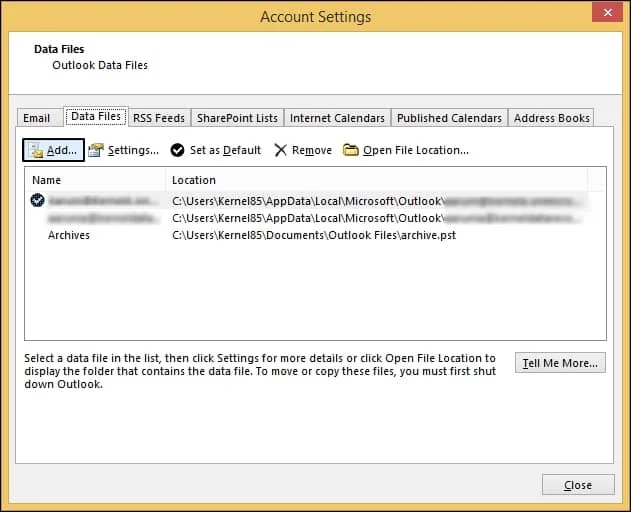
- Rename the file the way you want. Save the file as an Outlook data file (.pst ) and click OK.

Method 2. Take the Help of Outlook’s Import or Export Feature
Export your existing mailbox data to a new PST file with the help of Outlook’s Import/Export wizard. Follow the steps to do so:
- Run Outlook and click on the File tab.
- Click on Open & Export, and then select Import /Export.
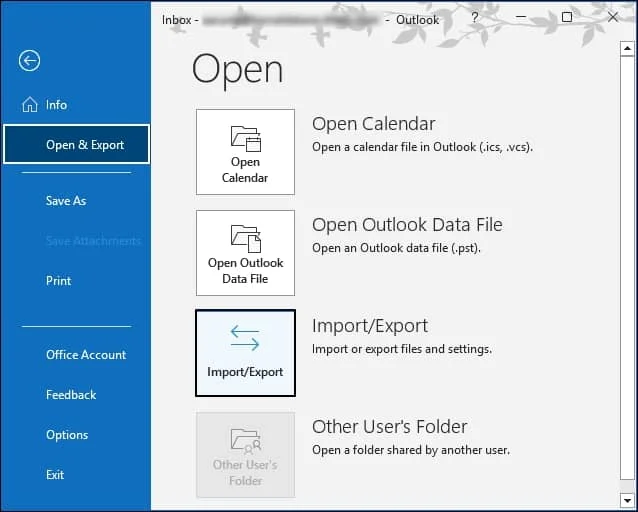
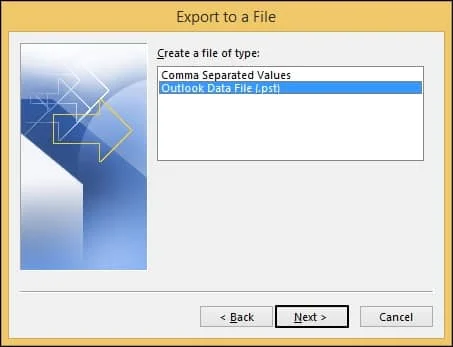
- In the Import and Export Wizard, choose Export to a file from the given options and click Next.

- Choose the file type as Outlook Data File (.pst) and click Next.
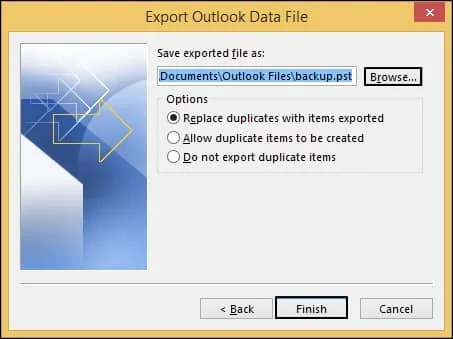
- Select the folder Inbox to export the data. Then click Next.

- Now, browse the location to save the exported file and tick the option Replace duplicates with items exported. Click on Finish to complete the process.
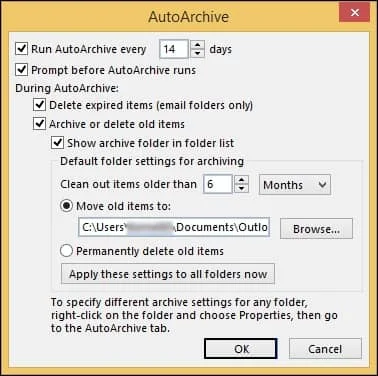
Method 3. With the Help of the AutoArchive Feature
Archive your old mailboxes to a specific location periodically with the help of the AutoArchive feature in Microsoft Outlook. This feature helps users free up space in their mailboxes and keep them organized. Follow the steps below to enable the AutoArchive feature:
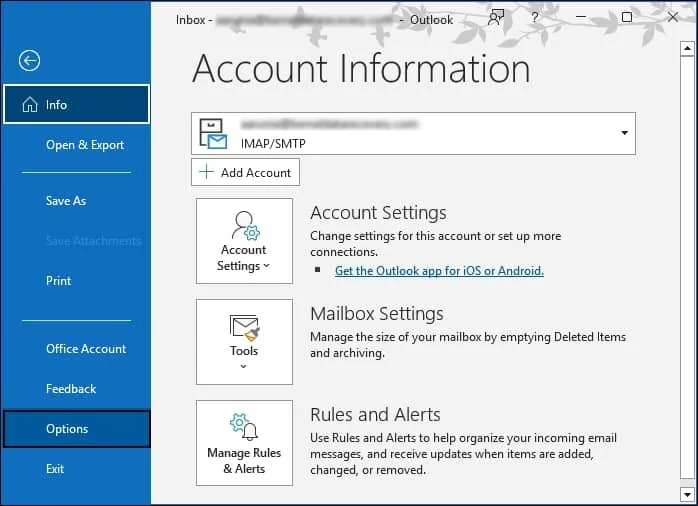
- Run Outlook and click on File.
- Click on Options from the left pane. A new window will open.
- Select Advanced and then click on AutoArchive Settings to enable the AutoArchive feature.
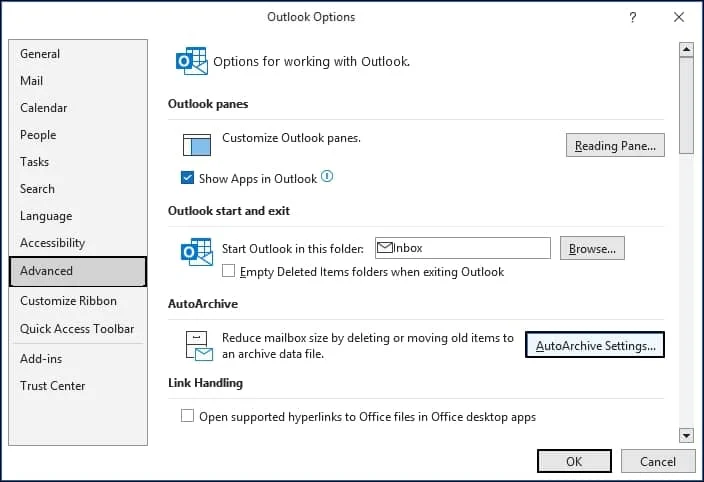
- Ensure that Run AutoArchive checkbox is ticked. Specify how often you want the archive process to repeat and apply the filters according to your requirements. Click OK.
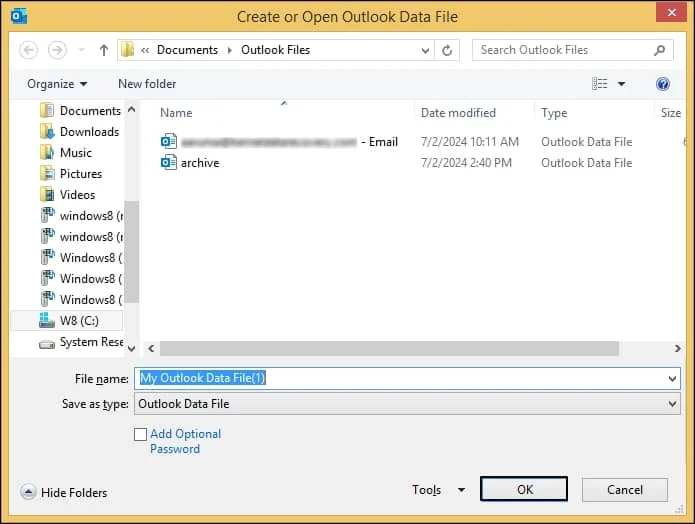
Method 4. Using the New Items option
To create a new PST file using the New Items option in Outlook, follow the steps listed below:
- Launch Microsoft Outlook and click on New Items.
- From the drop-down list, choose More Items and click on Outlook Data File.
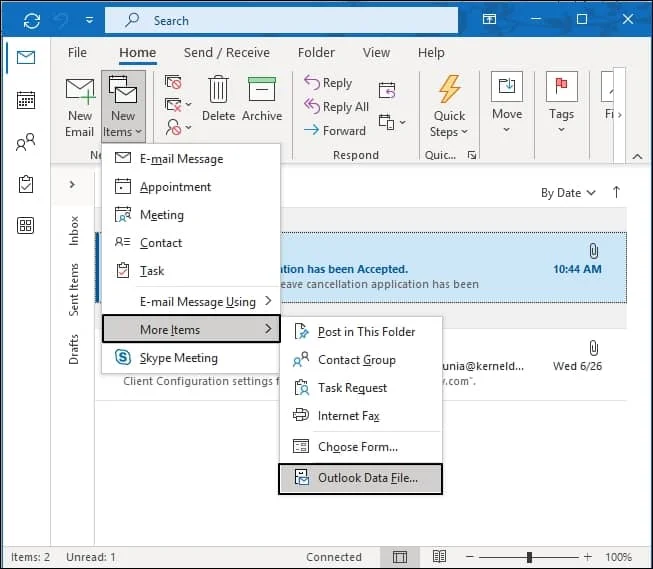
- Rename your data file and click OK.
What If My PST File Got Corrupted?
There’s a high chance that your PST files can get corrupted while exporting or archiving them due to reasons like connection failure, improper transfer, etc. Corruption in PST files can pose a huge problem for Outlook users since they contain crucial data. It is advised to use a professional tool like Recoveryfix for Outlook PST Repair to recover your damaged PST files. This innovative tool can also recover permanently deleted PST files. In addition to this, PST emails can be saved in new PST or MSG files or DBX OR EML formats.
Best Practices While Creating PST Files
Make sure you are following the provided practices, as it can help you to minimize the unwanted mishaps.
- Store PST files in a secure location.
- Avoid oversized PST files.
- Create periodic backups.
- Use meaningful file names.
- Maintain separate archive structures.
Create a New PST File in Outlook: Last Thoughts
Along with the backup containers, PST files are also helpful to
- Organize mailbox data.
- Improve Outlook performance.
- Archive older emails.
- Simplify migration processes.
Hence, all the available methods to create a new PST file in Microsoft Outlook have been discussed with you. I hope they helped with successful results. But if your PST files are damaged or corrupted, then you can take the help of the suggested advanced software.
FAQs
Q- Why does Outlook automatically create PST files sometimes?
A- It happens because POP email accounts commonly use PST files for local mailbox storage.
Q- Why is Outlook unable to find my PST file?
A- The PST file may be moved, renamed, or deleted from its original location.
Q- Is it possible to use multiple PST files under one Outlook profile?
A- Yes. Outlook supports multiple PST files simultaneously for better mailbox organization.