Repair corrupt Windows Media Player (WMP) Database error

Updated On - April 17, 2026
Windows Media Player is default application in Windows to stream and play diverse media content. Its database holds all audio and video files on your system. In certain cases, if Windows Media Player (WMP) does not allow you to browse the library and add or delete items within the WMP library, there’s a possibility that the database is damaged. Thus, the “Media library is corrupted” error pops up on the desktop screen.
It occurs when the Windows Media Player Library database or the data stored in it becomes damaged. However, you can perform manual methods to resolve the windows media player stopped working issue.
Before you go for the manual solutions, you should create an initial system restore point to restore your system to the previous state in case anything goes wrong. Follow this free guide to repair corrupt MP4 video files easily.
Windows System Restore point
System Restore is the Microsoft Windows tool designed to safeguard and fix computer software. It utilizes a snapshot of various system files along with the Windows registry and saves these in restore points.
If a failure in installation or data corruption is detected, System Restore can return the system back to its original state without the need to install the operating system again. It can repair the Windows environment by returning to files and settings stored in the restore point.
That’s why, it is crucial to establish a System Restore point before you use the provided manual solutions to fix problem with Windows Media Player.
Manual solutions to repair a corrupt WMP database
Experiencing issues with a corrupt WMP database proves to be frustrating for the users. Listed below are few effective methods to repair corrupt Windows Media Player.
Solution 1: Rebuild WMP Library database
Windows Media Player (WMP)’s database has been corrupted if you are unable to view, add, or delete items from your WMP library. A common problem Windows Media Player user’s face. In this case, you should rebuild the Windows Media Player database by following the given steps.
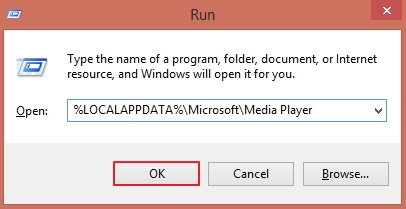
- Open Run wizard by pressing Windows + R keys. Type %LOCALAPPDATA%\Microsoft\Media Player then hit OK.
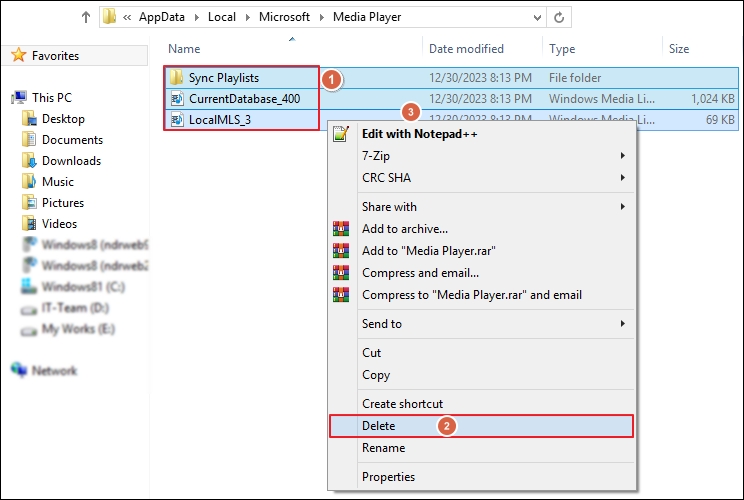
- Select all files within the folder and use Shift+Delete keys to permanently delete all files within the folder.
- Launch the Windows Media Player, its database is now restored.
Solution 2: Clean the WMP database cache files
Sometimes, cached data from the WMP database can create a hindrance in performance. Therefore, clearing it might resolve the Windows Media Player play to not working issues. Here’s how to clear cache files:
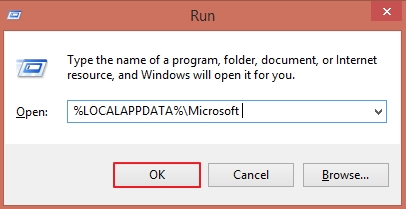
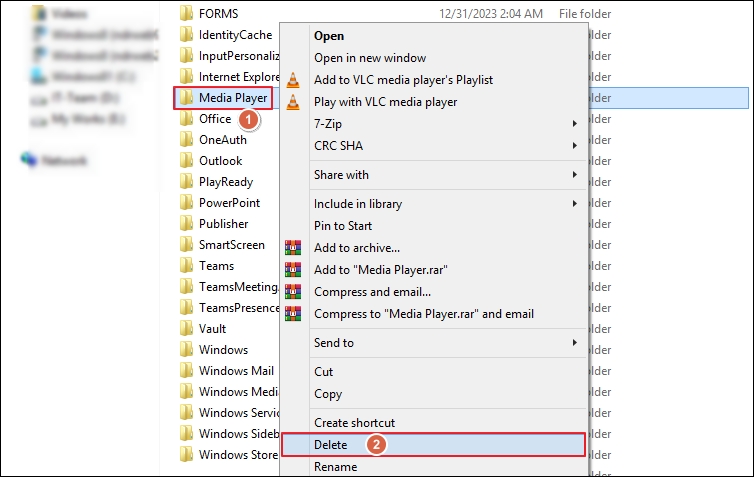
- Use the Windows + R keys to open the Run window. Type %LOCALAPPDATA%\Microsoft within Run wizard, tap OK.
- Right-click on Media Player folder and delete the same folder.
- Empty your system’s Recycle bin and then reboot your system.
- After rebooting the system, Windows Media Player rebuilds the database.
Note: If you’re unable to remove your WMP Library database and get the following error pop-up “The current database could not be removed since it was opened in the Windows Media Network Sharing Service” then go through the following steps:
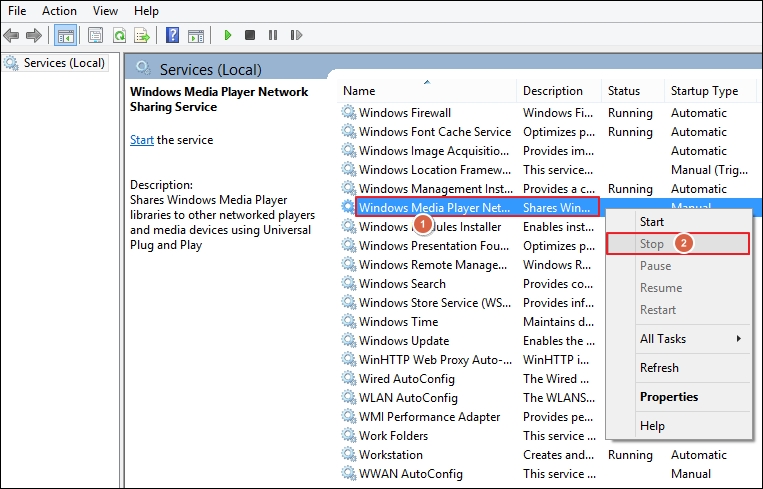
- Use Windows+R keys to access the Run window. Next, type services.msc, hit OK.
- Locate Windows Media Network Sharing Service then right-click on it and choose Stop to end this network sharing service and exit.
- Again, access Run wizard and type %LOCALAPPDATA%/Microsoft then click OK. This will open the Microsoft folder.
- Locate the Media Player folder, right-click on Media Player folder to permanently delete it.
- Lastly, reboot your system to check if the Windows Media Player does not work issue resolved or not.
Solution 3: Disable WMP & enable again
Users can’t remove Windows Media Player because it’s an operating system program that forms one of the core components of Windows. To fix the Windows Media Player stop working issue, you need to disable and then re-enable this program from your system. Follow the given steps carefully to perform this task.
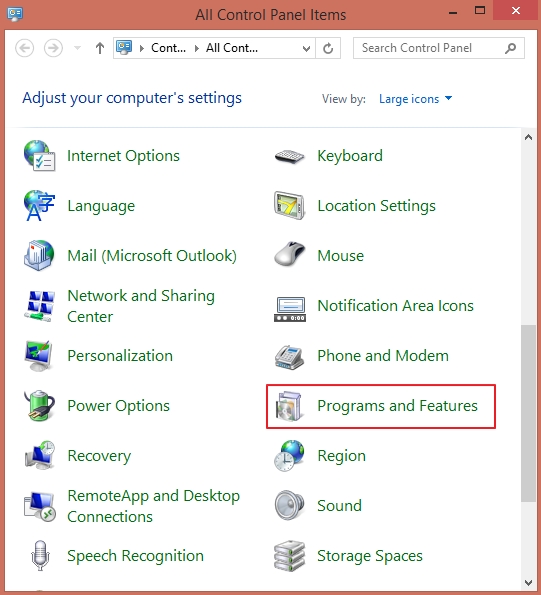
- Go to the search box and type Control Panel then open it.
- Once you access the Control Panel, choose the Program & Features.
- In Programs & Features, tap on the option Turn Windows features on or off.

- Select the symbol (+) beside the Media Features tab on the next window to expand it.
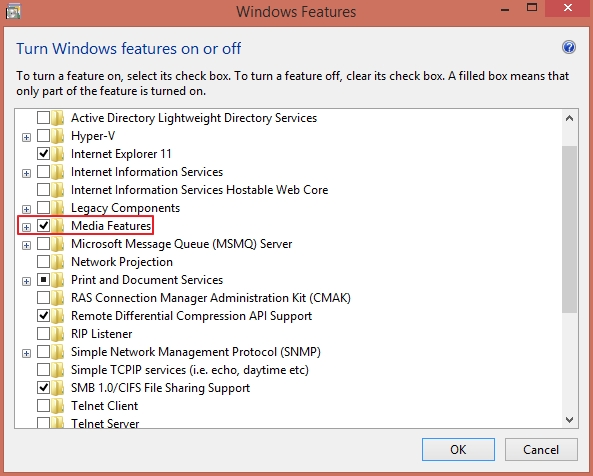
- Unmark Windows Media Player and tap on Yes.
- A restart window will pop-up. Restart your system and re-enable the Windows feature by going through the above steps once again.
Solution 4: Run a clean boot
Clean booting will ensure that your PC starts with a minimal set of drivers and startup programs. This could solve the Windows Player not working issue. To run a clean boot, go through these steps:
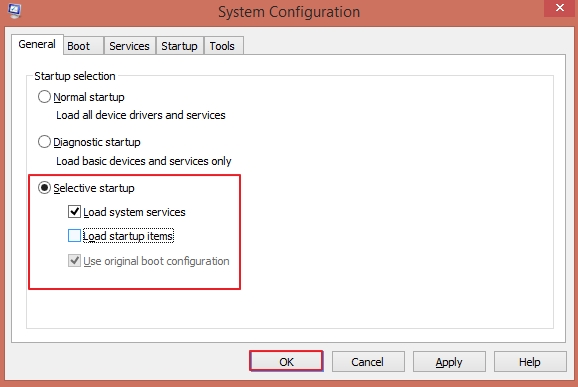
- Use Windows + R keys to access the Run window. Next, type msconfig and tap on OK.
- Navigate to the General tab and unmark the Load startup items option. Then, checkmark the Load system services option.
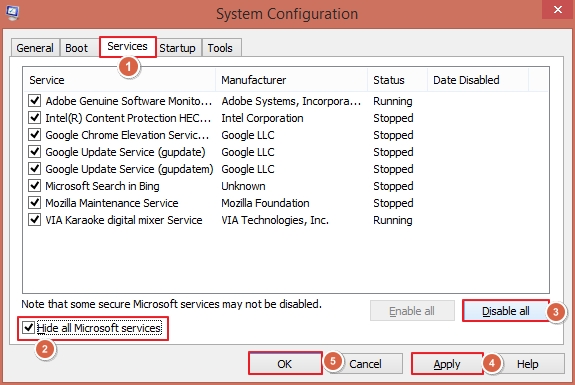
- Tap on the tab Services and mark the Hide all Microsoft services option. Press on the option Disable all then press on Apply and then hit OK to apply the made changes.
- After you’ve completed all these steps, you can reboot your PC, and it will boot in clean mode.
Solution 5: Run the Troubleshooter
You can use the Windows built-in troubleshooting utility to fix the Windows Media Player not working issue. Here are the complete steps to access and use the troubleshooter:
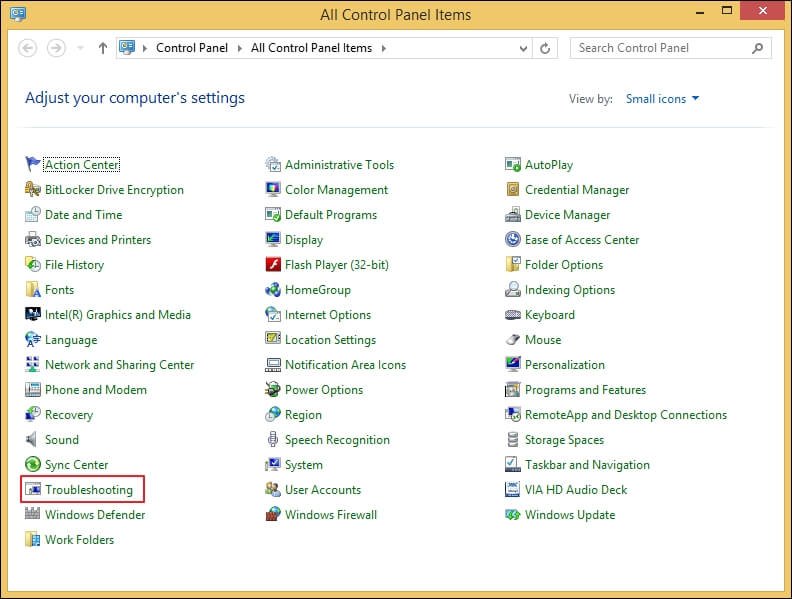
- Go to Control Panel and click on Troubleshooting.
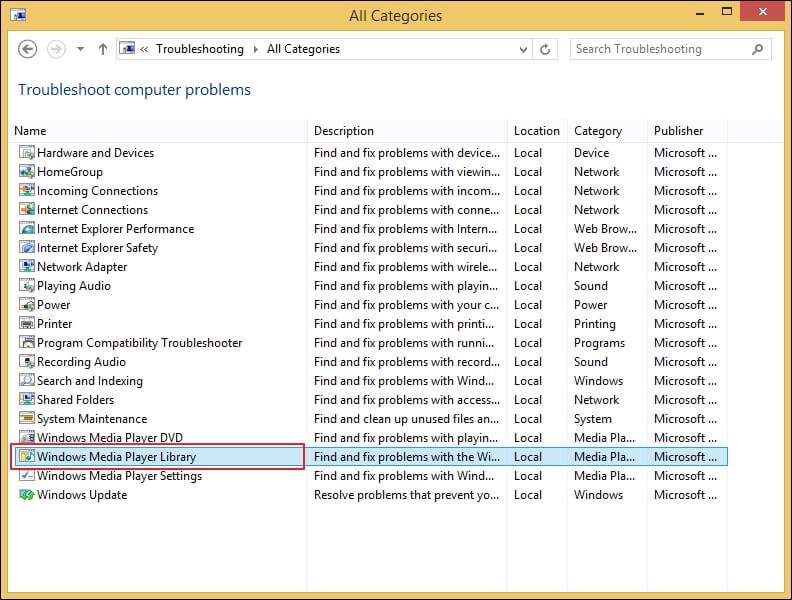
- View all programs under Troubleshoot computer problems.

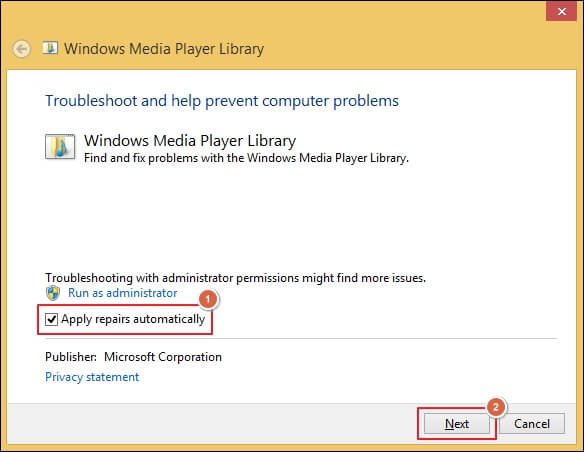
- Click on Windows Media Player Library from the program list.
- Open the Advanced section to check the Apply repairs automatically option. Then, click Next.
- Wait for the Windows Media Player troubleshooter utility to complete the process.
Use Recoveryfix Video Repair tool to fix WMP issues
In case the above manual methods are unable to fix the WMP database issue then you can go for the Recoveryfix Video Repair tool. With this tool, you can fix damaged MTS video files and repair corrupt MXF video files for free. Moreover, this advanced tool repairs corrupt video files of almost every format like MOV, MP4, WEBM, MTS, WMV, ASF, M4V, AVI, M4A, AVCHD, 3G2, FLV, 3GP, etc. Also, it supports recovery from all types of recorded video cameras. It repairs:
- Poor-quality or stuck pixels in video files.
- Blurring, choppiness, flickering, etc. in videos.
- Crashes during editing of video files.
- Synchronization issues between audio and video.
- Damage or distortion caused by Windows or software upgrades.
The bottom line
You can easily fix the corrupt WMP database problem by using the above manual methods. But these methods fail, and Windows Media Player will not work if the video file is corrupted or inaccessible. Therefore, using the recommended solution will be the best option to repair video files of any format. It makes the entire process smooth and error-free.