Import PST to Online Archive Office 365: Master the Complete Guide!

Updated On - March 30, 2026
Are you facing slow Outlook performance issues due to oversized PST files? Like you, many users watch their mailboxes grow heavier day by day, which leads to sluggish performance, missed emails, and endless storage warnings.
But an easier solution is available to you – Office 365 Online Archive mailbox. You can regain the speed, space, and stability again by importing your files there.
The blog will show you the best methods to import PST to Exchange Online Archive and keep your mailbox running smoothly.
Thinking to Import PST files to Office 365? Here’s Why You Should!
Here is the list of possible reasons that drives them to move their PST files to Office 365 Online Archive mailbox:
- Simplify backup and recovery of PST files.
- Keep Outlook performance fast and responsive.
- Avoid the risk of accidental deletions or data loss.
- Free up storage space without losing single emails.
- Access archived mailbox data from any device, anywhere.
- Gather data in one place for centralized email management.
- Meet compliance and regulations without manual management.
- Find specific emails quickly with improved search and organization.
How to Import PST to Online Archive Office 365 Manually?
We have searched a lot and found these three most effective manual solutions. Follow the detailed guide for each solution to identify the most suitable method for your needs.
Method 1. Import PST files using the Import/Export Utility
The most basic method is using your Outlook application to move PST files to archive mailboxes. Here’s how:
Important to Know: Configure your Office 365 account in the Outlook application before using the given method.
Step 1. Launch the Outlook application and go to the File tab.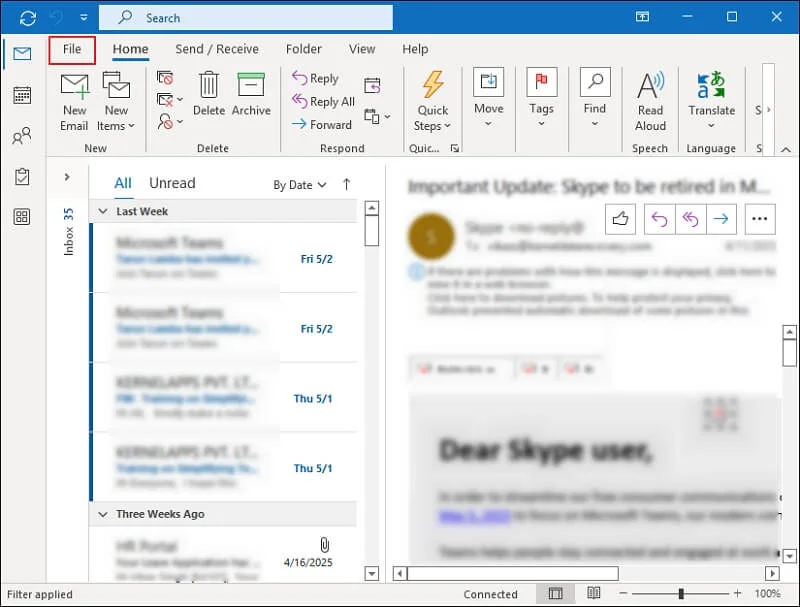
Step 2. Navigate to the Open & Export section and click on the Import/Export option.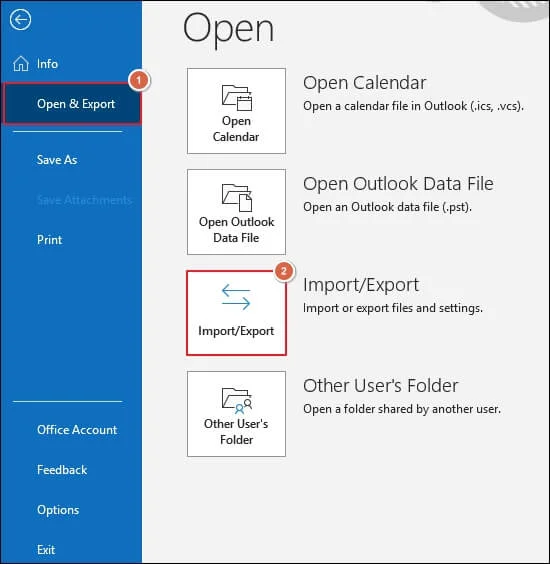
Step 3. Choose Import from another program or file and proceed to Next.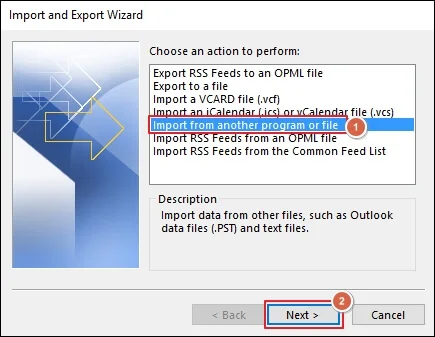
Step 4. Select Outlook Data File (.pst) and click Next.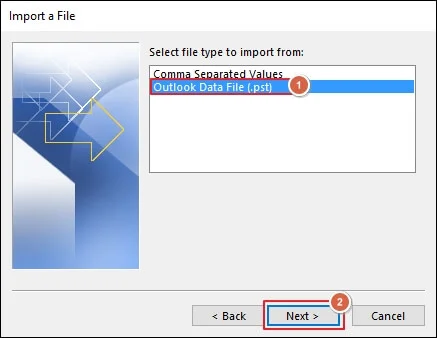
Step 5. Browse to choose the PST file location, select suitable Options, and tap on Next.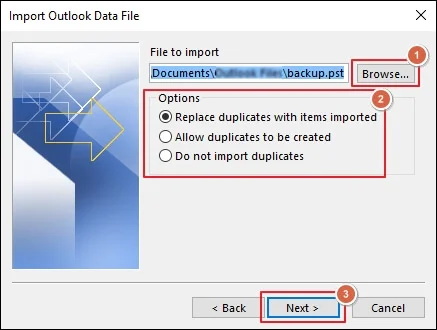
Step 6. Select the folder to import from the Outlook Data File and check Include subfolders. Then, choose the Import items into the same folder in option and click on archive mailbox.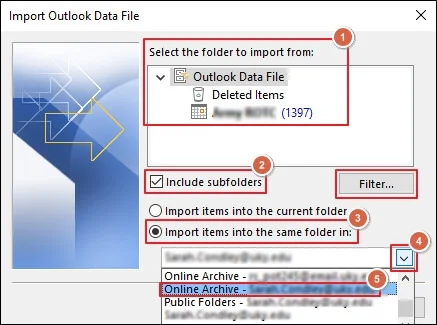
Note: You can use the Filter option to sort unwanted data.
Step 7. It will start importing the PST file data to Office 365 archive mailbox.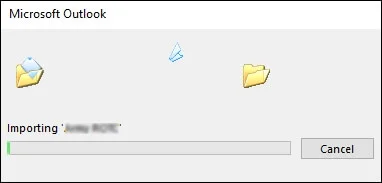
Step 8. Once done, you can see the mailbox data in Outlook.
Method 2. Move PST files via Microsoft 365 Import Service
The previous solution will be helpful only when you have to import limited PST files. However to import PST files on a large scale, using the Microsoft Import service is the best alternative.
Network Upload: It helps users to upload files over a temporary Azure Storage location in the Microsoft cloud. Later, use Import Service of Microsoft to move PST data to mailboxes in your organization.
Drive Shipping: Use the Bit Locker-encrypted hard drive to copy the data of your PST files and physically ship them to Microsoft. The data center personnel upload the files to a temporary Azure Storage location when they receive them. Finally, you can access the Import Service to transfer PST files to mailboxes.
I) Network Upload
Here are the complete steps to import PST files to Exchange Online using the network upload:
Step 1. Copy the SAS URL for network upload and Download Azure AzCopy tool.
Step 2. Use the AzCopy tool to upload PST files to Microsoft 365.
Step 3. View the list of uploaded PST files by using Microsoft Azure Storage Explorer.
Step 4. Create the PST Import mapping file to specify the user mailboxes for data import.
Step 5. Start a + New Import job in Microsoft 365 Import Service.
Step 6. Trim data using the setting filters and begin the PST Import job.
II) Drive Shipping
Follow the given steps to import PST file data to Office 365 through the drive shipping method:
Step 1. Download and install the Azure Import/Export tool version 1 (WAImportExportV1).
Step 2. Use the WAImportExport tool to copy and encrypt the PST file data to the hard drive.
Step 3. Create the PST Import mapping file to define the user mailboxes where data needs to be imported.
Step 4. Begin a + New import job in Microsoft 365.
Step 5. Ship the hard drive to Microsoft with the correct tracking number and return shipment information.
Step 6. Filter data and start the PST Import job after Microsoft receives the hard drives.
Native Methods Seems Difficult to You? – Try the Simple Solution Now!
Even though there are several manual solutions available to import PST to the Online Archive Office 365, their execution is not a simple task for all users. Since it requires high technical expertise and carries the risk of data loss, which nobody desires.
Therefore, third-party tools like Recoveryfix PST to Office 365 are most suitable for beginners or non-tech users. It avoids the limitations of manual solutions and helps users quickly migrate their files to Office 365 in a few clicks.
Also, the Import PST to Office 365 tool lets you import files directly to Office Groups or shared mailboxes.

The Bottom Line
Here, we have highlighted both manual and automated methods to import your PST files into the Archive Mailbox. Whether to use a native or a professional solution totally depends on you.
However, going with the recommended solution will offer you more benefits. It provides easy login modes for instant account authorization. Also, you can migrate selective Outlook emails to Office 365 with its advanced filtering options.
FAQs: Before You Ask, Read This!
Q. Can I import PST to Online Archive Office 365 via PowerShell commands?
A. Yes, you can use PowerShell commands along with the Azure AzCopy tool to import PST files directly into the Online Archive Mailbox of Office 365.
Q. Is it possible to import PST to Office 365 Admin Center without tools?
A. Absolutely! The Office 365 Admin Center provides a native option called “Import Service” that allows you to upload PST files manually and map them to their respective user mailboxes.
Q. Does PST import to Public Folder Office 365 require special permissions?
A. Yes, importing a PST file into a Public Folder in Office 365 requires admin-level permissions and some preparation, such as assigning the Public Folder as a mailbox target.
Q. What steps do I need to execute to import a PST file to the Shared Mailbox in Office 365?
A. Follow the given steps to import a PST file to Shared Mailbox in Office 365:
Step 1. Prepare the Shared Mailbox and assign required permissions.
Step 2. Use Microsoft 365 Import Service or PowerShell to upload and map PST files.
Step 3. It is done. You have successfully uploaded your PST files.