Guide to Change OST File Location for Outlook 365 account

Updated On - July 15, 2026
Running out of storage on your system is a common challenge for Outlook users. Especially when large mailboxes generate equally large Offline Storage Table [OST]. Since Outlook stores OST files in a default location, many users look for ways to move OST files to different location to improve disk management or optimize system storage.
Thinking that changing the OST file location is as simple as copying the file to a new folder? No, the incorrect approach can cause synchronization issues or Outlook profile errors. Get the workable & practical approach to change OST file location with this new write-up.
Why Do Users Change OST File Location?
Know the reasons that drive users to change the location of OST file:
- Avoid data loss like situations.
- Mitigate the risk of file corruption.
- Easy to backup & restore the Outlook data.
- Store Outlook data on a larger internal drive.
- Helps in improving the system performance.
- Prevents low disk space warnings on Windows.
- Free up storage space on the system (C:) drive.
- Move large Outlook data files to a secondary HDD or SDD.
- Improve storage organization for enterprise or business users.
drive:\Users\\AppData\Local\Microsoft\Outlook
drive:\Documents and Settings\\Local Settings\Application
Want to Change OST File Location? Consider These Things First
Here are certain things that you need to consider when you need to change the OST file location:
- Close Outlook completely before making any changes.
- Ensure the destination drive has sufficient free storage.
- Backup your Outlook profile or create a Windows restore point.
- Avoid storing active OST files on external drives or cloud-sync folders.
- Maintain a stable internet connection so Outlook can resynchronize if needed.
How to Change OST File Location? [Get the Best Ways]
The best possible methods that can change the location of OST file in Outlook in the right way are described below.
Solution 1. Create a New Outlook Profile [Most Preferred]
It is one of the safest & Microsoft-recommended approach to change the location of OST file. During profile creation, Outlook generates a fresh OST file that minimizes the risk of profile corruption. Here are the steps to execute the process:
Step 1. Close the Outlook application, press Windows + R keys, type Control Panel & hit OK.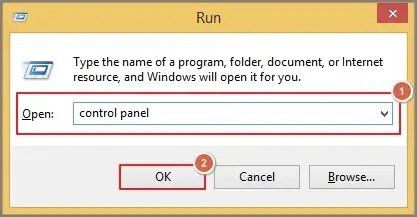
Step 2. Choose the Mail > Show Profiles option.
Step 3. Tap on the Add tab, type the profile name & click on OK.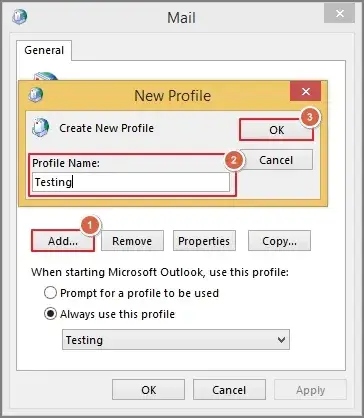
Step 4. Configure the account with the right credentials.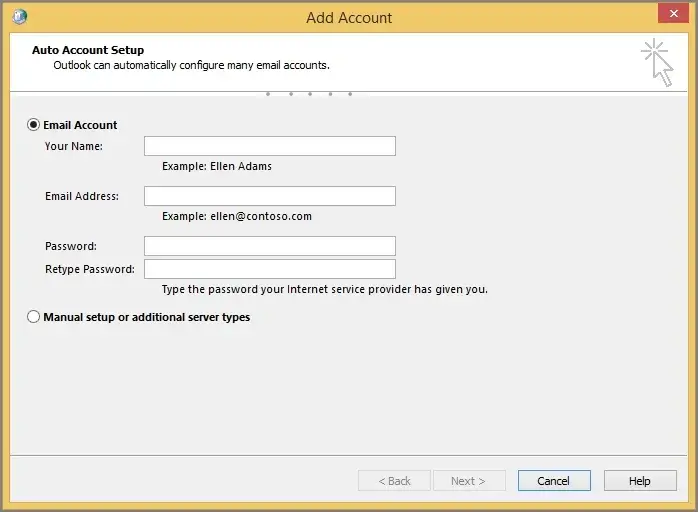
Step 5. Make the profile the default one; click Apply > OK.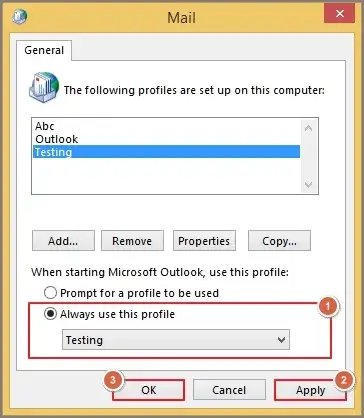
Solution 2. Set the ForceOST Value
One way to change OST file location is by using the ForceOST registry key. In this method, you will be required to remove the Exchange account to proceed with the settings. If you have not configured your account yet, then don’t do it. Follow the below-mentioned steps first:
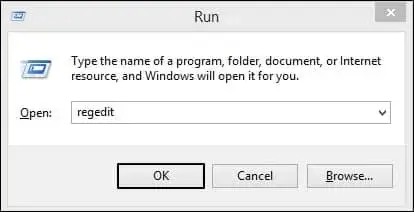
- Press Win + R keys to open the Run window; type regedit and click OK.
- Now, you need to follow a path that leads to Outlook, depending on your Outlook version. Listing below the paths:
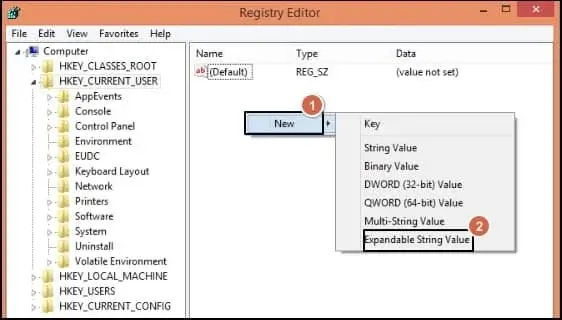
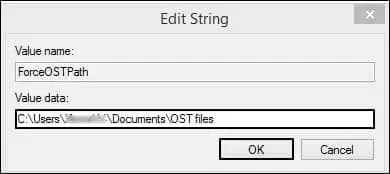
- Now, you need to generate a string value. It will be the same for all, which is ForceOSTPath. Right-click on the blank space to access the New option, then choose Expandable String value.
- As you create one, make a right-click on the ForceOSTPath value and click on the Modify option.
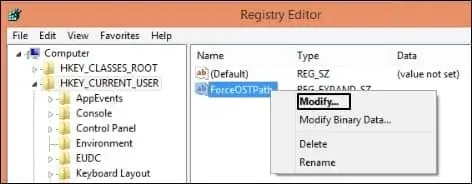
- Now, mention the value type and value path.
Outlook 2016
HKEY_CURRENT_USER\Software\Microsoft\Office\16.0\Outlook
Outlook 2013
HKEY_CURRENT_USER\Software\Microsoft\Office\15.0\Outlook
Outlook 2010
HKEY_CURRENT_USER\Software\Microsoft\Office\14.0\Outlook
Outlook 2007
HKEY_CURRENT_USER\Software\Microsoft\Office\12.0\Outlook
Outlook 2003
HKEY_CURRENT_USER\Software\Microsoft\Office\11.0\Outlook
Value Type: REG_EXPAND_SZ
Value Path: Path of the storage folder, where you want to save your OST.
So, after following the steps mentioned above, you can finally configure the Exchange account again in your Outlook. Now, all your OST files will be saved at the location you have selected. Using this method, you can also change OST file location in Outlook for Office 365 accounts.
Solution 3. Using Outlook Account Settings
Another way to change the location of OST file in Outlook is by making some changes in the account settings and providing a new storage path. In this method, we first disable the cached Exchange mode, set a new location for the OST, and then again, we will enable the cached Exchange mode.
Part 1
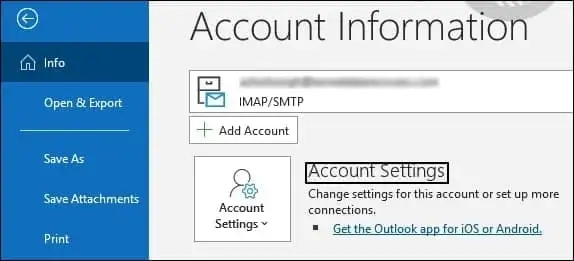
- Open Outlook and click on the File tab.

- Tap on Account Settings > Account Settings.
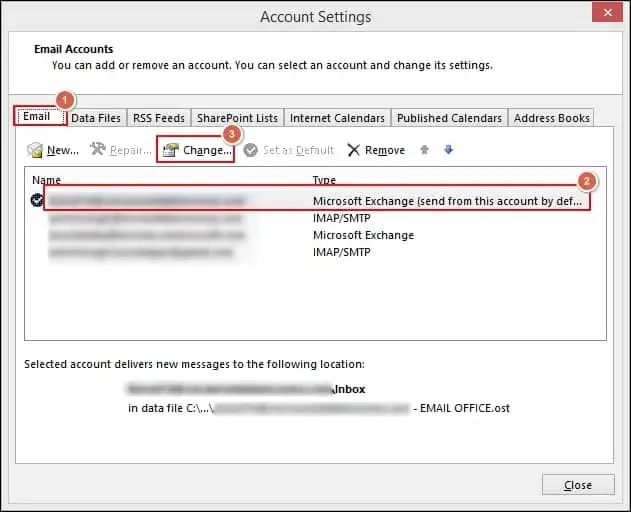
- In the window of Account Settings, click on the Email option. Select the account and click on the Change option.
- Now, click on the More Settings option in the next tab. Then, in the new Microsoft Exchange window, go to the Advanced tab and check Use Cached Exchange Mode. Once located, uncheck it & click on the Apply option.
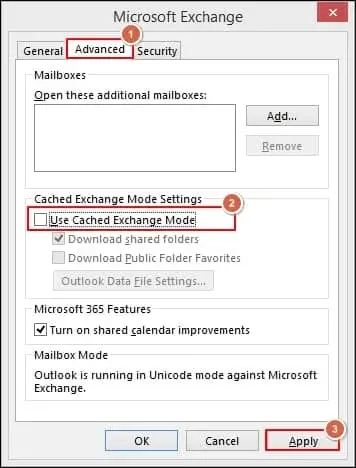
Note: You will get a notification stating You must restart Outlook for these changes to take effect. Click on OK and do the same.
Part 2
- Open Outlook again and follow the same procedure until the Data Files tab.
- Select the account and click on Settings.
- Click on the Advanced tab and go to the Outlook Data File Settings.
- Now, click on the Disable Offline Use and then click on Yes when asked.
Part 3
After following the Part 2 steps, you will again need to resume from the Advanced tab.
- In the Advanced tab, select Outlook Data File Settings and browse to the new location for your OST file.
- Once added the location, click on OK.
- Now, in the Advanced tab, check Use Cached Exchange Mode and click on OK.
Once all the steps are completed successfully, restart Outlook and check whether the process is executed or not.
Solution 4. Use Symbolic links
Symbolic links are useful to change OST file location from its default place through the MKLINK command. The command helps to create a symbolic link between the original & new paths.
Follow the given steps to relocate Outlook OST file:
- Transfer the OST file to a different location from its default place.
- Open the Command Prompt and type the mklink command.
mklink%localappdata%\Microsoft\Outlook“D:\Outlook Data Files\”
- The Symbolic link will form once the command is executed accurately.
Common Issues After Changing OST File Location
Check out some general issues that users often experience after changing the OST file location.
- Outlook creates a new OST file in the default location
Solution: Recreate a new Outlook profile after applying the desired configuration. Outlook typically creates a new OST file based on the settings of the newly created profile. - Outlook fails to synchronize emails
Solution: Verify folder permissions, ensure the destination drive is accessible, & confirm that Cached Exchange Mode is enabled or not. - Outlook displays startup errors
Solution: Restore the registry backup if required & recreate the Outlook profile instead of manually reconnecting the existing OST file.
Concluding Words to Change OST File Location
We have learned here all the aspects to move OST files to different location & workable ways to do it. Try the provided methods carefully for better results.
But if you have a corrupted or damaged OST file, then you can’t access & perform any function with it. In that scenario, taking the help of an advanced solution, Recoveryfix OST to PST converter,can be your most affordable & effective approach. It repairs the corrupt OST file & provides you the option to save the file in a different format [PST, DBX, MBOX, MSG, EML, etc] at the desired location.
FAQs
Q-1 What is the right way to move OST files from the C to the D Drive?
A- You can easily move the OST files with the following steps:
- Locate the OST file and select it.
- Right-click on the file and select Cut to proceed.
- Go to the D drive and Paste the file there.
- It will start moving the OST file.
Q-2 How to change the registry path for the Outlook OST file?
A- You can change the location of OST files by editing the ForceOSTPath registry key. It indicates that the Outlook app should create a new OST file in the specified folder.
Q-3 What is the process of changing the OST file location in Group Policy?
A- Use the Group Policy Editor to define a new OST file path. Here’s how:
- Enable Force OST Path policy setting.
- It will redirect Outlook to make a new OST file at the defined location.
Q-4 I want to create a new OST file. How should I do so?
A- You have to close Outlook and rename or delete the existing file. Later, when you reopen Outlook, it will create the new OST file automatically.