VLC won’t play MP4 files– how to solve?

Updated On - December 24, 2025
Nothing is more frustrating than an MP4 video that stops playing in the middle, especially when you are using VLC Media Player. It happens due to mismatched codecs, outdated versions, output settings, or file corruption.
However, users can easily fix them with the help of simple and tested methods. Let’s explore different ways to fix VLC Media Player not playing MP4 videos issue in the blog.
Common errors faced while playing MP4 videos on VLC media player
Although, VLC player rarely poses any difficulty in playing MP4 files, sometimes it is unable to play even healthy MP4 files. Here are some reasons why:
- Codec issue: You might face this error if the codec required to play the video file isn’t available.
- Freezing: This error occurs when your video files get corrupted while downloading it.
- Playback error: It generally occurs when the video file you’re trying to play isn’t compatible with your current media player.
Causes behind the ‘VLC not playing MP4 file’ issue & their solutions
Below listed are some causes behind the ‘VLC not playing MP4 file’ issue and their relevant solutions.
Cause 1- Issue in hardware decoding
VLC player renders its video effects and subtitle tracks when it plays a video. Suppose the selected video is a high-definition video that requires better specification or multiple subtitle tracks and the graphic card of your computer is old and is unable to process the high-definition video. In that case, you can overcome such a problem by deactivating the hardware decoding in the VLC Player. Follow the steps;
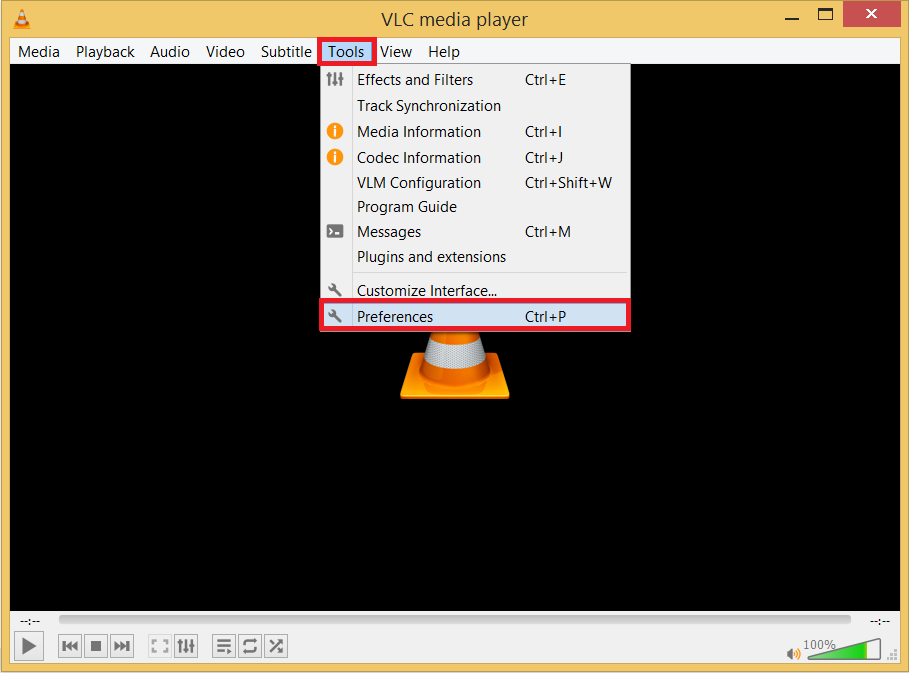
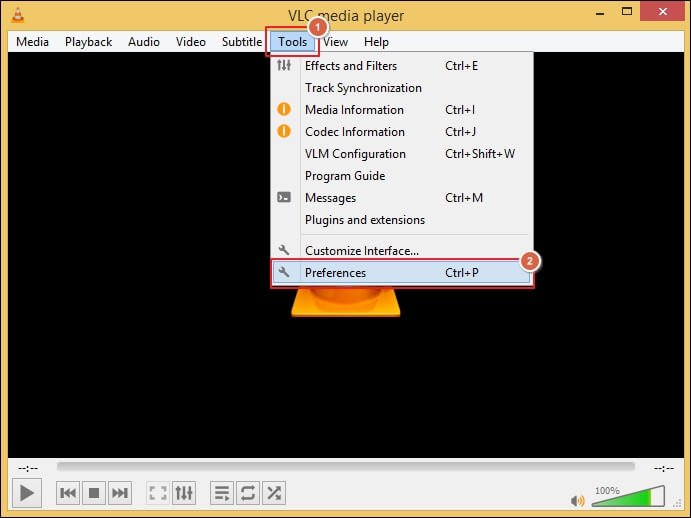
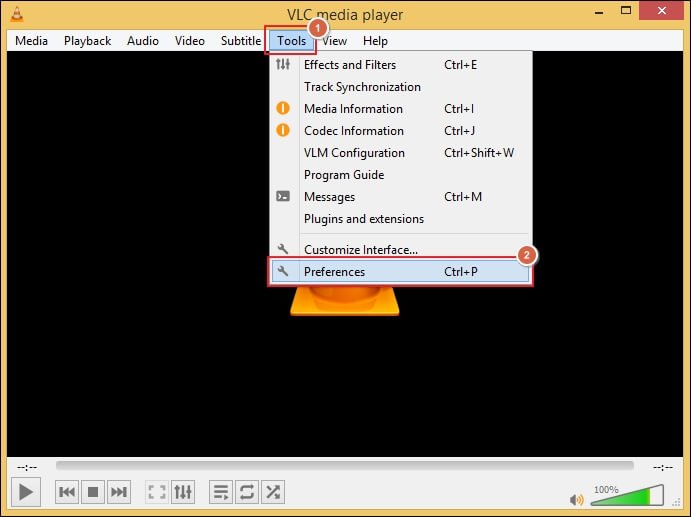
- Start VLC media player and go to the Tools tab. After opening the drop-down, choose Preferences.
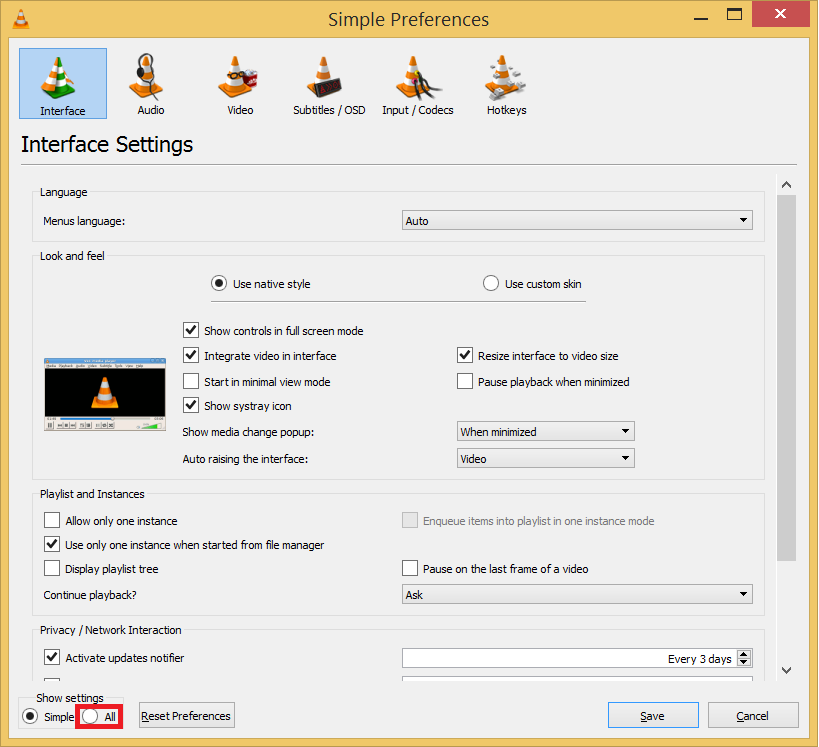
- In the Simple Preferences wizard, there is a Show settings section at the bottom. Click the All button.
- In the Video Codecs category, click FFmpeg and choose the Disable option in the Hardware Decoding. Click the Save button.
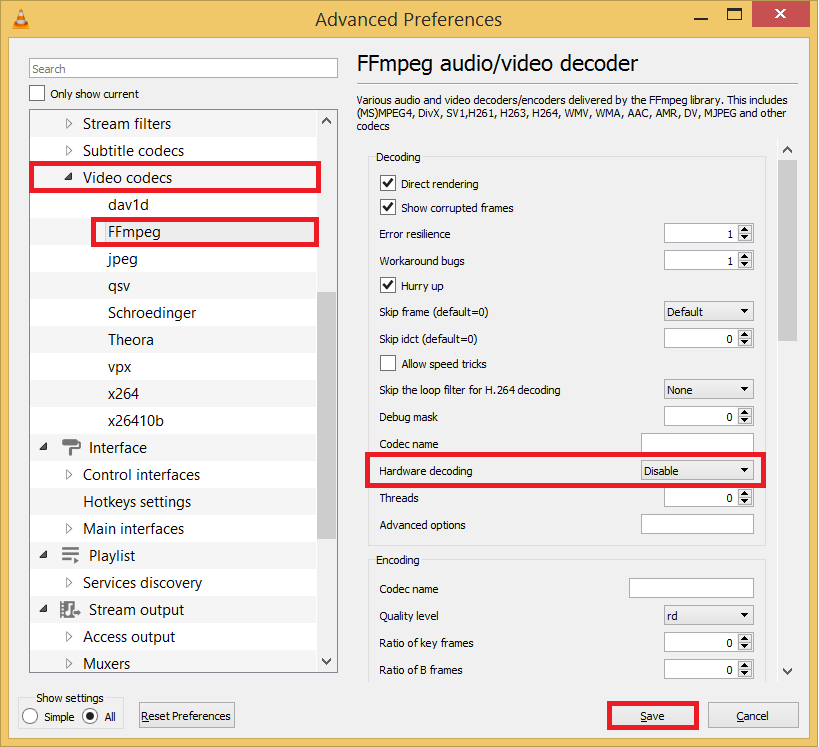
Now restart the VLC Player and try to run the MP4 Video. The change in the hardware decoding will not affect the rendering of the video. But it’s a possibility a high-definition video may not work well after disabling the hardware0020decoding.
Cause 2- Problem in Video Output Mode
Sometimes, the properties of a video are not supported by the default video settings of the VLC Player. You can make some adjustments in the video settings and try to run the unplayable Video.
- In the VLC Player, go to Tools and choose Preferences.
- Click the Video option.
- If the Enable Video is unchecked, then check it.
- In the Output drop-down, choose ‘DirectX (DirectDraw) video output.’
- Restart VLC Player and try to run the Video.
Cause 3– An outdated VLC player version
If you have an outdated version of the VLC player, then it won’t run a video file with new features. You need to download the latest version from the website of the VLC player.
Cause 4- Malfunctioned Video Driver
Outdated video drives can cause playback optimization issues, which lead to MP4 files not playing in VLC media player. Updating them might resolve the issue. Here’s how:
Step 1. Open the Device Manager on your system.
Step 2. Expand the Display adapters and right-click on the graphics card. Then, proceed to Update Driver Software.

Cause 5- Unsupported or Mismatched Codecs
Sometimes, MP4 files not playing in VLC due to their resolution or unsupported video codecs. The best way is to convert the video files into another format to play the video again. Here are the detailed steps to convert using VLC media player:
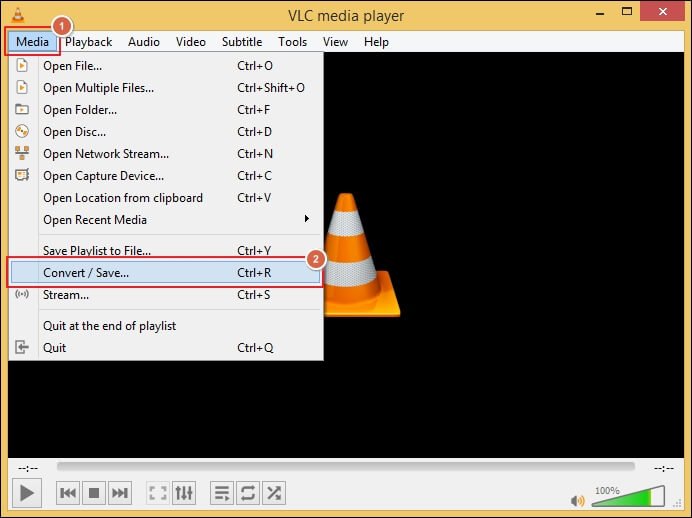
Step 1. Go to Media and select the Convert/Save option.
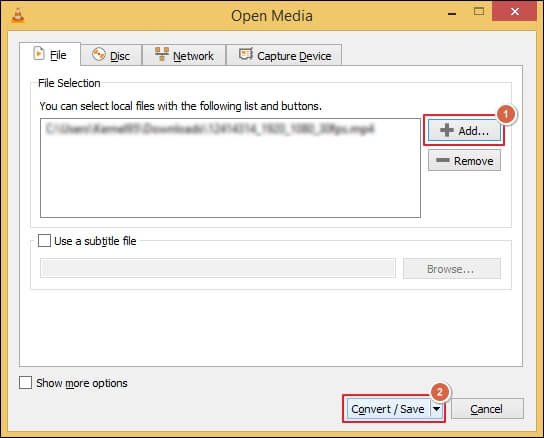
Step 2. Click on +Add to select the video file and proceed to Convert/Save.
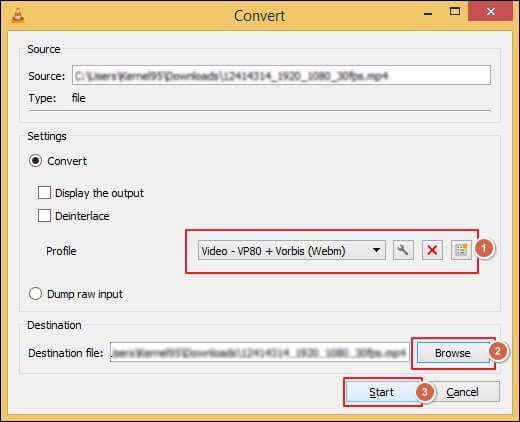
Step 3. Use the drop-down menu to choose the preferred video output format.
Step 4. Then, Browse to select the Destination file and Start the process.
Step 5. VLC will start converting the added video file.
Cause 6- Inaccessible Location Drive
VLC location drive sometimes becomes inaccessible due to system errors in Windows. But you can fix VLC not playing MP4 videos problem using the CHKDSK command. Follow the steps below to repair the location drive:
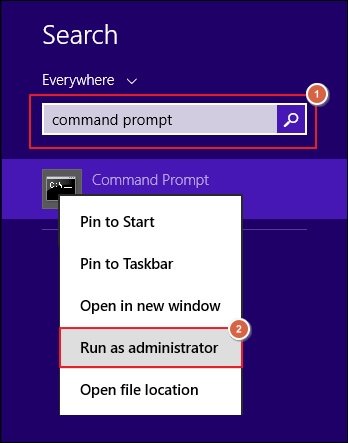
Step 1. Access the Command Prompt and Run as administrator.
Step 2. Type chkdsk (location where VLC is installed) :/R and press Enter.
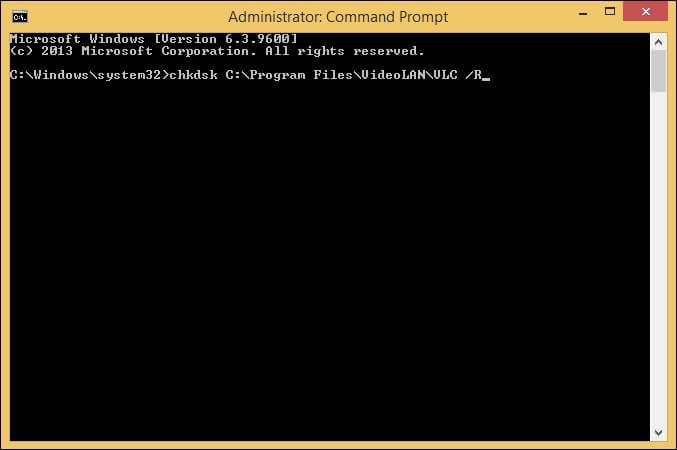
Step 3. Type Y and press Enter to dismount the drive. It will start the repair process.
Step 4. After the completion of the CHKDSK repair process, check that the issue is resolved.
Cause 7- Automatic Repair is Disabled
VLC media player comes with built-in features to repair video files automatically. Enable the settings if disabled in your VLC using the following steps:
Note: Change the file extension to AVI format before using this method.
Step 1. Click on Tool and go to Preferences option.
Step 2. Navigate to Input/Codecs and Browse to add the video file.
Step 3. Select Always fix under the Damaged or incomplete AVI file section. Then, click Save.

Step 4. It will fix minor inconsistencies in the added video file.
Cause 8- Incorrect Audio/Video Settings
Incorrect audio or video settings of the VLC media player may result in playback issues. You can fix these settings with the help of the given steps:
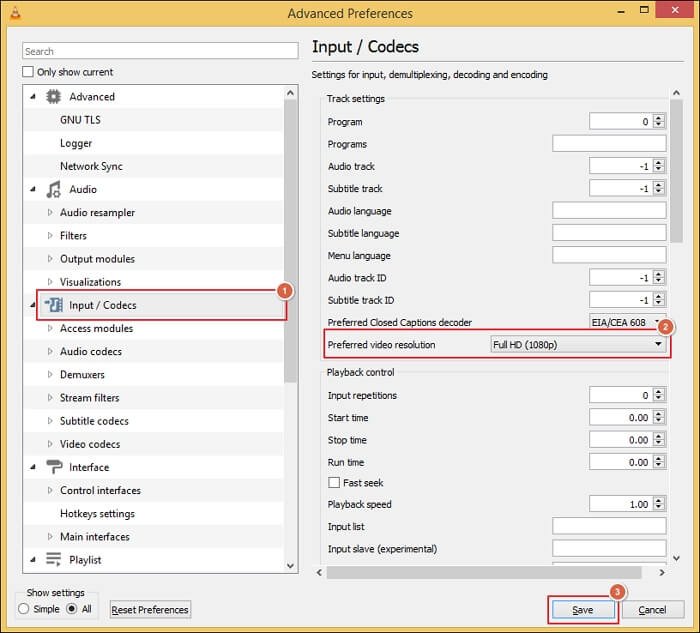
Step 1. Go to Tools and click on the Preferences tab.
Step 2. Navigate to Input/Codecs and click All in the Show settings section. Then, proceed to Save.
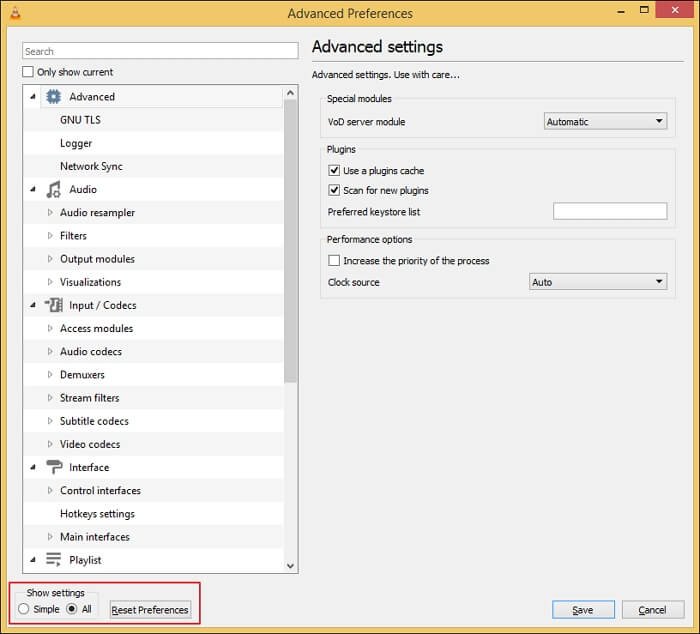
Step 3. Under the Advanced section, choose the Input/Codecs option.
Step 4. Change the Preferred video resolution to Full HD (1080) and click Save.
Cause 9- Video File is corrupt
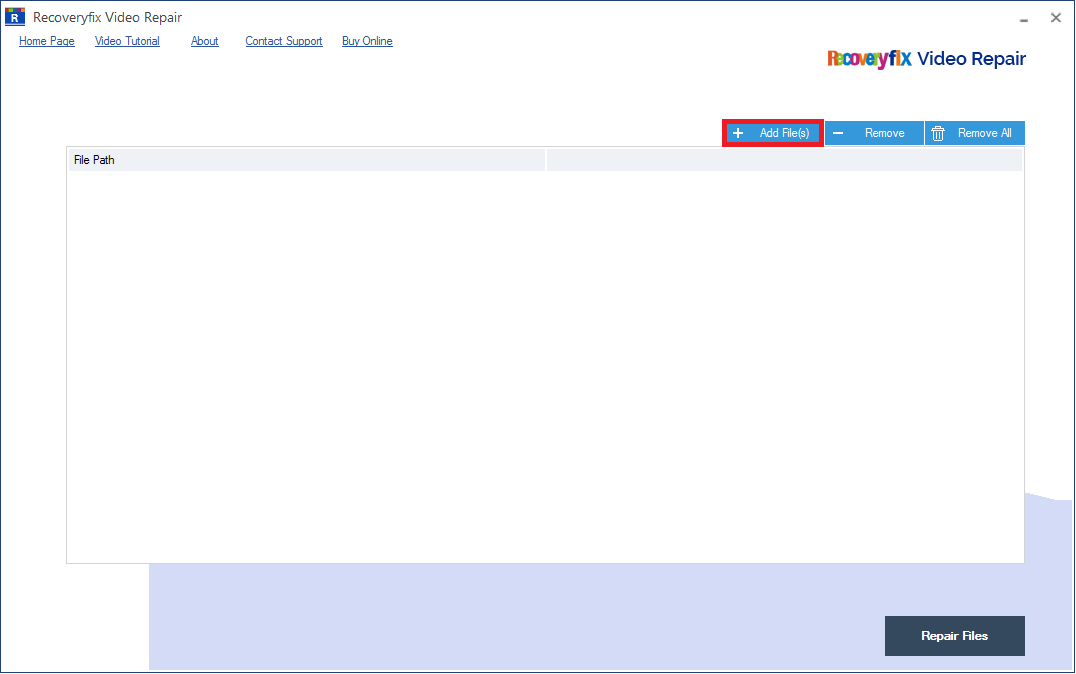
If the video file does not play on the VLC player as well as on other media players, then it means the file is corrupted. The reasons may be an improper transfer, bad codecs, synchronization issues in audio-video streaming, bad compression due to an abrupt stopping, etc. If MP4 files face such errors, then you need to repair corrupt MP4 video file otherwise it will not play in any medial player. You need to repair the video using a professional software like Recoveryfix Video Repair tool.
Follow the steps presented below
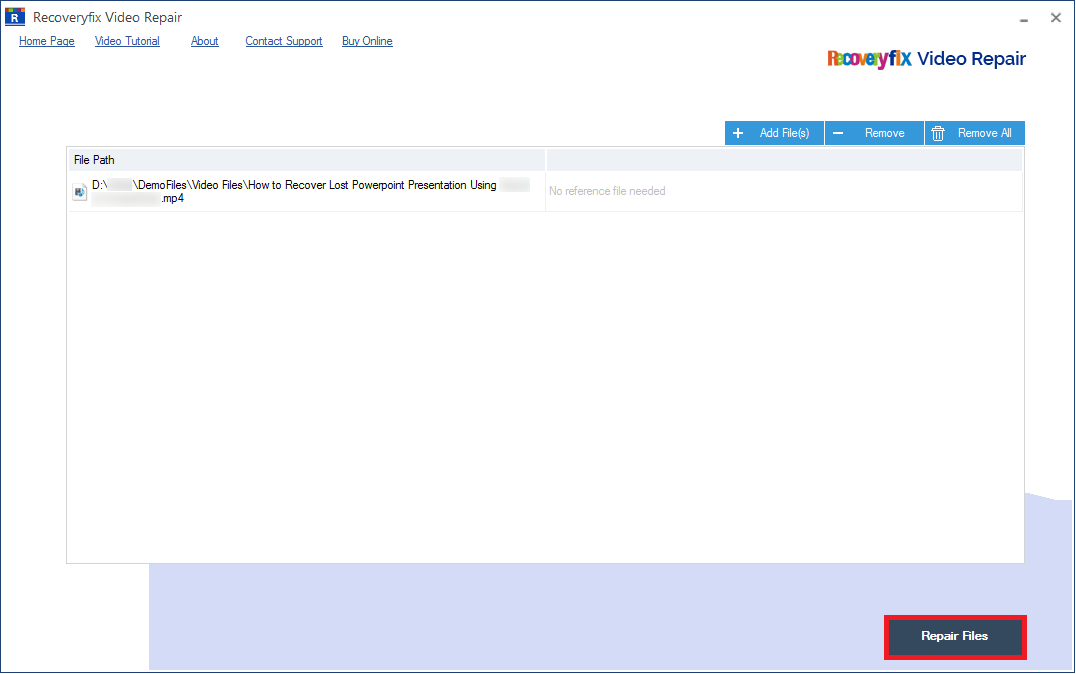
- Download and install the Recoveryfix Video Repair software. Launch it and click the Add File(s) button present in the home screen.
- After choosing the MP4 file that is not playing, click the Repair Files button.
- Choose the folder where you need to save the repaired file and. click OK.
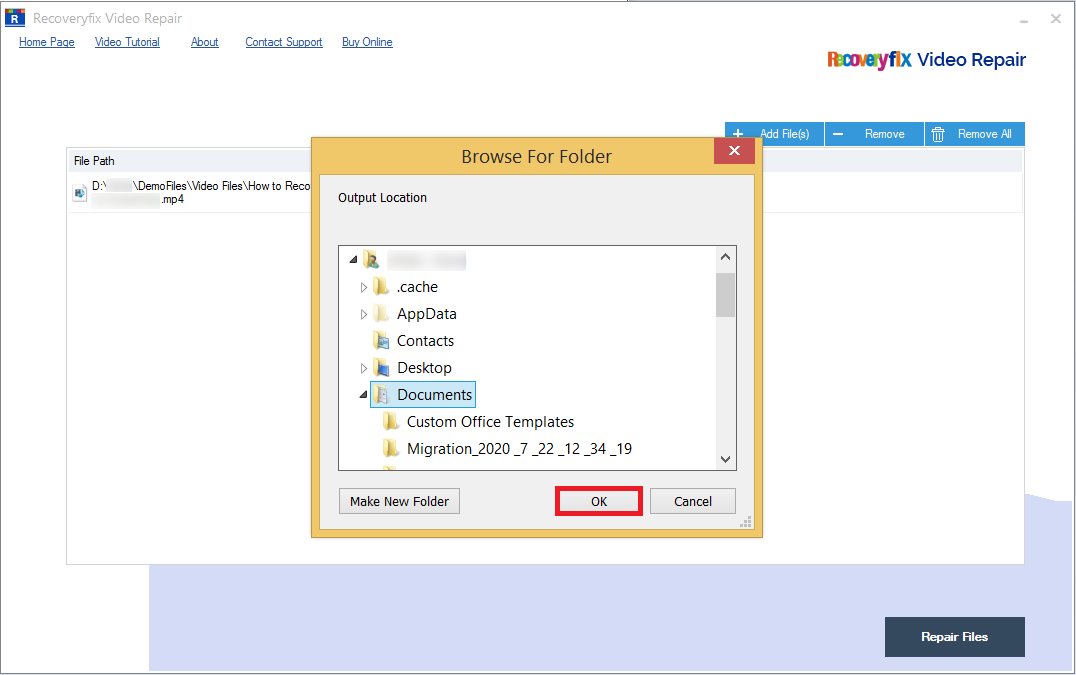
- The tool will repair the video. You can see the status of Success. There is a Saved File Location link that you can click to go to the folder directly.
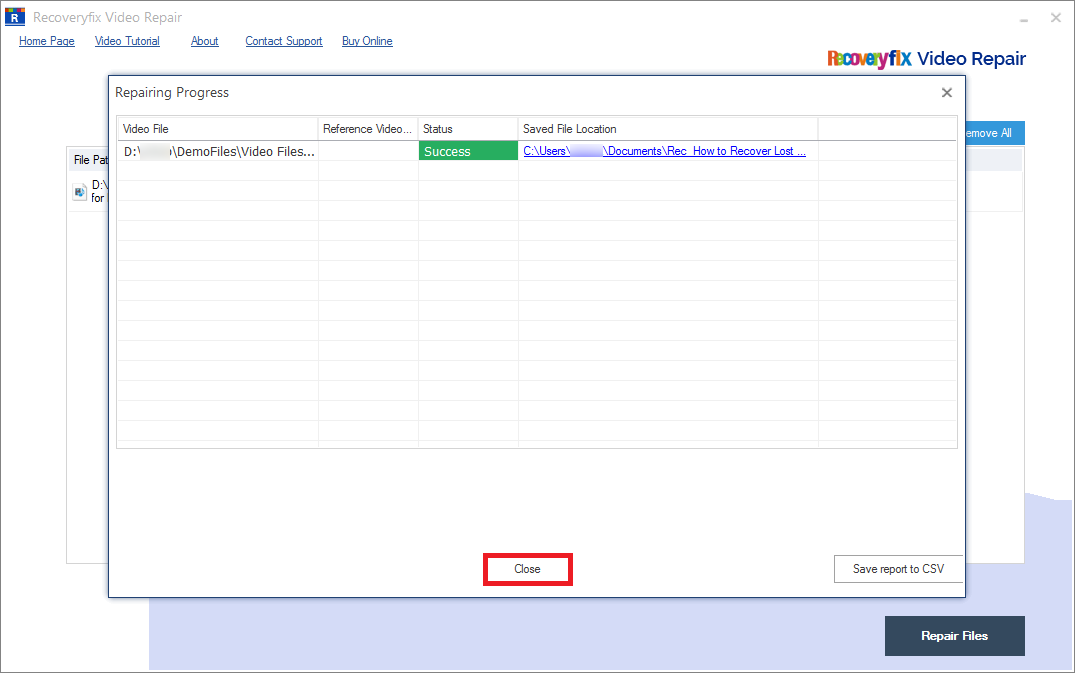
After saving the report in the CSV file, click the Close button to finish the repair process.
Conclusion
Here, we have mentioned several causes and their solutions to fix MP4 video file not playing in VLC issue. You can use them to solve the playback issue of your MP4 files and make them playable again. However, if a video file is corrupted, then go with the recommended solution. It can repair videos from all the major formats quickly and efficiently.