OST is an abbreviation for Offline Storage Table files used to store data such as emails, notes, contacts, attachments, tasks, and others in Microsoft Outlook. Accounts such as Office 365, Exchange, and IMAP (like Outlook.com) use an OST file to store a synchronized copy of your mailbox contents on your local machine. Also, it helps you to access your mailbox even when you are not connected to the Exchange server.
However, your changes won’t be synchronized at that time. But once the connectivity is restored, all the changes made by you will be automatically synchronized. These features make the user comfortable using OST files frequently to manage their data including contacts, daily tasks, etc. Contacts play a crucial role in communicating with people known to the users. Users also need to export contacts from OST file in certain cases.
Therefore, this article will guide you through step-by-step methods to execute the export contacts from OST file.
What are the needs to extract contact from OST file?
There are several instances that create the need to extract contacts from Outlook OST file for users. Here is the list of significant ones:
- You can use it to create a backup of all your contact information.
- It helps to migrate your contacts when you are looking to switch to a new email client or version of Outlook after executing the export contacts from OST files process.
- You can retrieve your contacts even if your OST file gets corrupted or lost.
- It provides you with the facility to access your contacts offline.
Methods to extract contacts from Outlook OST file
The best manual method to extract contacts from OST file is described below:
Using Import/Export Wizard in Outlook
Outlook has a built-in feature to export contacts to PST and CSV file formats. Use the ‘Import/Export’ feature to accomplish this.
- Go to the File option.

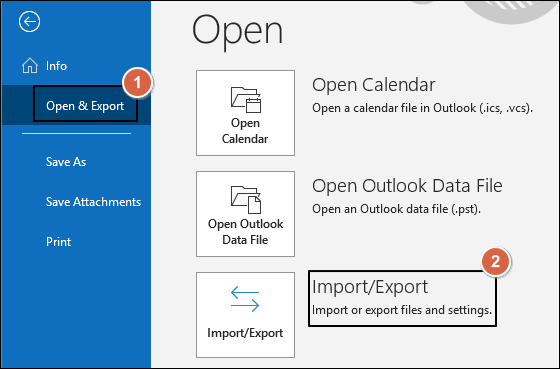
- Tap on Open & Export > Import/Export.
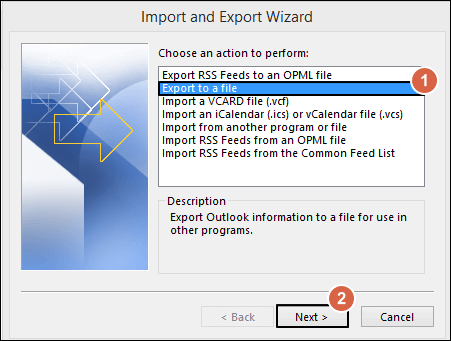
- Select Export to a file option and click Next.
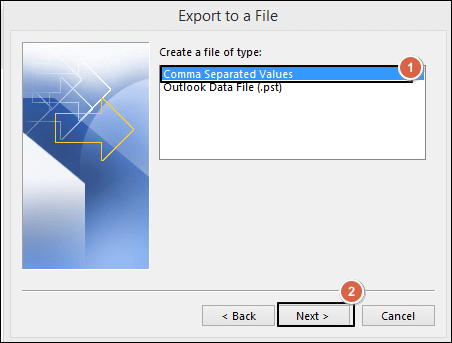
- From the window that appears, select Comma Separated Values, and click Next.
- Now, select Contacts and tap Next.
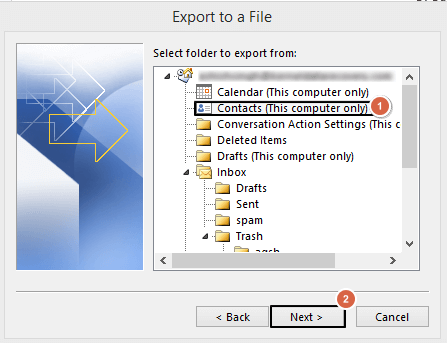
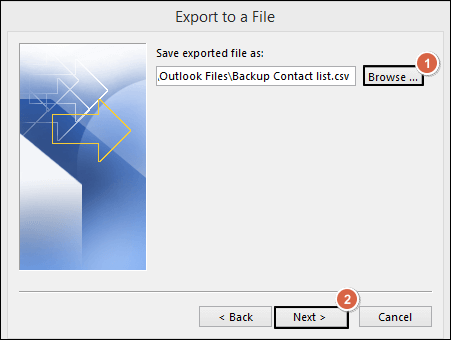
- Go to the Browse option to select the file location where you want to save it and Click Finish.
- Map Custom Fields accordingly & tap on the Finish option to extract contacts from the OST file.
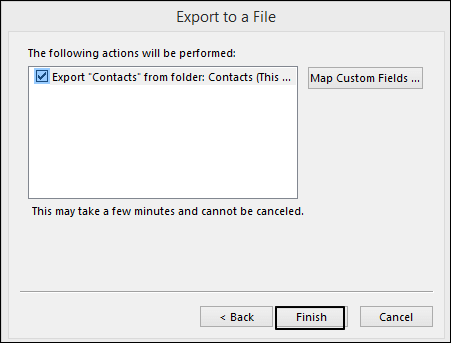
The selected location now contains a CSV file with the contacts converted from your Outlook OST file.
Use a professional tool to extract contacts from OST file
As you see, it will consume too much time while going through a manual process with no guarantee of error-free extraction. Besides that, the major limitation of the above method is that it only works when the user is connected to the Exchange server. So, in that scenario, it is highly recommended to use the third-party OST to PST converter software to extract contacts from Outlook OST file efficiently.
Recoveryfix for OST to PST Converter tool stands out as the best option to export contacts from OST file. It even can extract contacts from damaged or corrupt OST files. It also lets you to preview extract contacts from OST files before saving them. The original data hierarchy is preserved during the extraction process.
Let’s discuss the steps to accomplish the task.
- Launch the application and Browse for the OST file from which you want to extract contacts.
- Select one of the provided modes and hit the Next option.
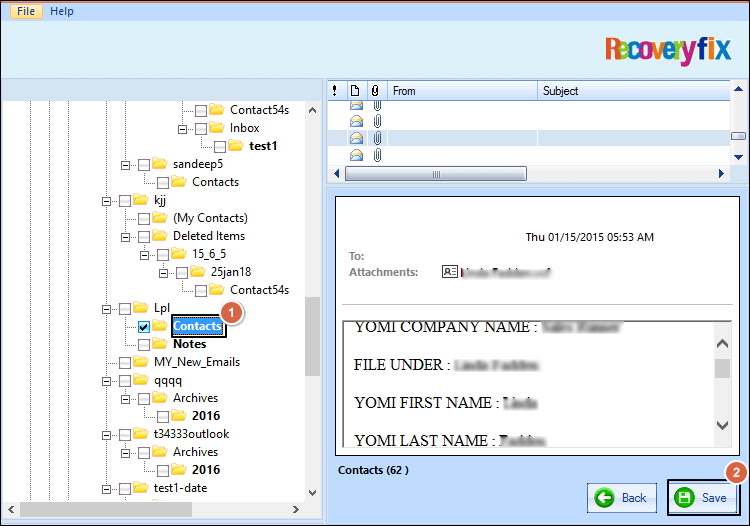
- The list of mailbox items previewed in the right pane once the process is complete.
- Go to the Contacts folder and hit the Save option.
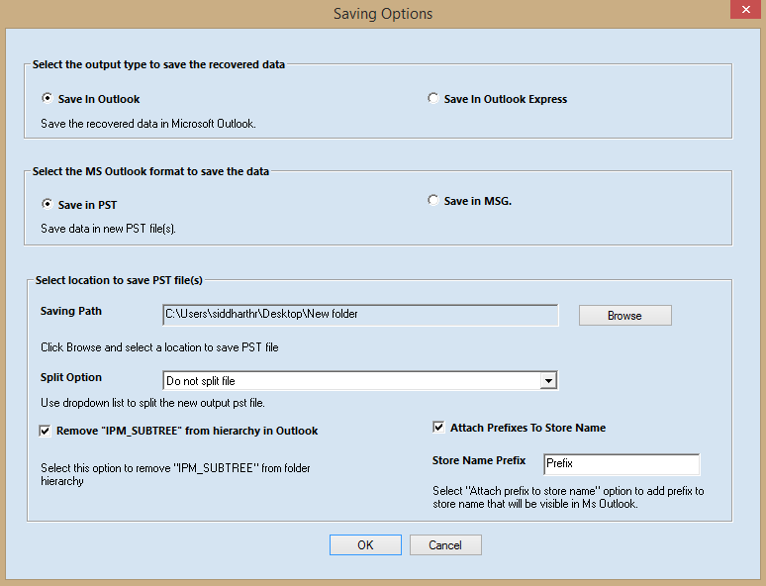
- Next, you will be prompted to choose between the two options to save your file. Further, you can select from the two formats to save the data. Next, browse for the destination folder where you would like to save your data. If you have a large data file, then you can choose to split your file into several smaller size PST files. Hit “Ok” to finish the Save process.

Conclusion
We have discussed manual and tool-based approaches to extract contacts from OST file. The manual method has certain limitations, as it may fail if the OST file corrupts or when you are not connected to the Exchange server. In this case, you should prefer OST recovery tool, which extracts contacts from Outlook OST file in just a few simple steps.


