Quick Guide to Create A Shared Calendar In Microsoft 365

Updated On - August 10, 2026
Missed meetings, scheduling conflicts, or overlapping commitments aren’t always caused by poor planning. Sometimes, it happens because teams are not working from the same calendar.
The Office 365 shared calendar solves these challenges by allowing teams to view, manage, and collaborate from a single calendar. Here, we will show you how to create shared calendar in Office 365 and stay aligned in real-time.
No matter which service you are working on OWA, Outlook 365, Shared Mailboxes, Microsoft 365, or Teams- the blog covers them all.
Why Create Shared Calendar In Office 365? – Explore Benefits
You can avail several benefits with the creation of Office 365 shared calendars. The most frequent ones are listed below:
- Improved team collaboration with clear visibility.
- One centralized calendar to track team events.
- Better project planning across multiple departments.
- Real-time synchronization reflects changes automatically.
- Simplify resource booking with Office 365 shared calendars.
- Avoid conflicts or double-booking of important appointments.
- Flexible permission control decides who can access calendars.
Before You Start: Complete These Requirements First
Verify and prepare the critical requirements before you create shared calendar in O365 smoothly. Here they are:
- Decide the permission structure before sharing the calendar.
- Confirm Outlook is up to date and supports the latest features.
- Get the required permissions based on the calendar type you create.
- Check internet connectivity for faster synchronization across devices.
- Understand and assign a suitable permission level for effective collaboration.
- An active Microsoft 365 account subscription with Outlook & Exchange Online services.
How to Create Share Calendar In Office 365? [5 Manual Ways]
Go through this section carefully to set up Microsoft 365 shared calendars using Outlook 365 or OWA, Office 365 Groups, Shared Mailboxes, Resource Mailboxes, & Teams. Let’s explore them.
Method 1. Set Up A Shared Calendar In Outlook 365 or OWA
This method is suitable for individual users who need to share calendars with coworkers, assistants, or managers. Here’s how to set up and share:
Step 1. Access the Outlook Web Application (OWA) on your browser.
Note: You can also perform the same steps on Outlook 365.
Step 2. Tap on the Calendar icon from the side pane.
Step 3. Go to My Calendars and select the Calendar that you want to share.
Step 4. Click on three dots and proceed to Sharing and permissions.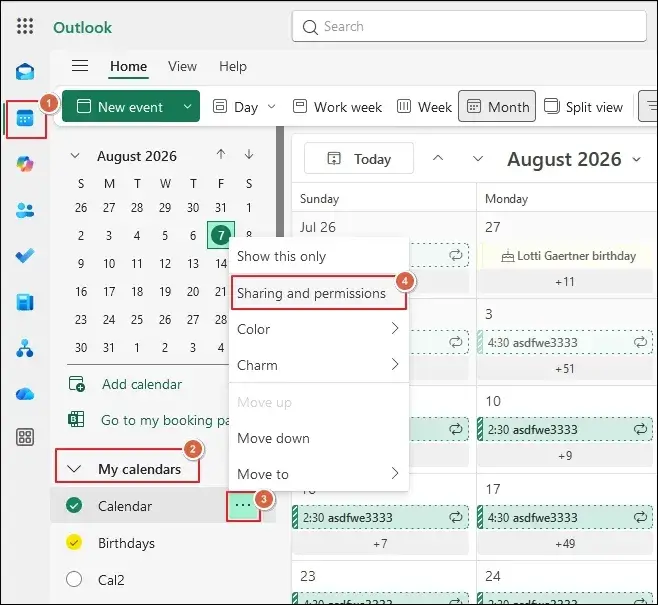
Step 5. Add the recipient by providing the email address.
Step 6. Select the required permission level from the available ones:
- Not shared
- Can view when I’m busy.
- Can view titles and locations
- Can view all details
- Can edit
Step 7. Once done, click on Share.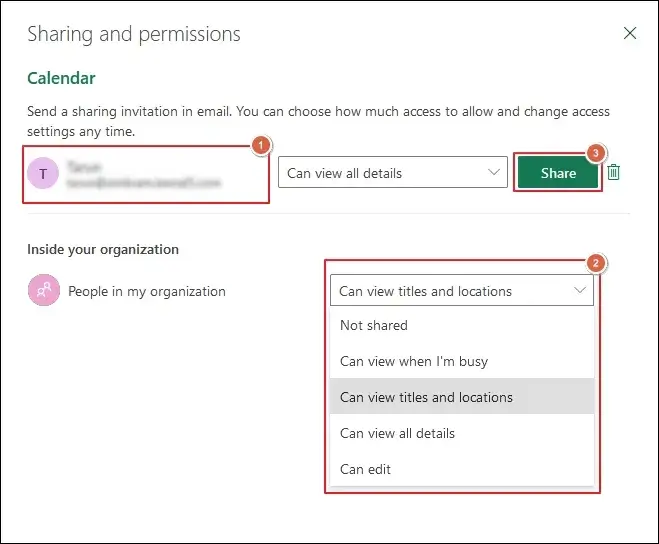
Step 8. It will automatically appear under Shared Calendars once accepted.
Method 2. Create A Microsoft 365 Group Calendar
A Microsoft 365 Group calendar belongs to the group where all members work from the same schedule. Here are the steps to create it:
Step 1. Open Outlook Desktop or OWA using a Microsoft 365 account.
Step 2. Expand the New mail option and click on Group.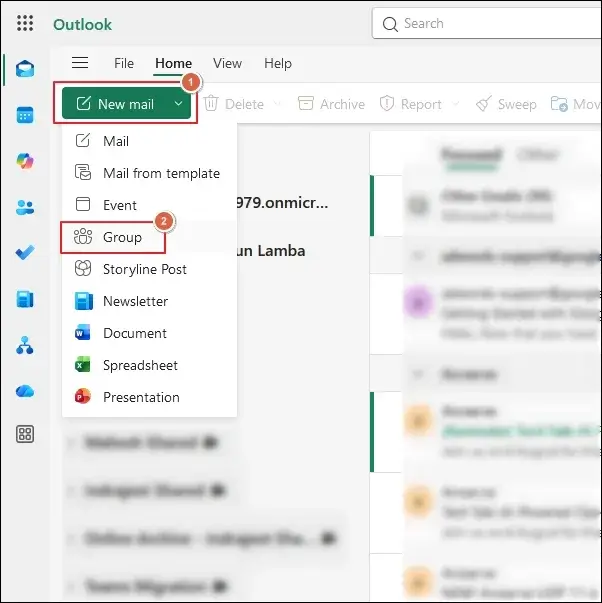
Step 3. Create a new group by entering the following details:
- Name
- Email address
- Description
- Privacy
- Subscription
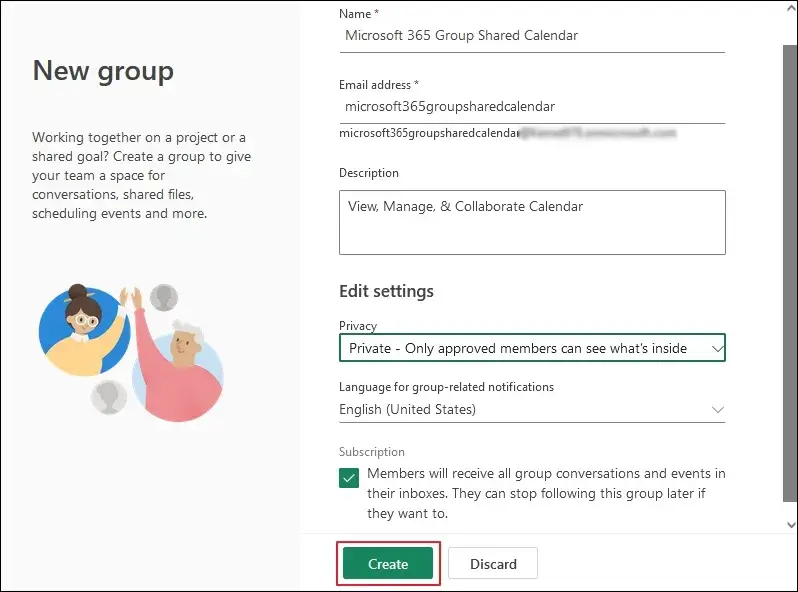
Step 4. Add members once you have provided the details.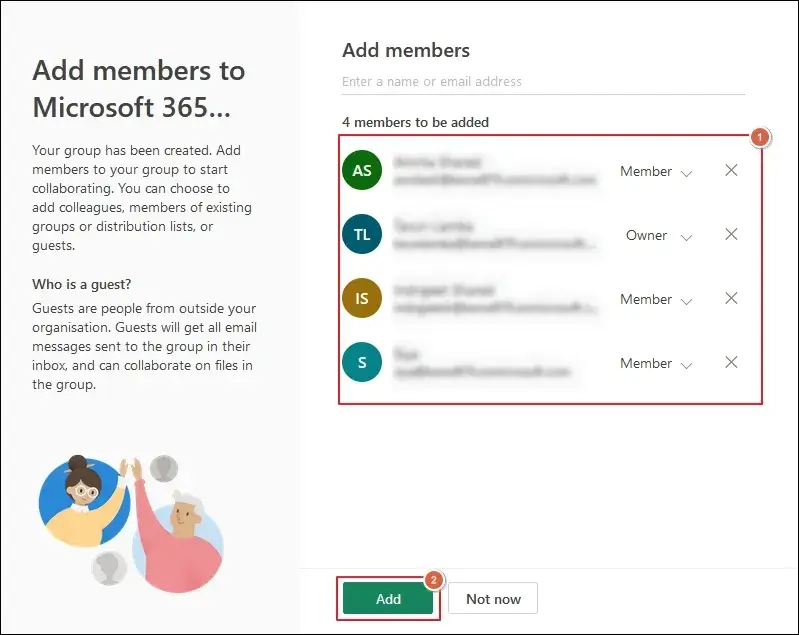
Step 5. Go to Groups to see the created ones.
Step 6. Locate the newly created group and go to Calendar.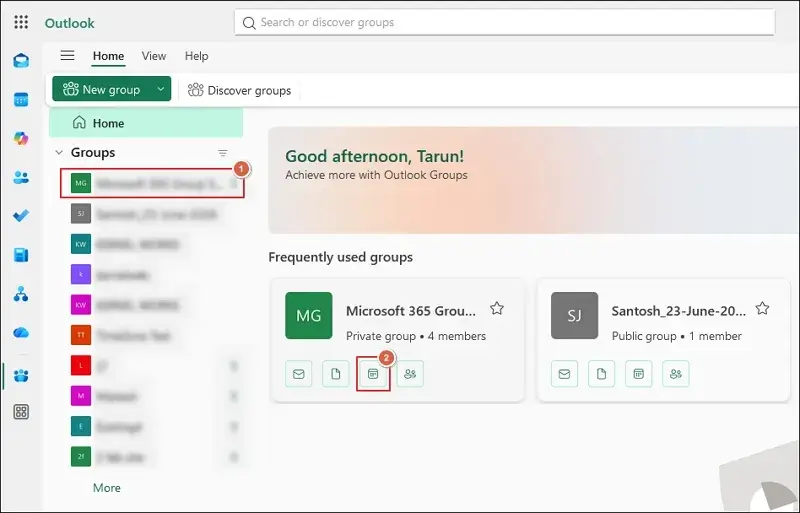
Step 7. Access the New event dropdown and proceed to the New event.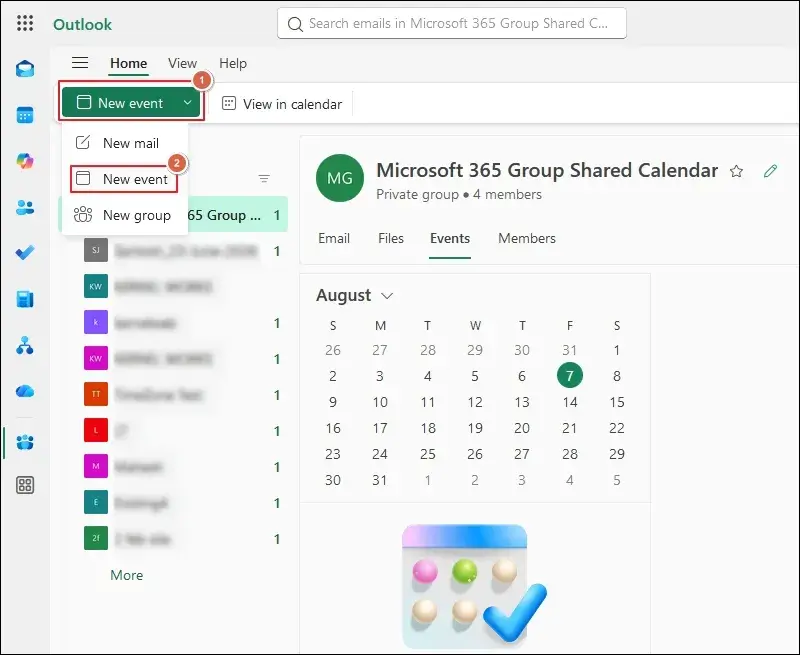
Step 8. Create a new event by providing the required details:
- Event title
- Date
- Time
- Location
- Description
- Attendees
Once done, Save the event. 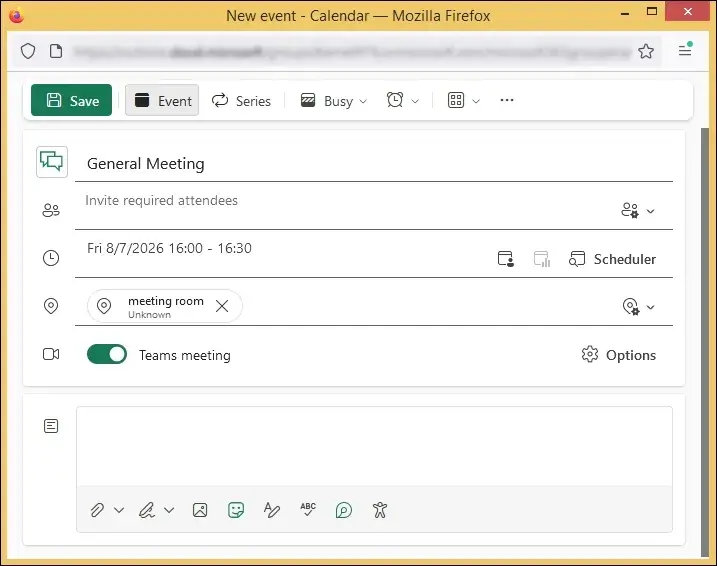
Step 9. Now, group members can easily collaborate with real-time synchronization.
Method 3. Build A Shared Mailbox Calendar
Shared Mailbox Calendar is the ideal choice for departments where multiple employees need to manage the same schedule. Follow the steps to set it up:
Step 1. Go to Microsoft 365 Admin Center and access Exchange Admin Center (EAC).
Step 2. Expand Recipients > Mailboxes > Add a shared mailbox.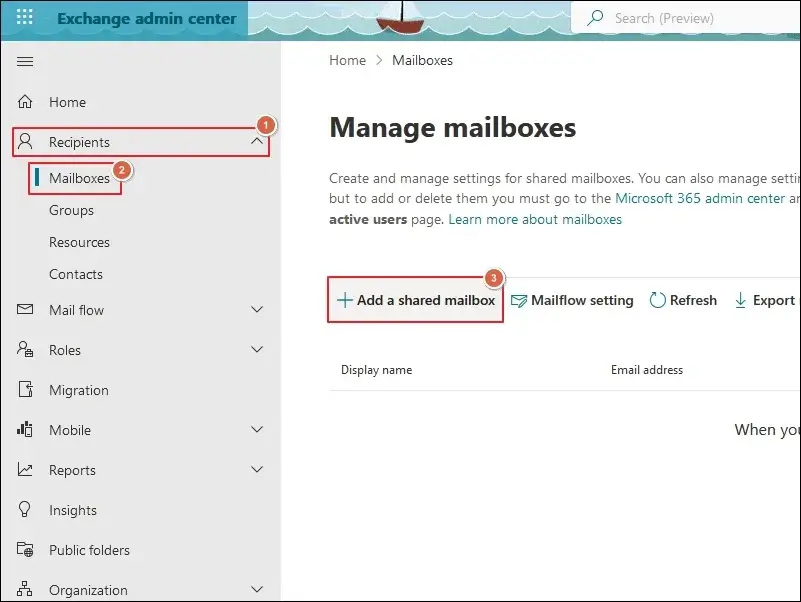
Step 3. Enter the Display name, Email address, & Alias to Create.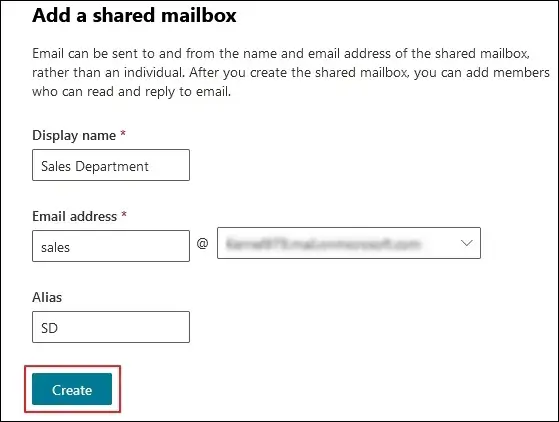
Step 4. Once created, Add users to this mailbox.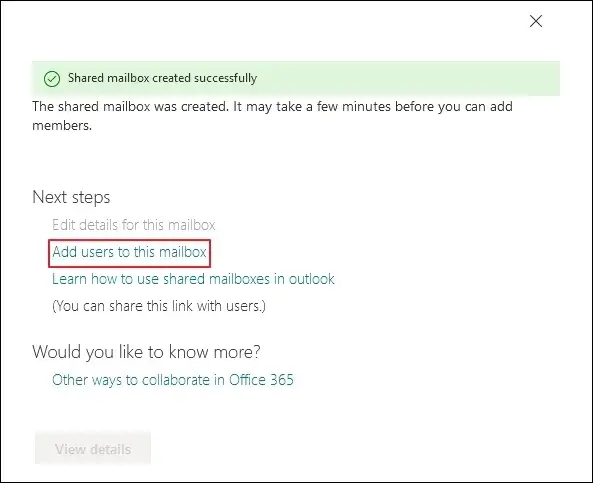
Step 5. Grant the suitable permissions from the Delegation tab.
- Send as
- Read and manage (Full Access)
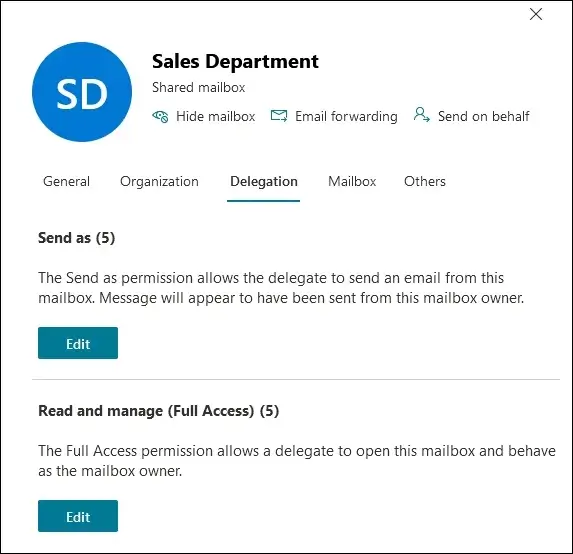
Step 6. Wait for several minutes for the created mailbox to appear in Outlook profiles.
Step 7. Tap on the Calendar icon and go to Shared Calendars or the shared mailbox.
Step 8. Create department events to access the latest updates by the authorized members.
Method 4. Set Up A Resource Mailbox Calendar
Manage organizational resources by creating a Resource calendar to prevent booking the same room or equipment. Here’s how to create it:
Step 1. Go to Exchange Admin Center and expand Recipients.
Step 2. Click on Resources and Add a room resource.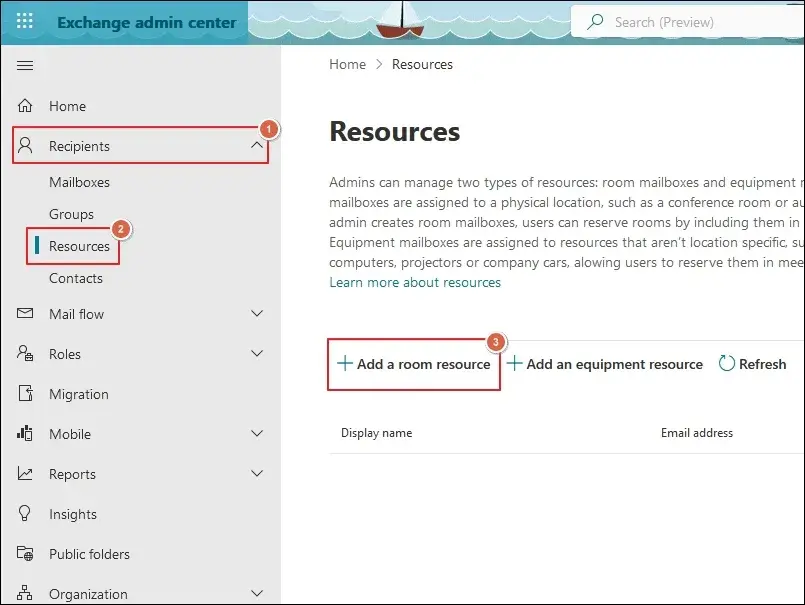
Step 3. Set up room mailbox and proceed to Next.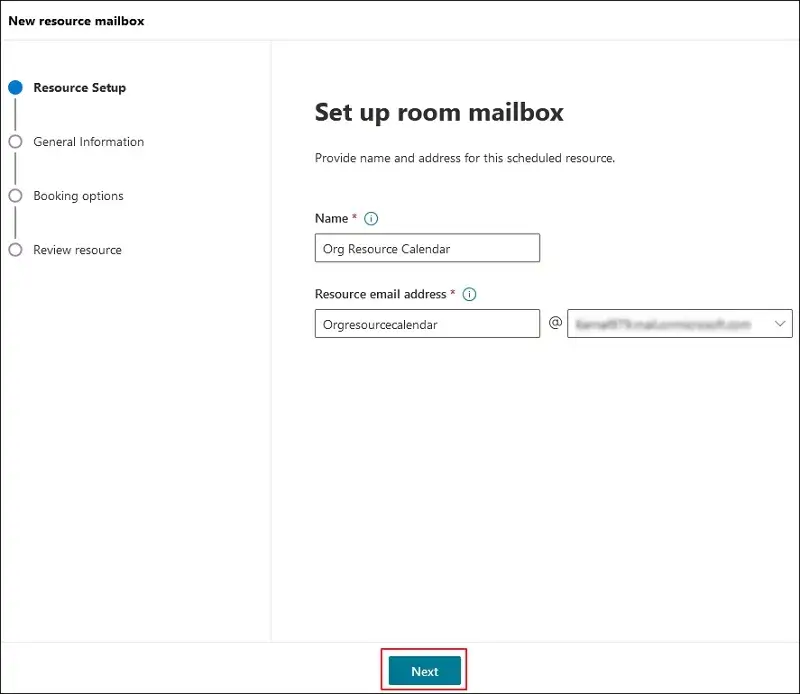
Step 4. Set properties by providing the required details and click Next.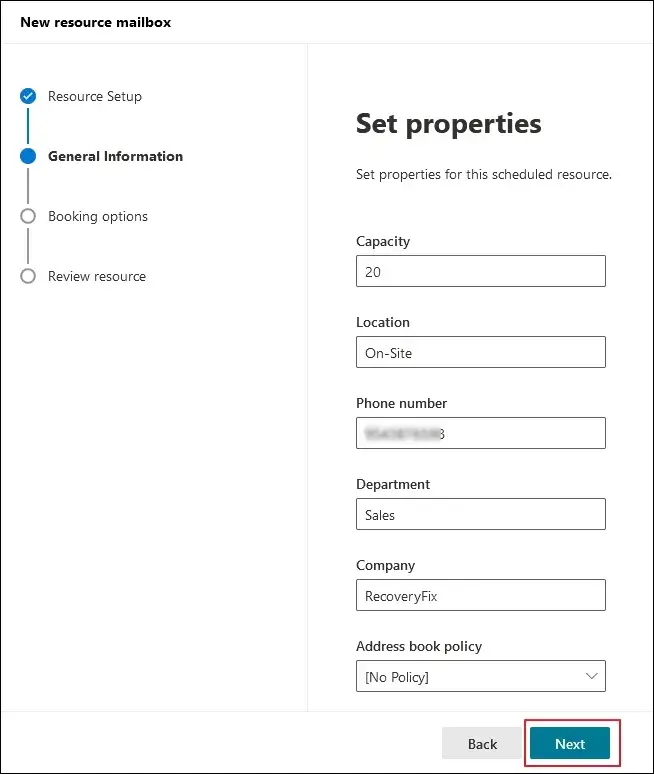
Step 5. Apply the necessary Booking delegate settings and hit Next.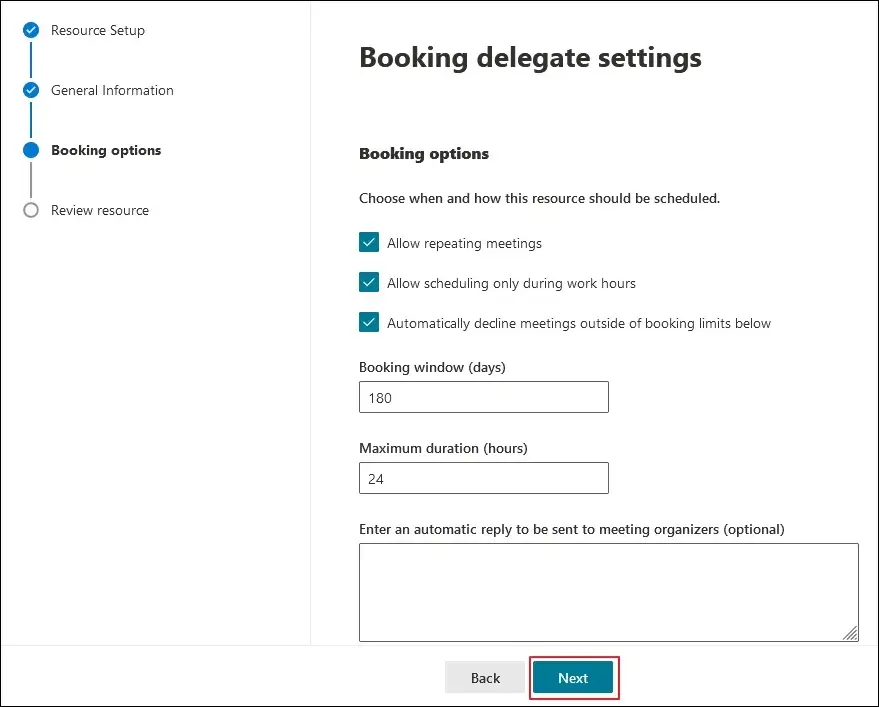
Step 6. Review resource information and proceed to Create.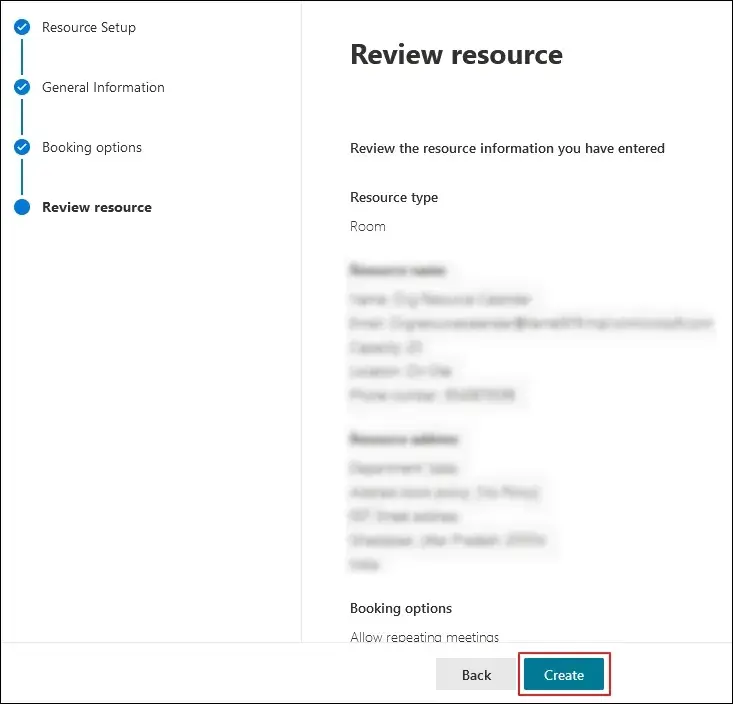
Step 7. It will create the Resource mailbox successfully.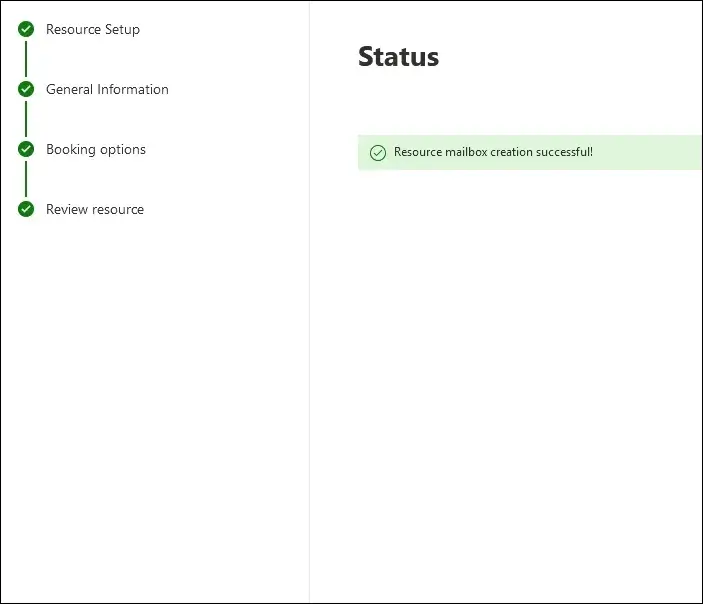
Step 8. Create a new meeting and select Location or Room Finder to choose the resource.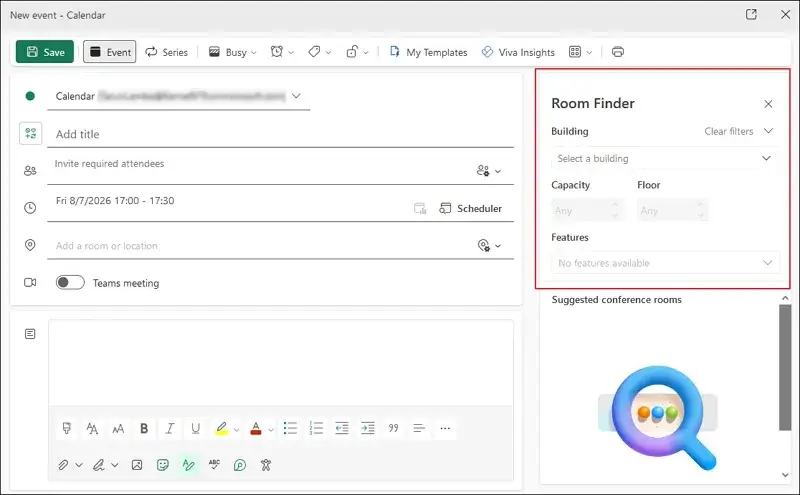
Important to Know: Administrators or delegated users can manage reservations easily.
Method 5. Create A Shared Calendar In Microsoft Teams
Microsoft Teams calendar helps you to track meetings, project deadlines, training sessions, and team events in one place. Here’s how to create:
Step 1. Access Microsoft Teams desktop or web browser.
Step 2. Add a new team or select the existing one to proceed.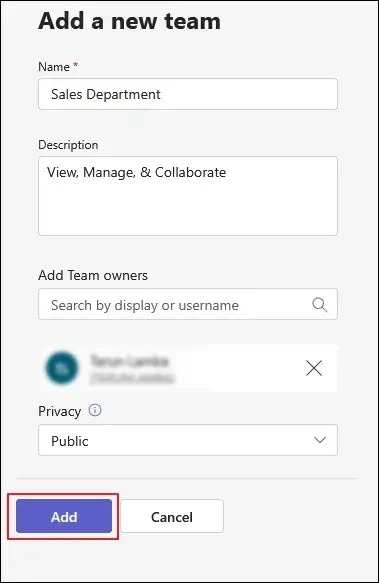
Step 3. Add members to the created team and Apply.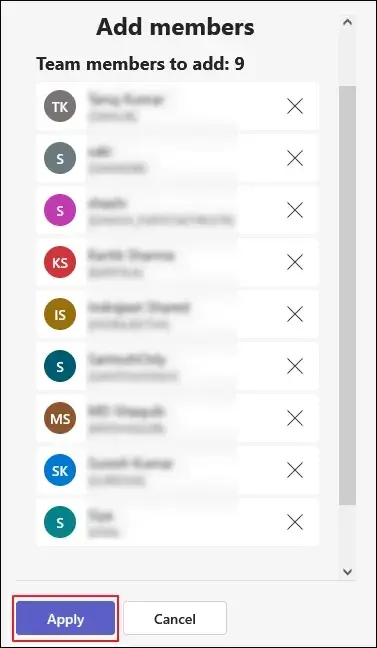
Step 4. Create a New Meeting by providing the necessary details.
Step 5. Save the created meeting, and it becomes visible to authorized group members.
Step 6. Team owners and authorized members can manage future events.
Office 365 Shared Calendars Mistakes Almost Everyone Makes!
Here is the list of common mistakes that you should avoid that cause shared calendar-related issues.
- Granted excessive permissions to every user.
- The calendar was created but not tested properly.
- Using a personal calendar for department scheduling.
- Created duplicate calendars for the same department.
- Confidential information is shared with external users.
- Not reviewing permissions on a regular basis may cause security threats.
- Time zone settings are not considered when working with teams across regions.
Why Is Microsoft 365 Data Backup Necessary For You?
There is no doubt that Microsoft is one of the most reliable platforms, yet taking regular backups allows you to stand on the safe side. If you are doing so, then you can ensure data security from mishaps. However, the issue arises when you are not practicing it.
You can execute the Microsoft 365 email data backup process anytime to secure your precious data with its native solutions. But if you want to make the process more efficient, then opting for our Recoveryfix Microsoft 365 Backup tool benefits you. The software not only helps you back up your entire data into multiple formats, but it also helps you restore the backed-up files into Office 365 instantly.
Closing Remarks
The blog has covered a detailed process on how to create shared calendar in Office 365. You can follow the step-by-step process to set up a shared calendar using the different components of Microsoft 365. However, along with collaboration, data backup is also necessary for any organization. For that, go with the recommended solution that not only backs up your data but also restores deleted mailboxes in Office 365 with ease.