Easy Ways to Move PST to Outlook Web Access!

Updated On - February 18, 2026

Outlook Web Access [OWA] is a well-known web-based email client for Office 365 users. It helps them to use the email services the same as the Outlook desktop version through the web browser.
Import PST to Outlook Web Access process not only helps in easy or anywhere accessibility but also opens the door for other Office 365 facilities & services. But the only need is good internet connectivity. This guide will help you to get the right solution to achieve the same. It can be a manual or an advanced one.
Why move PST to Outlook Web Access? Top Scenarios!
We have covered the top scenarios where it becomes necessary to transfer PST to Outlook Web Access:
- Provide remote & hybrid work environments that can reduce the maintenance of IT infrastructure.
- Auditing & managing legal compliances becomes easy on consolidated data instead of scattered PST files.
- Helps in reducing the workload of PST management for IT support teams.
- Easy collaborating with the teams without importing/exporting PST files.
- Minimize the storage & downtime issues and boost the user’s overall performance.
Top methods to move PST to Outlook Web Access!
Since Outlook Web Access is just an email client that acts as a mediator between users & their mailboxes, we need to import PST files into Office 365. So, here we have provided the methods to import PST file data into the Office 365 mailbox that you can access with OWA.
Solution 1. With the help of Outlook desktop version
To export PST to Outlook Web Access, you can use the Outlook desktop version. In this, we first add the OWA or Office 365 associated account & sync all the desired data with this account. Follow the detailed stepwise approach to get the preferred result:
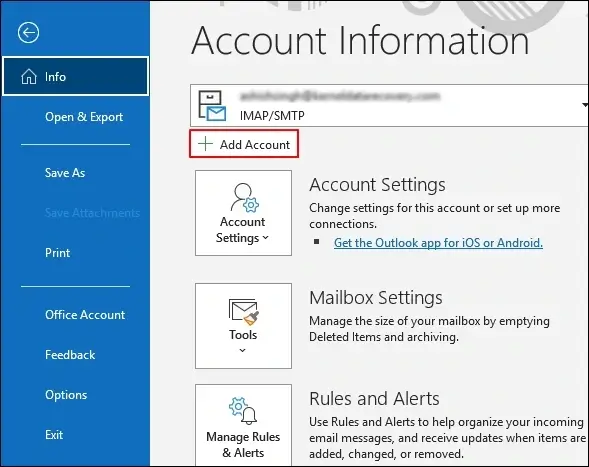
- Launch the Outlook application & tap on the File menu.
- Go to the Add Accounts section & configure the Outlook desktop with the same Office 365 account in which you want to sync with OWA.
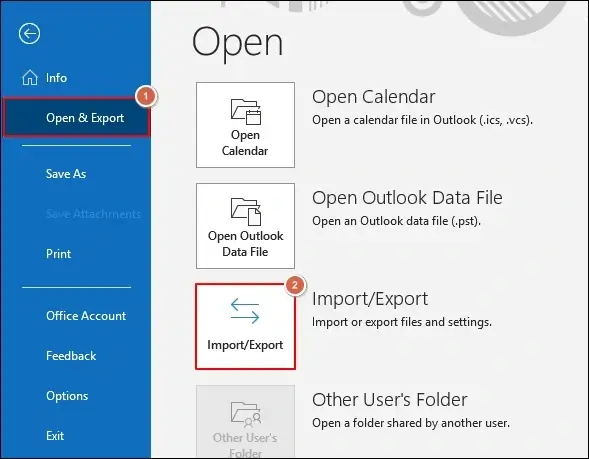
- Then, search for the Open & Export option & click on the Import/Export section.
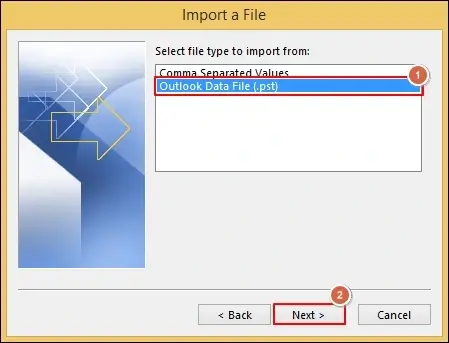
- Choose the Import from another program or file option & hit Next.

- Select the Outlook Data file (.pst) & tap on Next.
- Browse the location of the PST file, select it & click on the Open option. Then, choose the desired option & click on Next.

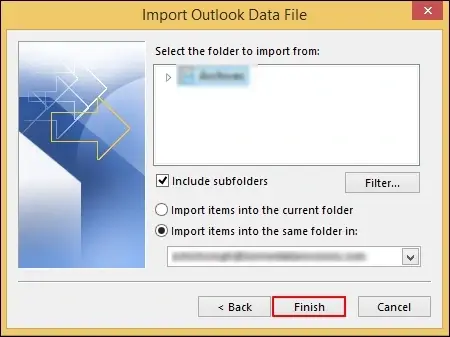
- Choose the user mailbox or specific folders along with the needed filters. Hit Finish to end up the process.
- Wait for a while till Outlook syncs imported PST data with your Office 365 mailbox. After that, access all the imported data by logging into Outlook Web Access through the web browser in the saved respective folders.
Important to Know: Now, the upcoming methods are only applicable at the administrator level.
Solution 2. Use Network Upload Method to import PST file!
Office 365 provides users the utility to move multiple PST files into Microsoft 365. One of the most used is Network Upload method. Here, we have provided a basic overview about the steps to execute the method. For a complete stepwise approach, you can refer to the ways to Import PST to Exchange Online.
- Maintain the copy of the SAS URL & then download the Azure Az Copy tool.
- Upload the PST file to the Office 365. Here, you have an option to view the list of uploaded PST files.
- Now, create the PST import mapping file & a PST import job.
- Once all the setup is done, filter the data accordingly & begin the PST Import Job.
Solution 3. Try the Drive Shipping method!
Drive shipping is another way to import PST files to desired users’ Office 365 mailboxes. In this, first, copy your PST files to a hard disk drive & then physically ship that drive to Microsoft. Once they receive your drive, data personnel move the data from the drive to Microsoft cloud storage. Then, we use the import service to import the PST data from the storage area.
Look at the following steps for a complete information:
- Download the PST Import tool from the Microsoft Purview portal.
- Copy PST Files to the Hard Drive by providing the command in the Command Prompt as an administrator.
- Create PST Import Mapping File in the CSV format with the following structure:
CSV Header Row: Workload, FilePath, Name, Mailbox, IsArchive, TargetRootFolder, ContentCodePage, SPFileContainer, SPManifestContainer, SPSiteUrl
Mentioned parameter info:
- Workload: Always “Exchange”
- FilePath: Azure storage path (leave blank if using “ingestiondata/” or specify subfolder)
- Name: Exact PST filename (case-sensitive)
- Mailbox: Target user email address or mailbox GUID
- IsArchive: TRUE for archive mailbox, FALSE for primary mailbox
- TargetRootFolder: Destination folder (/ for Inbox, blank for new “Imported” folder)
- ContentCodePage: Optional for CJK languages (e.g., 932 for Japanese)
- SPFileContainer, SPManifestContainer, SPSiteUrl: Leave blank for PST import.
- Return to the Microsoft Purview portal & create the PST Import job.
- Ship the Hard Drive to Microsoft with the necessary preparations like proper packaging, address format, carrier choice, documentation, etc.
-
Post-Shipping Tasks:
- Return to the Microsoft Purview portal.
- Go to Data lifecycle management > Import.
- Select your import job.
- Click Enter tracking number.
- Provide the delivery carrier name, tracking number, & return carrier account number (for return shipping)
- Save all the information for future purposes.
Timeline: 7-10 business days for Microsoft to process and upload PST files to the Azure Storage area after receiving the drive.
- Filter the necessary PST Data, start the Import Job & configure Import settings accordingly.
Note: Only use Azure Import/Export tool version 1 (WAImportExportV1). Because version 2 is not supported.
This way, you can import all your PST files into Office 365 with the drive shipping. Now, use the imported PST data with the help of the Outlook Web Access.
Looks lengthy & tedious? Try an advanced option!
Manual methods involved a time-consuming process with a number of permissions & manual steps. Besides, without good tech skills, getting the desired results can be a challenging task. As a result, professionals recommend using the advanced Import PST to Office 365 tool can be a better option than the manual ones.
Recoveryfix PST to Office 365 is one of the reliable options among others due to its versatile or high-end features. With this tool, you can upload PST files to Office 365 into Primary, Archive, or Public folders with same structure. Moreover, the tool comes with many other advanced features that make it the most preferred one:
- Users can migrate specific mailboxes from PST files to Office 365.
- Filter PST file data as per your requirements to get the structured results.
- Reduce data redundancy with its incremental migration feature.
- Import CSV file option boosts up the PST migration process.
- With a user-friendly or intuitive interface, no prior tech skills are needed to run the tool.
- No need to install Outlook application to run the software.
- Retains PST file data integrity as earlier during or after the PST migration process.
Conclusion
The blog has covered all the aspects to move PST to Outlook Web Access, including its reasons & effective solutions.
But to avoid their inherited limitations, we have also highlighted the advanced option that can make the whole process quick and error-free. For a hands-on experience, you can check out its trial version.