An Ultimate Guide to import PST to Shared Mailbox!

Updated On - February 18, 2026
Email management becomes messy when important messages are scattered across individual mailboxes. It makes tracking project updates, client conversations, or shared documents difficult for users.
Therefore, organizations pick a centralized approach and import PST to Shared Mailbox to solve their problem. It enhances team collaboration and ensures that everyone stays connected to the team.
So, the blog will walk you through simple ways to import your files to the Shared Mailbox without any prior tech expertise.
Why Users Import PST Files to a Shared Mailbox?– Key Reasons Explained!
Here are the primary reasons that drive organizations and individuals to import their PST files to shared mailboxes:
- Access important emails and historical data from a centralized location.
- Teams can collaborate more efficiently by accessing a shared mailbox.
- Backup and preserve old emails securely on the cloud storage.
- Shared Mailbox management is easier than handling multiple PST files.
- Easily access your important emails from various devices, anywhere.
- Free up local storage and reduce the risk of data loss due to hardware failures.
- Locate any email messages with advanced eDiscovery and search capabilities.
Important Prerequisites That Must be Known: Before You Begin!
Make sure these requirements are met before starting the process:
- Assign the Mailbox Import Export Role to the admin.
- The shared mailbox setup should be complete and accessible via Outlook.
- Check PST files for corruption issues and then upload them.
- Confirms that enough storage is available in the shared mailbox.
- Administrative access to the Microsoft 365 or Exchange Online environment is present.
How to Import PST to Shared Mailbox Office 365 Manually?
Based on user requirements, we have deeply analyzed several manual methods and found these ones helpful. You may be aware of them, but here you will get the detailed process:
Method 1. Use Outlook Application to Import PST files
You can easily import PST files to Outlook with the help of the Import/Export utility. Here’s how:
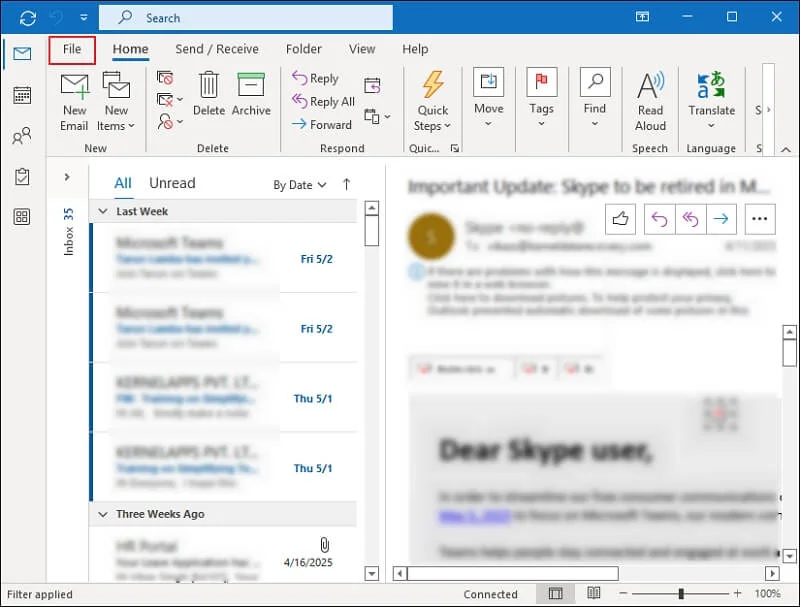
Step 1. Click on File tab in Outlook application.
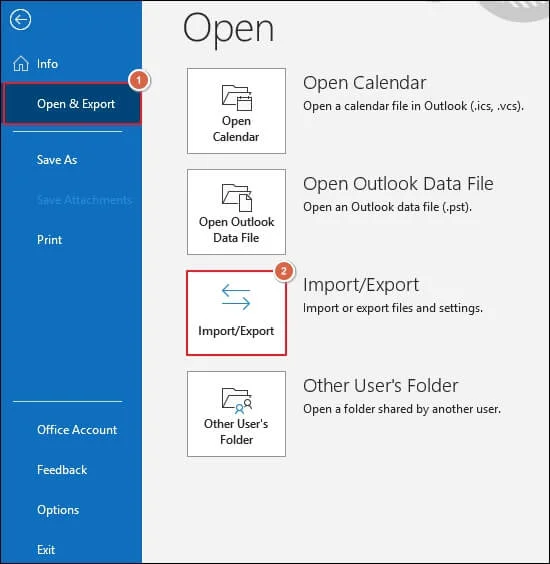
Step 2. Go to Open & Export section and click Import/Export.
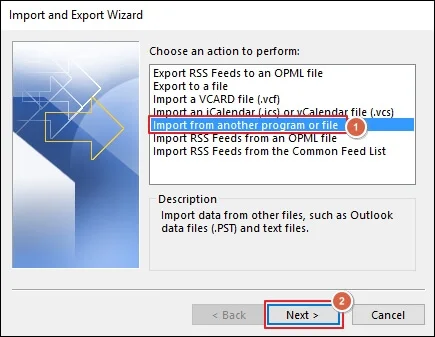
Step 3. Select Import from another program or file and proceed to Next.
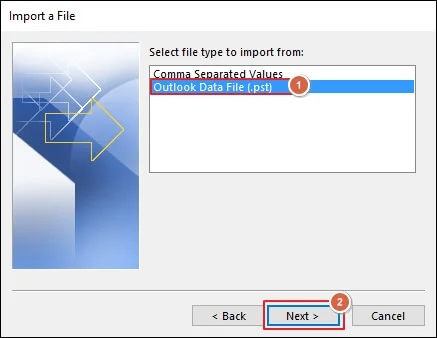
Step 4. Choose Outlook Data File (.pst) and click Next.
Step 5. Browse to select the PST files, choose appropriate Options, and proceed to Next.

Step 6. Select the folder to import from section and enable Include subfolders. Then, use the dropdown list to choose Shared Mailbox under the Import items into the same folder in section and click Finish.
Note: Filter the unwanted data if needed.

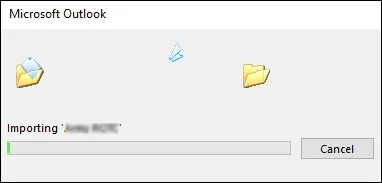
Step 7. It will begin the process of PST file transfer to the shared mailbox.
Step 8. You can access the contents of PST files in the Shared Mailbox.
Method 2. Import PST files using the Drive Shipping
Copy the data of your PST files into a BitLocker-encrypted hard drive and physically ship them to Microsoft. Then, the data personnel upload the files to a temporary Azure Storage location. Later, use the Microsoft Import Service to import PST files to Office 365:
Step 1. Download and install the Azure Import/Export tool (WAimportExportV1) from the Microsoft Purview portal.
Step 2. Copy and encrypt the PST file data to the hard drive using the WAImportExport tool.
Step 3. Create a CSV file and map the user mailboxes to the corresponding PST files.
Step 4. Use the Microsoft Import Service to create + New import job.
Step 5. Ship the hard drive to Microsoft with a tracking number and return shipment information.
Step 6. Filter out the unnecessary data and start the PST Import job once Microsoft receives the hard drives.
Method 3. Try Network Upload to Import PST files
Network upload allows users to import PST files over a temporary Azure Storage location. Here are the complete steps to do that:
Step 1. Keep the copied SAS URL safe and download the Azure AzCopy tool.
Step 2. Upload the PST files to Office 365 using the AzCopy tool.
Step 3. Install and use the Microsoft Azure Storage Explorer tool to view and verify the uploaded list of PST files.
Step 4. Create a CSV file and map the PST files to user mailboxes in it.
Step 5. Create the PST Import job in the Import Service of Microsoft 365.
Step 6. Sort data with setting filters and start the PST Import job once the data is ready to import.
Important to Know: You can check out the blog to get the detailed process of importing PST to Exchange Online.
Limitations: Why Are Native Approaches Not Suitable for Anyone?
Although several manual methods exist to import PST to Office 365 shared mailboxes, but they are not suitable for everyone. Here are the reasons:
- Incorrect execution may lead to file corruption or data loss.
- Import only the limited number of files with file size restrictions.
- Larger PST files may take hours or even days to upload to the cloud.
- Requires technical expertise and multiple steps, which makes them complex.
Want an Instant Solution? – Try the Best Alternate Method Now!
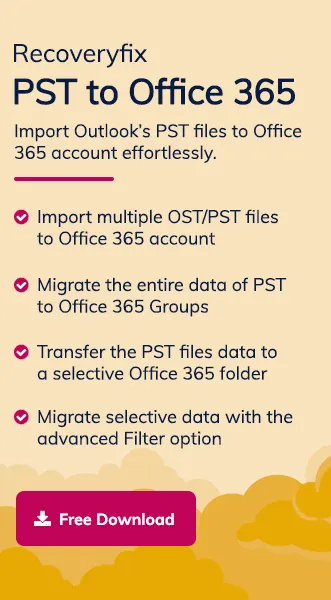
As you already know, manual approaches are quite time-consuming and not suitable for beginners. Therefore, professional tools like Recoveryfix PST to Office 365 will be the best option to avoid these limitations.
It simplifies the process and easily imports PST files to different components of Exchange Online. The Import PST to Office 365 software comes with advanced data filtering options for selective data migration.

Wrap up
The blog has provided various manual methods to import PST to Shared Mailbox. You can use the step-by-step illustrations to move your PST files easily. But if you are looking for an instant and direct approach, then go with the recommended solution. It will help you to migrate emails from Outlook to Office 365 without any prior knowledge.
FAQs: Common Questions Answered!
Q. Can I import a PST file into a Shared Mailbox without admin rights?
A. No, you must have administrative permissions or delegated rights to import PST files to Shared Mailboxes.
Q.Is there a size limit for importing PST files to Office 365 Shared Mailboxes?
A. Manual solutions like Outlook and PowerShell have some practical limits. On the other side, professional PST to Office 365 migration tools handle large PST files better.
Q.What happens if the mailbox gets full during import?
A. It will stop the import process. To resume the process, you will need to free up space or upgrade your subscription plan.
Q.Can I schedule an automatic PST import to shared mailboxes?
A. Manual methods don’t offer a scheduling feature. However, some third-party tools support the scheduled imports feature.
Q.What steps are needed to import PST to shared mailbox Outlook 365?
A. You can import a PST file to a shared mailbox in Outlook 365 using the Outlook Import/Export feature or by uploading the PST to Office 365 with the Import Service.
Q.Is it possible to import PST to shared mailbox Mac without Outlook?
A. Direct import of PST files to a Shared Mailbox on a Mac without Outlook isn’t possible. You must use Outlook for Mac or transfer the PST files through a Windows machine and sync the mailbox.
Q.Can I import PST to shared mailbox office 365 PowerShell without errors?
A. Yes, you can use PowerShell and the New-MailboxImportRequest cmdlet to import PST to a shared mailbox in Office 365. But it is necessary to provide the required permissions and complete access to PST files.