Outlook error 0X800401d: “An unknown error occurred” – How to fix?

Updated On - May 27, 2024
If you use Outlook regularly, then you might be aware of the errors error 0X800401d: “An unknown error occurred” and problems that keep on popping up in Outlook. Some errors are familiar and easy to fix, but some errors are totally unknown and leave us puzzled. Similarly, many users are facing an error “0X800401d” and don’t know why it’s happening and how to fix it. Here, we are going to discuss why this error happens and how to fix it.
The causes of Outlook error 0X800401d
Before we discuss the solutions for this error, let’s know why this error happens and how to avoid it. Let’s see the reasons that may lead to this error:
- Oversized PST files
- Corruption in PST files
- Improper shutdown of Outlook
- Virus or Malware attack
- Oversized Outlook mailbox
- Damaged header files within Outlook
Methods to fix the “0X800401d?” error
Once you know the root of the error, you can fix it with a proper solution. If you don’t know the cause, you can try all the below-mentioned solutions one by one and see which one works for you.
Method 1: Reduce the size of the PST files
By reducing the size of PST files, you can fix this error. Let’s know how to do it:
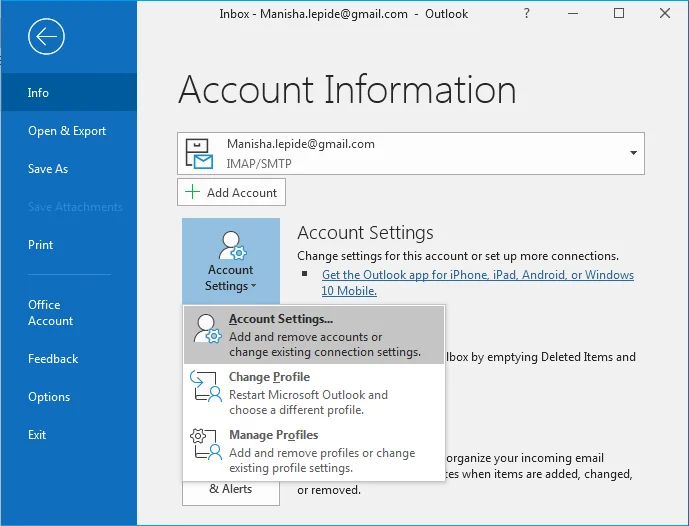
- Start by clicking on the File option.
- Select Account Settings from the menu and select Account Settings again.
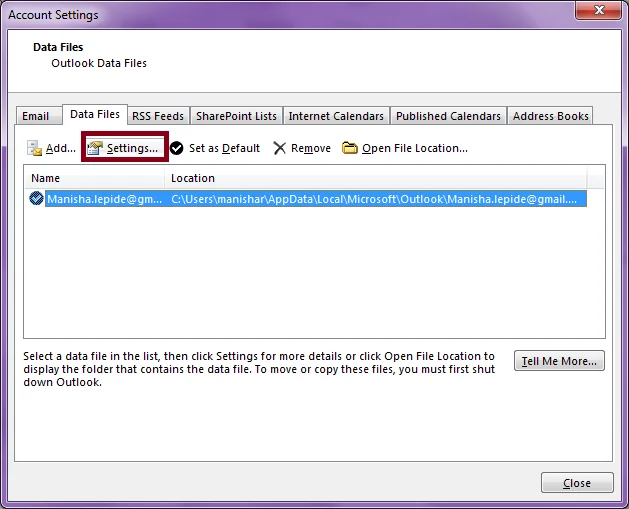
- Now, in the Account Settings dialogue box, select the Data Files tab. In that select the account from which you want to select the PST files to compact and click on the Settings option.
- In Microsoft exchange prompt, click on Advanced and click on Outlook Data File Settings.

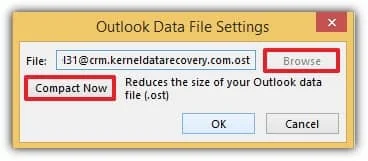
- Click Browse to select the PST files which you want to compact. Once selected, click on the Compact Now button and click on the OK to finish.
Doing this will compact your PST files and will reduce their size instantly. Reducing the size of the PST files should fix this error. If it doesn’t work for you, then move to the next method.
Method 2: Fix with Scanpst.exe
If reducing the size of the PST files did not fix the problem for you, then it might be a case of corruption. To fix the corruption in the PST files, you might need to fix the corruption in the PST files. Outlook comes with an inbuilt utility to fix minor corruption in the PST files. Let’s work our way out with Scanpst.exe.
- To find the Scanpst.exe utility, go to C drive > Program Files > Microsoft Office > Root > Office16 > SCANPST.EXE.
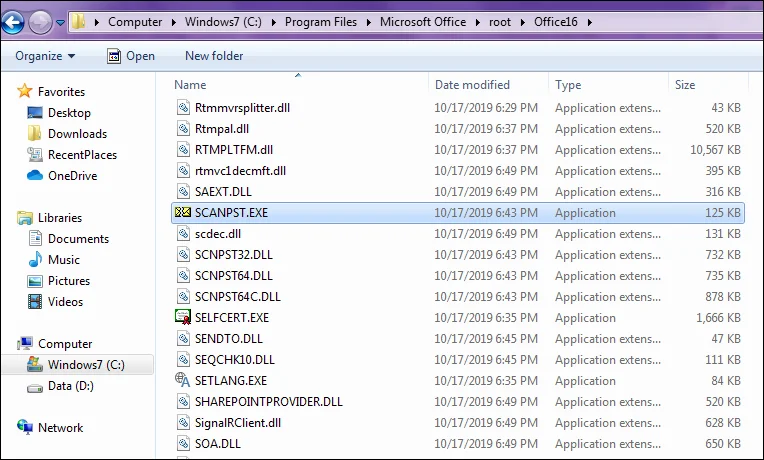
- Double-click on the SCANPST.EXE to open the Inbox Repair Utility.
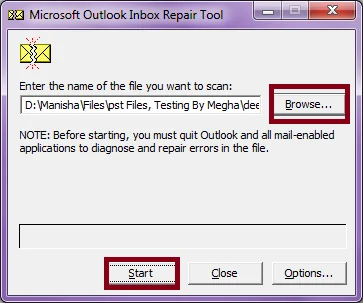
- Browse for the PST files and click Start.
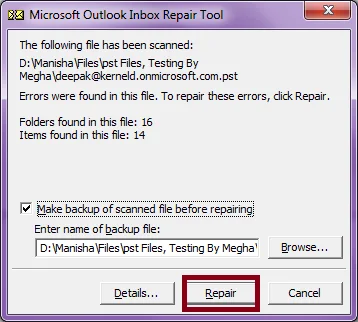
- Once the initial process is over, click on the Repair button next.
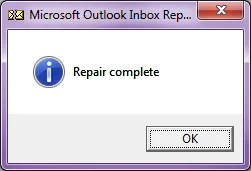
- Once the repair is over, click on OK.
This repair utility from Outlook can only fix the corruption if it is minor. If corruption is major or severe, then this utility may not help you. If you still wish to fix the error, move to the next method to fix the error.
Method 3: Using an Automated Third-party Tool
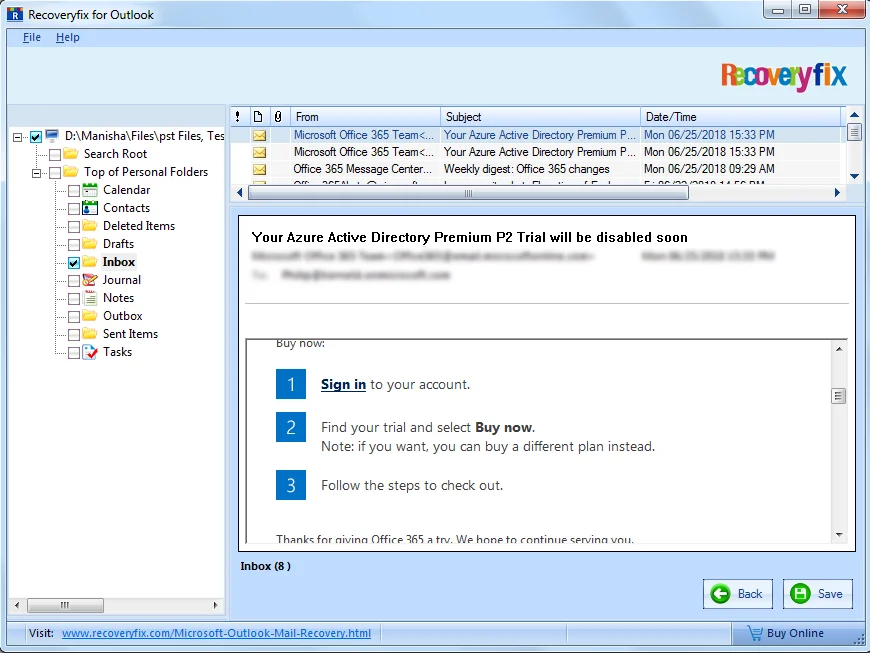
If you can’t fix the PST files with Scanpst.exe, then you need to use an automated third-party tool like Recoveryfix for Outlook PST Repair. It is a user-friendly tool with a simple GUI and advanced features to fix any type of corruption in a PST. Let’s see how this tool works:
- Click on the Browse button, select recovery modes from Standard and Advanced modes. And then click on the Next button.

- In the next step, you can have a preview of the recovered files by clicking on the individual files at a time. Once you are satisfied with the preview, select the folders and click on the Save button.
- Click on the Browse button to provide a destination to save the recovered PST file; also, select the split option for the file to split it into multiple PSTs after a specified size, then click on the OK button to proceed.

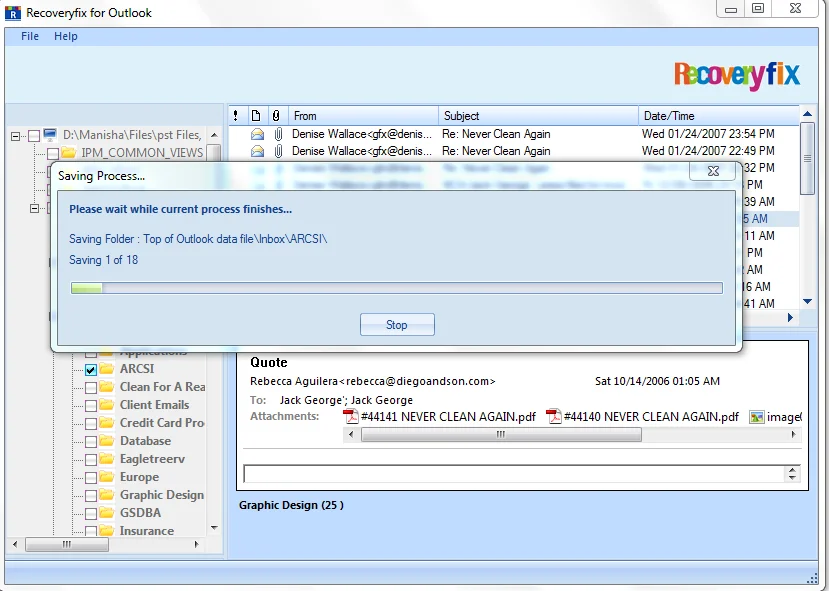
- Moving forward, the saving process will take place; wait for the process to finish.
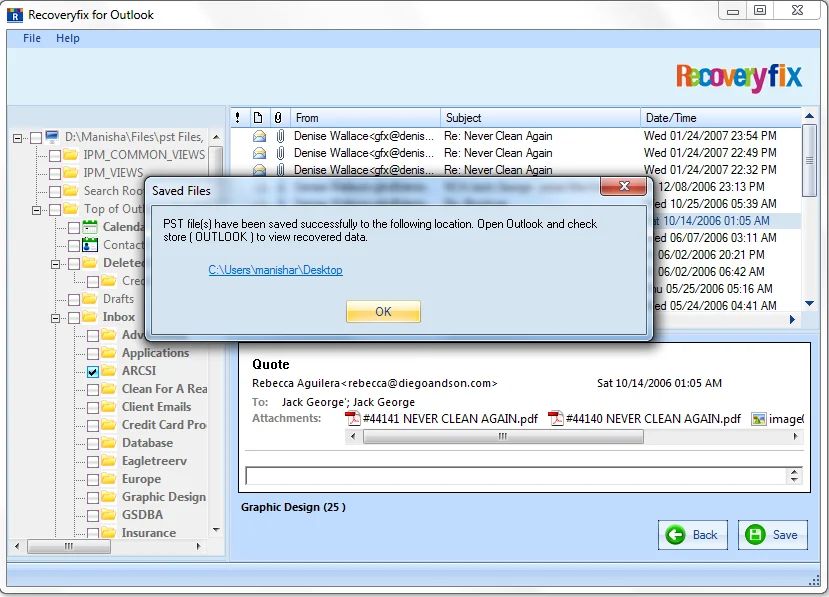
- As the saving process finishes, click on the OK button to finish.
Note: Click on Stop to stop the process anytime.
Conclusion
We have discussed to fix Outlook error 0X800401d “An unknown error occurred” using Inbox repair tool which might not effectively repair large-sized or highly corrupt files. If the error is occurring due to the highly corrupted PST, then Recoveryfix for Outlook PST Repair tool is highly recommended to fix the error. It recovers lost or accidentally deleted Outlook PST emails easily through smart scanning features of the software.