Email messaging has now become the most common mode of communication for professional and personal purposes. MS Outlook is a popular email client which handles most of these emailing tasks efficiently. It helps users to maintain emails, contacts, calendars, tasks, journals and other important information. Outlook handles the dependencies of several businesses in terms of operating and running. However, handling all these things regularly is not an easy task. While using Outlook, many users have to deal with different types of errors. Let’s understand some factors that may cause the Outlook error.
Common causes for Outlook error
These are some other factors that cause Outlook errors with corruption.
- Interrupted internet connectivity.
- Outdated Outlook.
- Accessing suspicious emails.
- Virus and malware attack.
- Corruption in PST file.
Common Outlook errors and their solutions
In this section, we will discuss some of the common Outlook errors along with their causes and solutions.
“Your MS Exchange Server is unavailable”
There are many reasons for this error. The error can be resolved by verifying a few settings:
- Test SMTP server connection using telnet as Microsoft.
- Check if PST/OST files are set to “Read Only.” Make suitable changes if they are set on “read-only” status. This can be done by locating the files on your system.
- Start Outlook in safe mode. It is required in cases where third-party software or any antivirus programs are blocking Outlook.
“Cannot open your default email folders. The information store could not be opened.”
This is one of the common errors in Outlook. To resolve this error:
- Type Outlook.exe in the Start Menu.
- Right-click and select Properties.

- Under the Compatibility tab, uncheck the box, “Run this program in compatibility mode for.”

- Click OK and restart Outlook.
“Office Outlook will not open personal folders, or personal folders do not show up in Outlook”
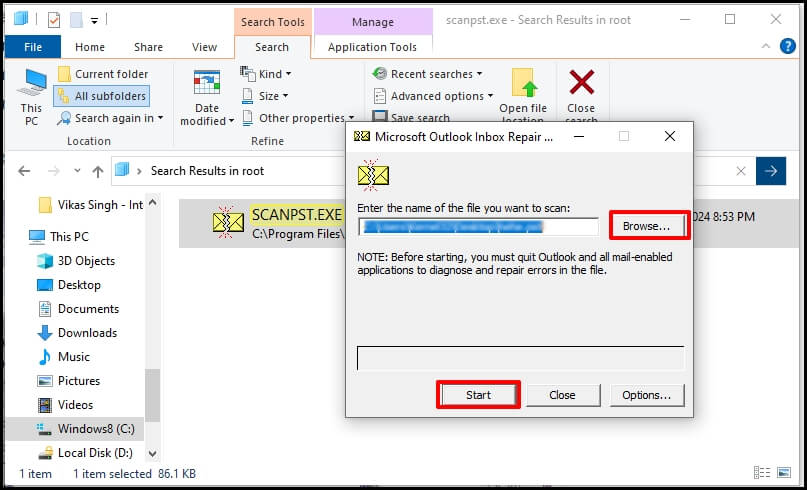
Many Outlook errors are related to PST files. Personal Storage files contain emails, contacts, calendars, tasks, journals and other important information. So, any corruption in PST files can stop the Outlook email client. Microsoft has provided an inbuilt solution, Inbox Repair Tool, to scan and repair corrupt PST and OST files.
- Open scanpsts.exe and browse the corrupt OST file.
- Run the repair process.
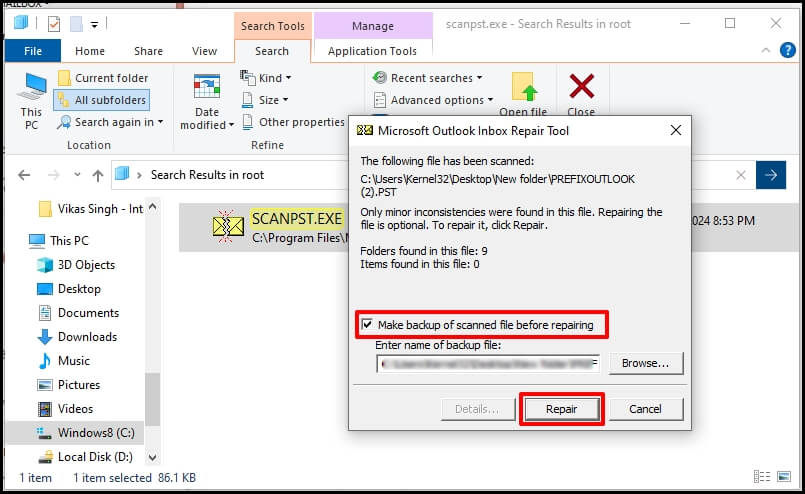
Other than this built-in utility, many third-party tools are available to repair corrupted Outlook PST files.
“None of the authentication methods supported by this client are supported by this server”
This error is related to the authentication in Outlook. You can change authentication settings to fix this error:
- Launch Outlook, go to File > Account Settings and click Account Settings.
- Select Change and click on More Settings.

- Select the Outgoing Server tab and uncheck the box, “My outgoing server requires authentication”.

“Cannot send this item”
Formatting email messages causes the ‘can’t send this item’ error. This error takes place when you enter an incorrect destination email address. Always verify the ‘To’ email address before clicking the Send button. Another possible reason for this error is some modifications in HTML-based email messages.
- Verify the “To” email address.
- Change the format of the outbound message from HTML to plain text or rich text.
Try advanced PST repair software to resolve errors related to Outlook
PST corruption issues cause many Outlook issues. As scanpst.exe is not a viable solution to fix many of these issues, trying professional tools is a good idea. Recoveryfix Outlook PST Repair is the best tool to deal with any PST file errors.
Recoveryfix Outlook PST Repair is the most recommended alternatives to repair your corrupt PST files. The tool allows you to preview the recovered data before saving it to your local drives. Moreover, you can save the recovered emails in formats like MSG, EML, and DBX. This is how the tool works:
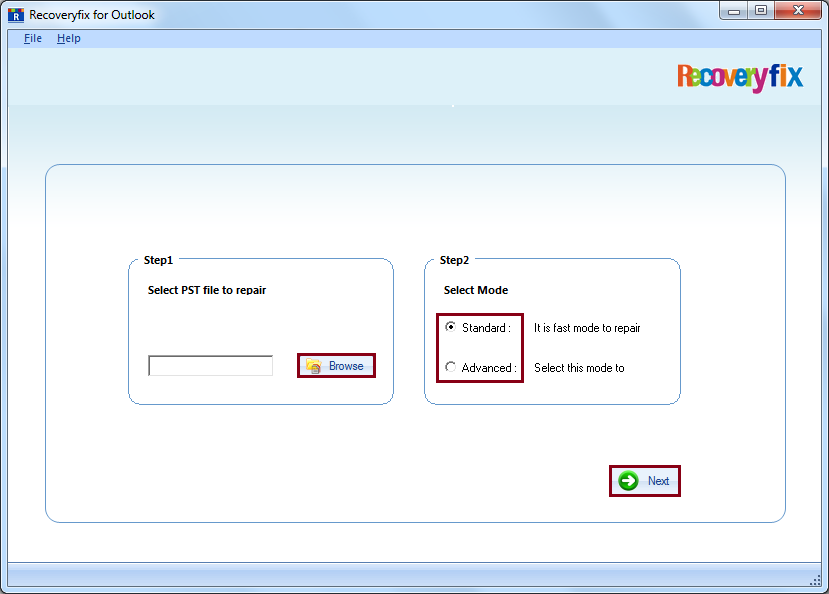
- Launch Recoveryfix Outlook PST Repair software on your Windows machine.
- Select the Mode to recover files. For a quick repair, select the Standard recovery mode. Select the Advanced mode to get better results. Meanwhile, you can click on the Browse button to navigate to the folder containing the corrupt or damaged PST files. Once you added the required files, click Next to proceed further in the process.
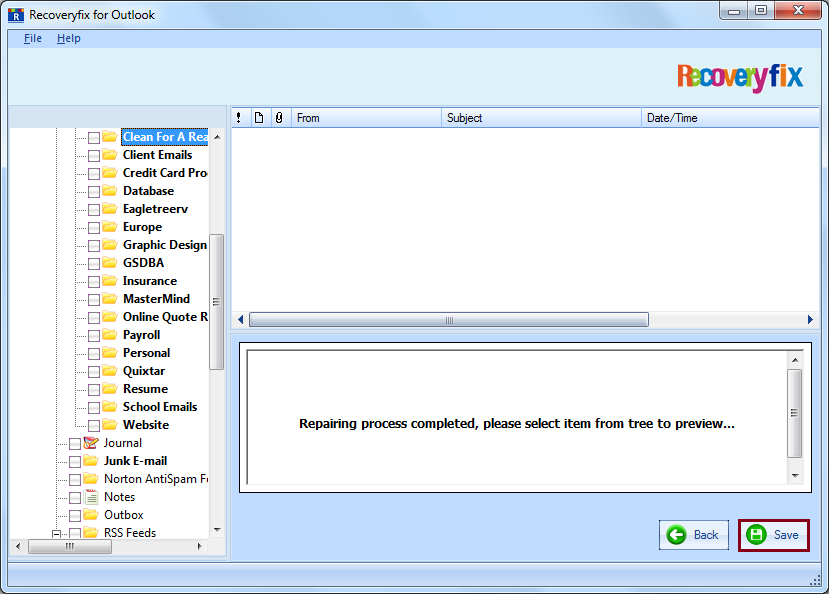
- The interface will provide you a preview of all mailbox data in the PST file. Select the required folders and click Save to save the recovered PST.
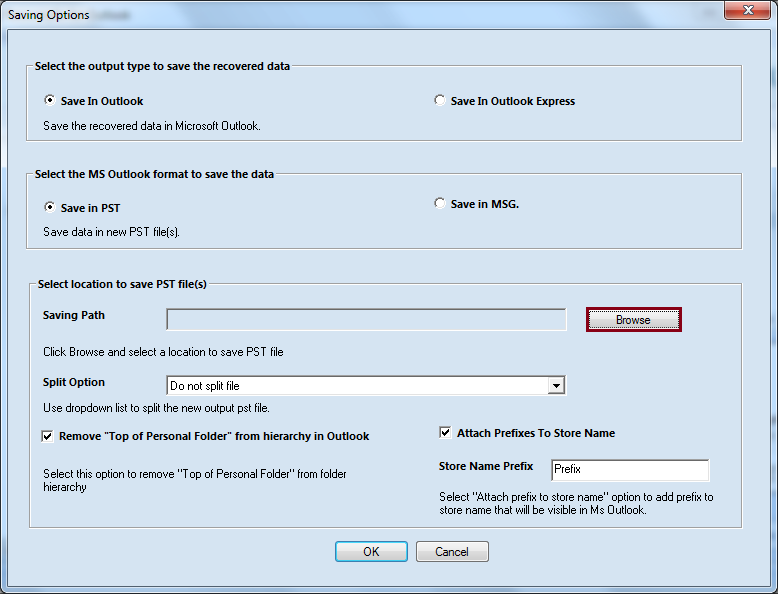
- Select the Output type & format along with a destination path to save the recovered file. If your recovered PST is large, choose the appropriate splitting options, and click OK.
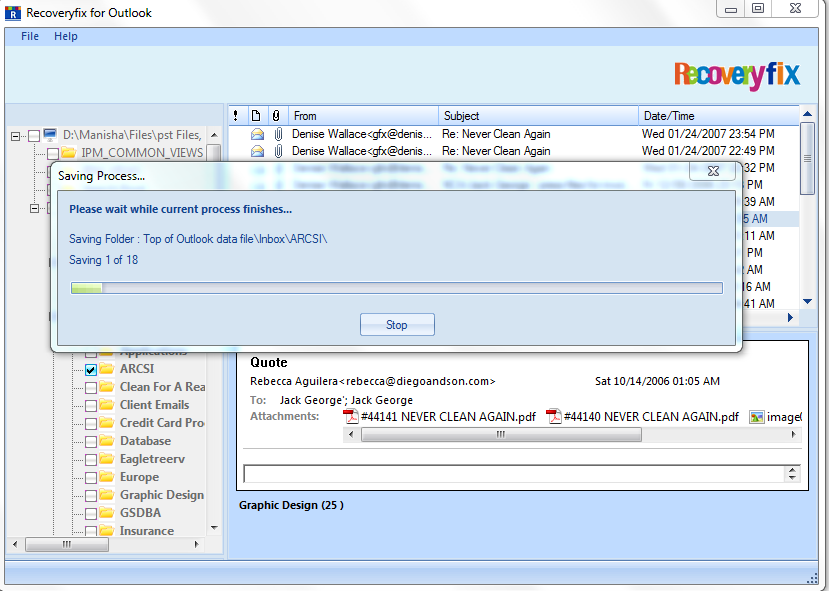
- Wait until the tool executes the recovery process and saves the recovered file to the specified location.
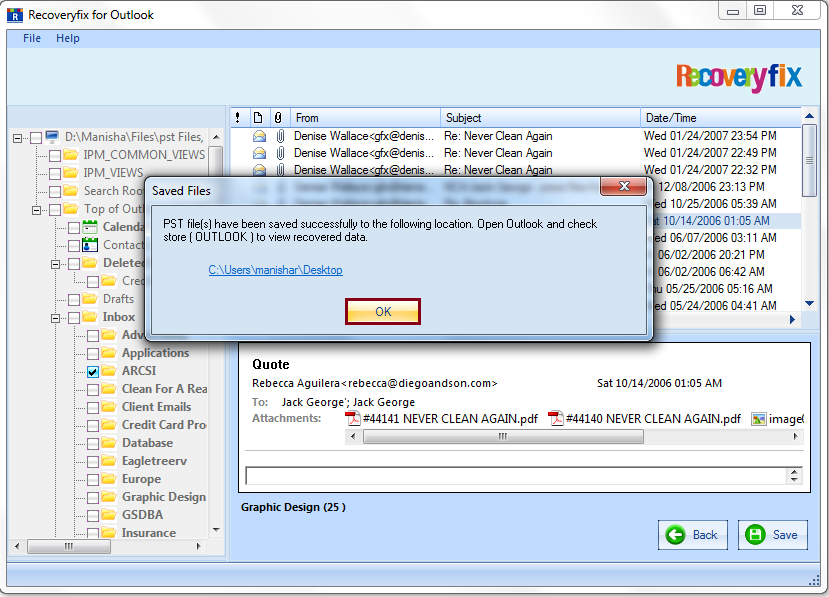
- Once the saving are completed, you’ll get a notification that the recovered file is saved to the specified location. Click OK to finish the process.
Conclusion
At last, if you’re using the Inbox Repair utility to repair your corrupt PST files, then you’ve to perform several iterations of the recovery process to get effective results. Moreover, manual methods don’t always provide the results you expect. Choosing a reliable third-party tool like Recoveryfix for Outlook PST Repair will save you from long and cumbersome native methods.


