Why and how to convert Outlook OST file to PST?

Updated On - July 29, 2024
Microsoft Outlook has become one of the most widely used applications in organizations for internal and external communication. When Cached Exchange Mode is enabled (while configured with IMAP or Exchange account), Outlook holds all the data of your Exchange mailbox on your hard disk in OST files. Outlook synchronizes the OST file with Exchange mailbox when the server is available.
On the Other hand, when you configure your Outlook profile with the POP account, then it will save your mailbox data in the PST format. Due to several factors users look to convert their files from the OST to PST. Let’s look at the factors that compel the users to do this conversion.
Why is it necessary to convert OST files to PST?
There are several reasons when it becomes necessary to convert an OST file to PST. Some of the reasons are:
- Sudden crash of MS Exchange Server due to power failure, virus attack, malicious software, or any other reason. If any such errors occur, then you won’t be able to connect with the MS Exchange Server to access your data.
- During the maintenance or downtime of the Exchange Server, you might not be able to access your mailboxes or synchronize OST files with Exchange. But sometimes, it becomes necessary to have access to Exchange mailboxes. So, at such times, you need to convert the OST file to PST to access those mailboxes.
- Converting OST files to PST will allow you to recover data even after accidental deletion of user mailboxes on the Exchange Server.
- By converting OST to PST, you can migrate Exchange data to other platforms, such as Office 365, Live Exchange, etc.
- There are always chances of OST corruption due to unexpected errors. So, it is a good idea to have a backup of that data by converting it to PST.
These points clearly define why you need to convert OST file to PST. Now, the question arises, how do you convert an OST file to PST?.
When it comes to converting an OST file to PST, there are two major manual methods available to execute this conversion. Here, we will elaborate on both these methods in detail.
An easy method to convert OST to PST is to log in to Outlook with your Exchange account for which the OST file is created on your system. Now, follow the steps below to convert this OST file to PST.
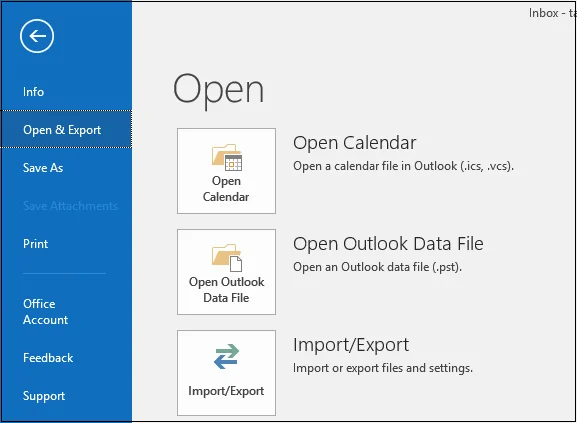
- Go to the “File” tab, click on the “Open & Export,” option & then, select “Import/Export.”
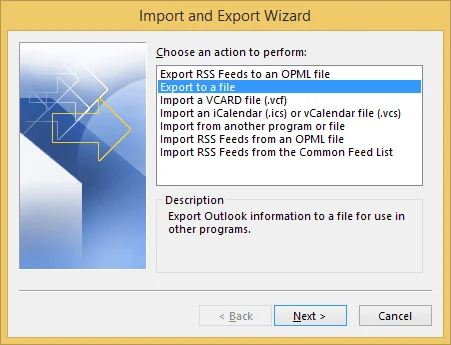
- A new wizard will appear on the screen; select “Export to a file” and click “Next.”
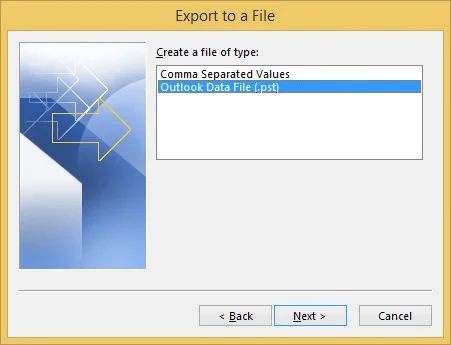
- In the next step, select “Outlook Data File” and click “Next.”
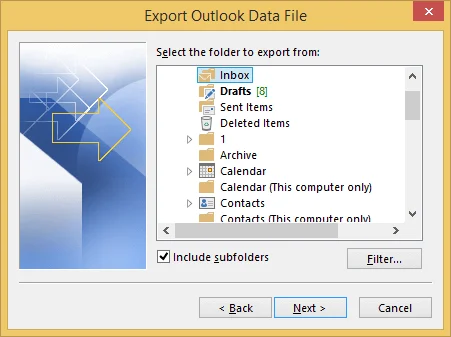
- The list of your mailbox folders will be available here; select the folder that you want to export and click “Next.”
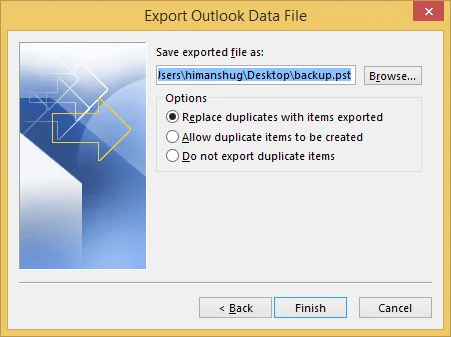
- Select the location where you want to save this file, choose the excerpt options according to your requirements, and click “Finish.”
Note: This method allows you to export one mailbox at a time.
This way, you can export your Exchange Mailbox to PST file format.
Another method to convert OST to PST is to enable archiving in Outlook after configuring your Exchange Account with it. When you enable archiving in Outlook, archived emails will be saved in a new PST file. Also, it helps to keep the size of the mailbox at an optimum level. Follow the below steps to configure archiving in Outlook:
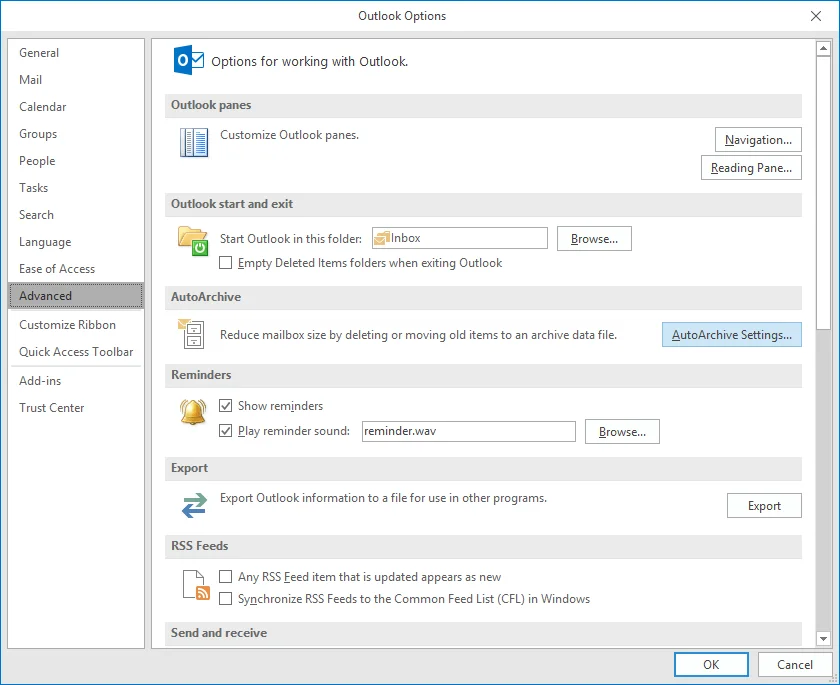
- Open the Outlook application, go to the “File” tab and click “Options.”
- Go to Advanced; a new wizard will appear on the screen; “AutoArchive Settings” from “Auto Archive.”
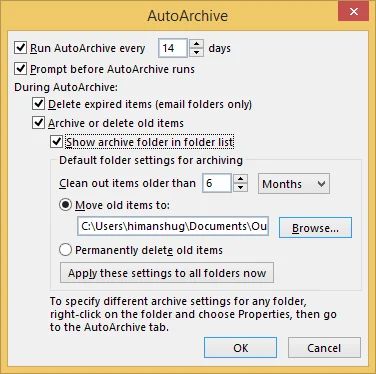
- Now, in the opened window, select the number of days in which you want to run auto archiving. Select the specific folder to save the archived file and click “OK.”
By enabling the archiving option, you can save your mailbox items from OST file to PST.
Although manual methods help you to convert your OST file into PST, it is time-consuming & complex for beginners. Also, it might not be supportive in case of missing Outlook profile or corrupted OST file. So, one alternate solution to convert OST to PST is using specialized tools like Recoveryfix for OST to PST Converter.
This tool allows you to convert OST file to PST quickly. Its enhanced user-interface and extensive features make the tool handy for the user. It maintains the hierarchy or integrity of the mailbox content during conversion. It even allows you to preview the mailbox content before conversion. Utilizing the tool not only helps you to convert in PST format but also supports conversion of OST to MSG.
Wrap Up
Converting OST files to PST becomes important when you start facing sudden crash of Exchange, or you want to back up your Exchange data. In such cases, using the discussed ways help you in the conversion. However, when you are not connected to the Exchange Server or your OST files are not in healthy state, using recommended tool might be the best possible solution. It also helps you to convert the OST file to EML format.