How to set up out of Office in Outlook? [A Complete 2025 Guide]

Published On - May 22, 2025
You are finally about to leave for that long-awaited vacation or important business trip. But leaving your inbox unattended even for a day worries you. Since it will pile up important emails and leave clients waiting for you until you return.
To avoid this, you can set up out of Office in Outlook and keep colleagues, clients, and partners informed when you are away from the organization.
Hence, this blog will show you the exact ways to set up automatic replies across Outlook desktop, web, and mobile versions. You will also learn to set up the same service for non-Exchange accounts using rules, get message templates, & troubleshoot common issues.
What Is an Out of Office Message in Outlook & Its Types?
An out-of-office (OOO) message is an automated email response sent to anyone who contacts you while you’re unavailable.
It’s commonly used in professional communication to let people know when you will be back and whom to contact in your absence.
You can customize different messages for internal (colleagues within your organization) and external (clients or vendors) contacts.
Top Out of Office Message Examples for Auto replies!
Here is the list of different types of replies based on the user’s specific situations.
Simple Out of Office Message:
Thank you for your email. I am currently on leave till [Date]. I will respond to your message once I get back to the office.
Professional/Internal Use:
I am away from my desk from [Start Date] to [End Date]. Please contact [Colleague Name] at [Email Address] for immediate assistance.
Responding-to-Client:
I’m currently unavailable until [Date]. For urgent matters, please reach out to [Backup Contact Info]. Otherwise, I will get back to you after my return.
Remote Work/Offsite:
I’m working offsite today and may have limited access to email. Please expect a delayed response.
How to Set Up Out of Office in Outlook: Step-by-Step Guides!
We have listed down the methods for setting up Out of Office in Outlook across different versions. So, use the process that is suitable for the Outlook version which you are currently using.
1. Outlook for Microsoft 365 (Desktop App – Windows)
Here are the detailed steps to set up Out of office message Outlook for Microsoft 365.
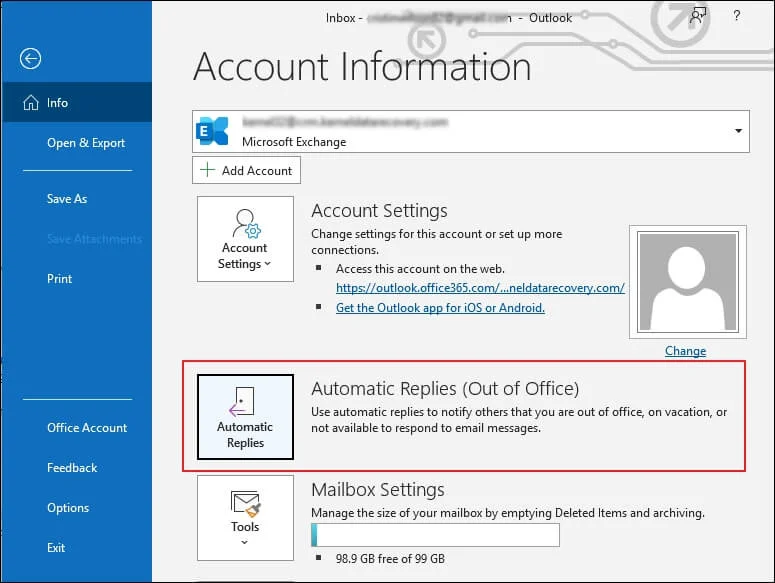
Step 1. Open Outlook and click on File tab.
Step 2. Select Automatic Replies (Out of Office).
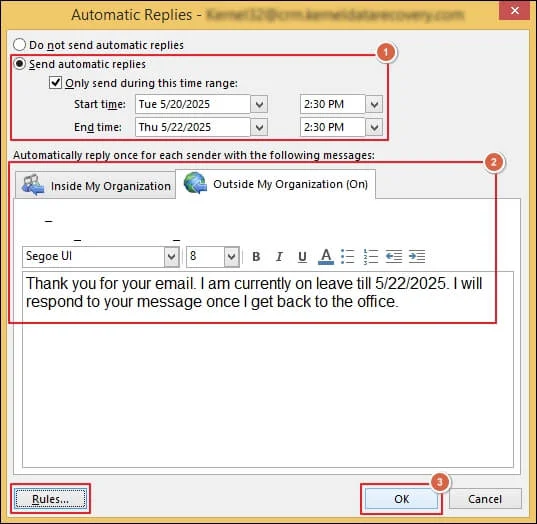
Step 3. Select Send automatic replies in the dialogue box.
Step 4. Check Only send during this time range and set your Start time and End time.
Step 5. Under the Inside My Organization tab, type your message for colleagues.
Step 6. Switch to the Outside My Organization tab and write a separate message for clients or vendors.
Step 7. Click OK to activate.
Note: You can set Rules to make the auto replies more specific.
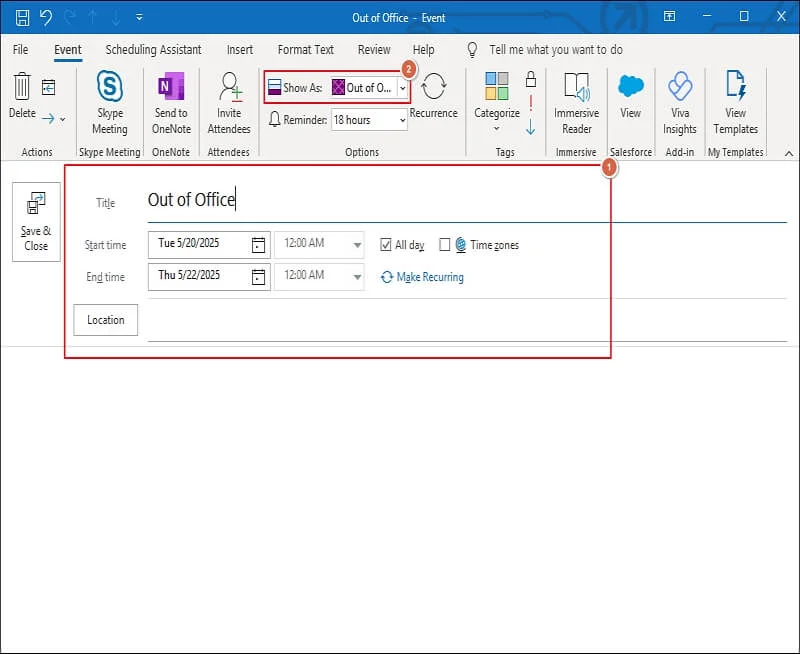
Make changes inOutlook Calendar Integration
Use the given steps to block your calendar and signal unavailability as per your Out of Office set up:
Step 1. Open a new event in your Outlook calendar.
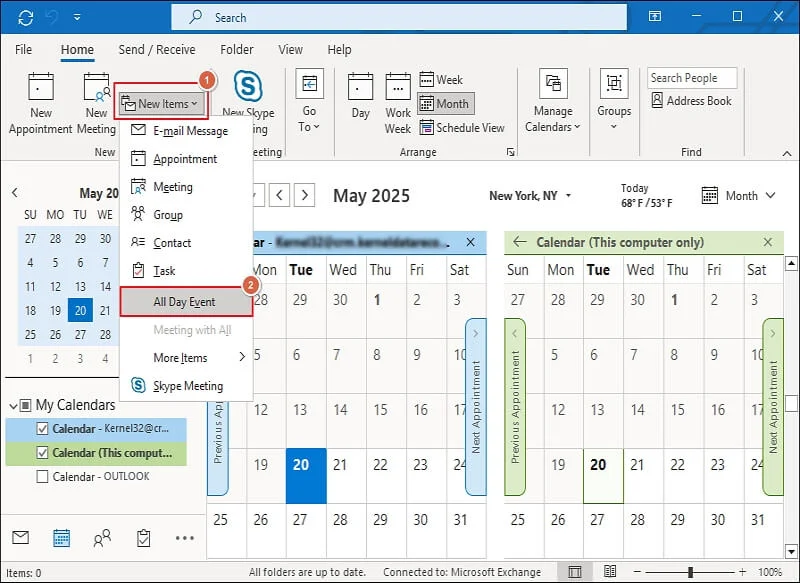
Step 2. Title it “Out of Office“.
Step 4. Set the correct date and time.
Step 5. Under Show As, select Out of Office.
2. Outlook for Mac
Follow the instructions to set up Out of Office message Outlook for Mac.
In Legacy Outlook for Mac
Step 1. Launch the Outlook application.
Step 2. Go to Tools and click on Out of Office.
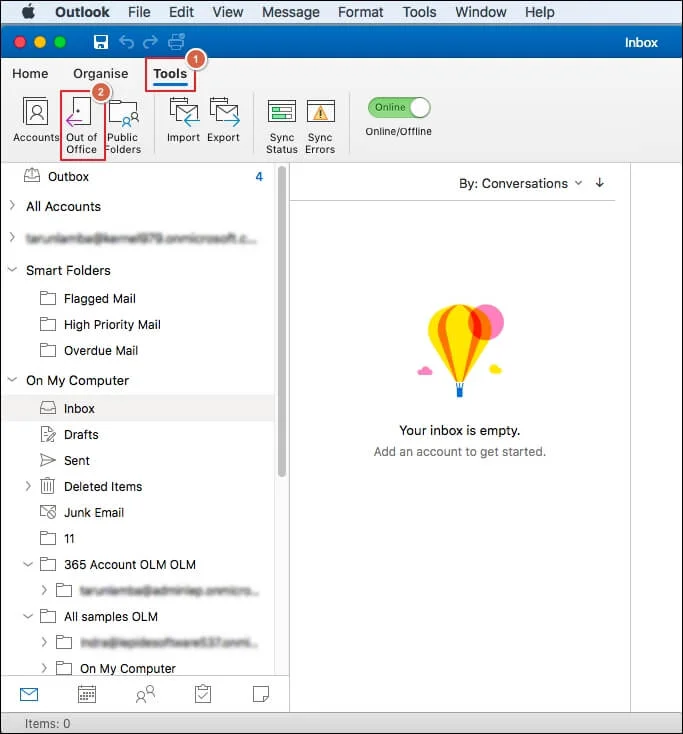
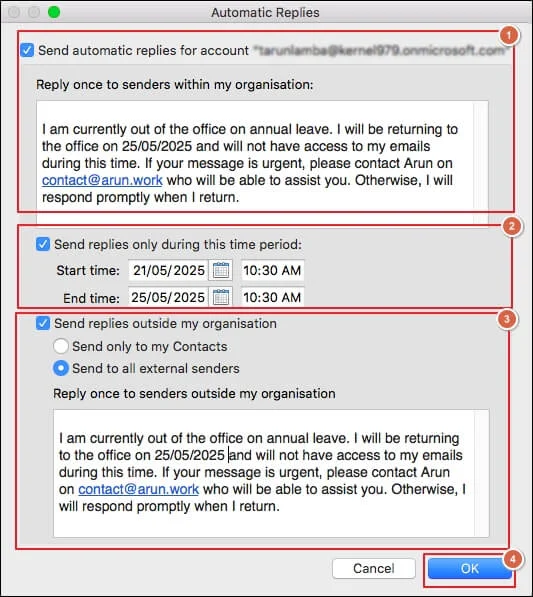
Step 3. Check the Send automatic replies for account.
Step 4. Set a time range and input your messages to internal and external contacts.
Step 5. Click OK to save the changes.
In New Outlook for Mac
Step 1. Open the Outlook application and navigate to Preferences. Then, tap on Accounts.
Step 2. Select the account and click Automatic Replies.
Step 3. Enable and customise the message.
Step 4. Click Save.
3. Outlook on the Web (Outlook.com or OWA)
Here’s how to set out of office in Outlook Web and enable automatic replies:
Step 1. Sign in to Outlook on the Web.
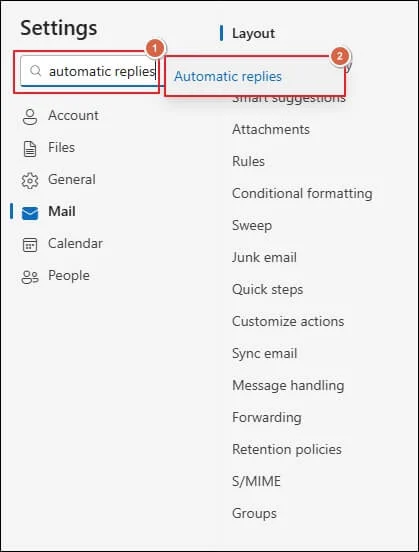
Step 2. Click on Settings icon in the top right.
![]()
Step 3. Type “automatic replies” in the search bar and click Automatic Replies.
Step 4. Turn on automatic replies and proceed further.
Step 5. Set the Start & End time and enable additional configurations as needed.
Step 6. Enter messages for both internal and external senders.
Step 7. Click to Save the changes.

4. Outlook Mobile App (iOS/Android)
Outlook mobile has no native option to set Out of Office directly. But you can enable it by using the given steps:
Step 1. Open the Outlook app.
Step 2. Tap your profile picture > Settings > Account.
Step 4. Turn on Automatic replies and enter your out of office message.
Note: The service is only available for Exchange or Microsoft 365 accounts.
Step 5. Tap the checkmark that is available on the top right corner.
Important to Know: If you don’t see this option, use the web version via your mobile browser.
5. Use Rules for POP/IMAP Accounts
POP/IMAP accounts like Gmail or Yahoo that are added to Outlook do not support automatic replies. But you can simulate an Out of Office message using rules:
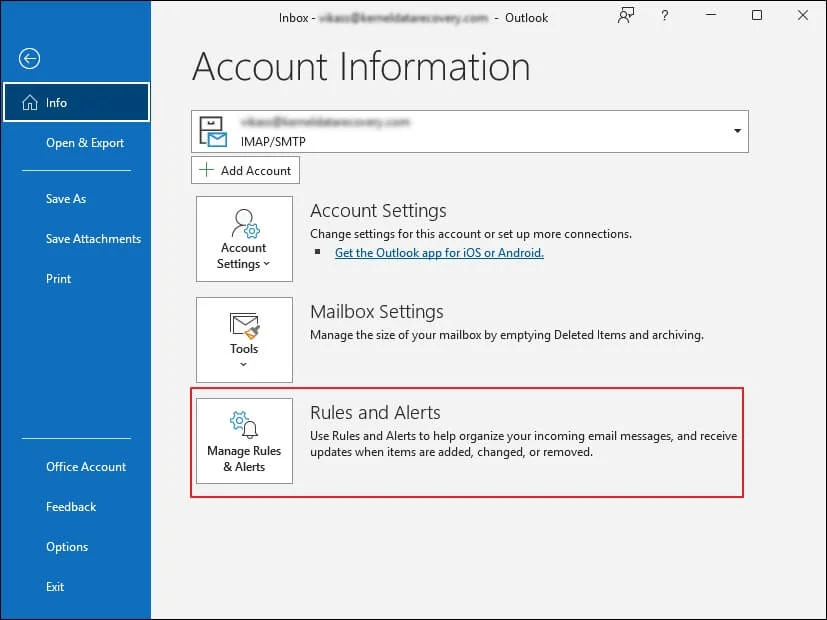
Step 1. Go to File and click on Manage Rules & Alerts.
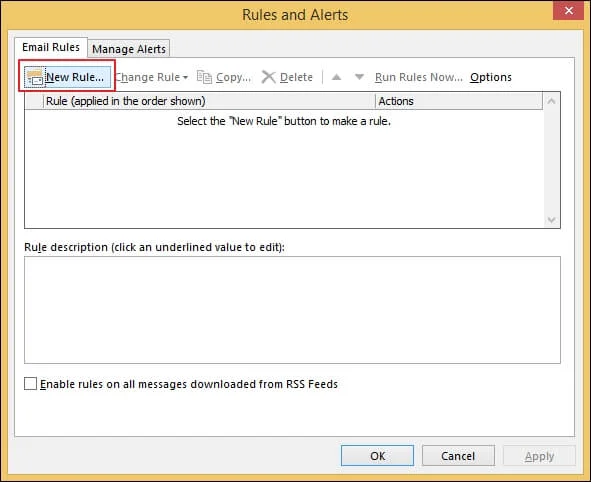
Step 2. Tap on New Rule option to proceed.
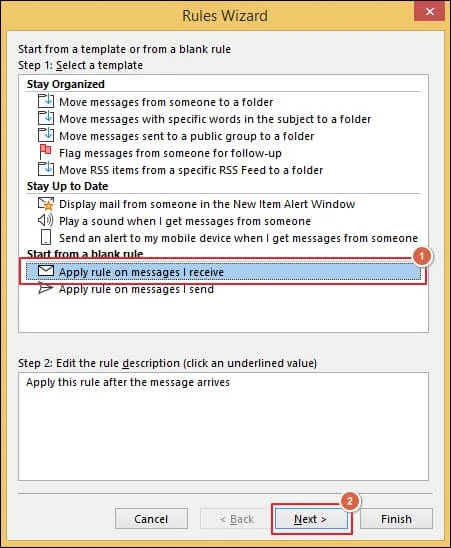
Step 3. Choose Apply rule on messages I receive and click Next.
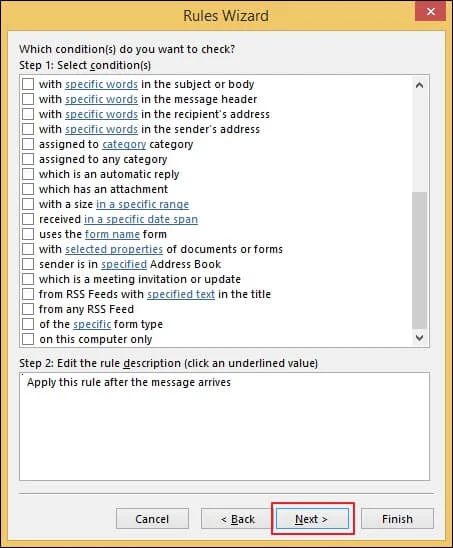
Step 4. Set conditions if needed or leave them unchecked to apply to all emails. Then, tap Next.
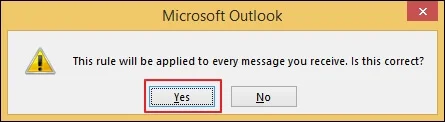
Step 5. Select Yes on the pop-up message to continue.
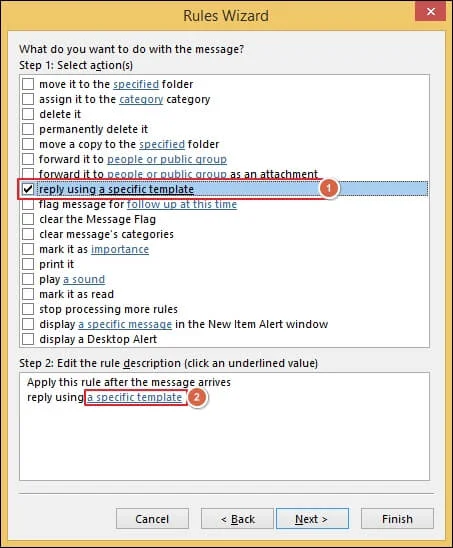
Step 6. Check Reply using a specific template option and click on the link to select a pre-written template or create one.
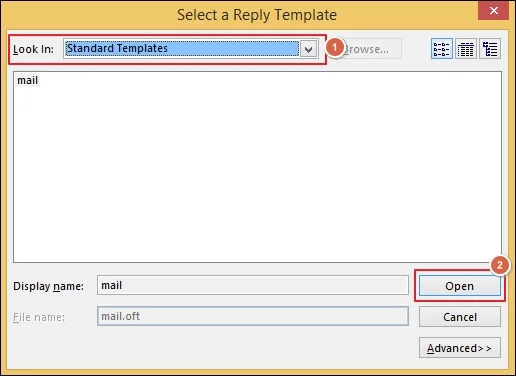
Step 7. Select a reply template from Look In and click Open.
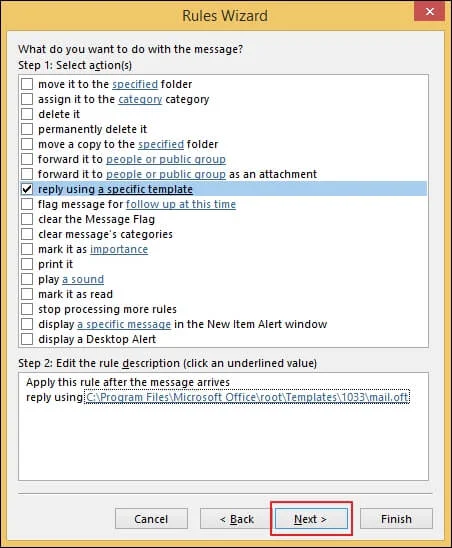
Step 8. Then, proceed to Next.
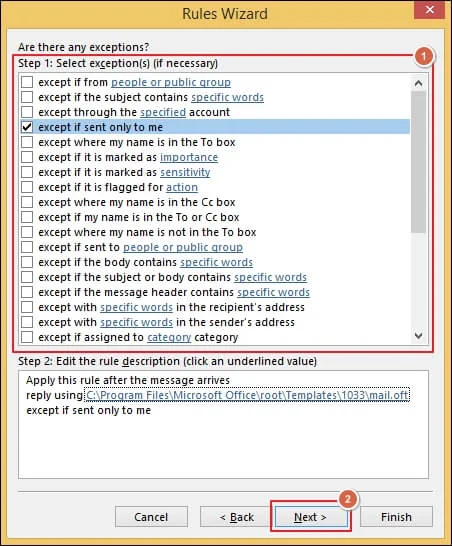
Step 9. Select the required exceptions and tap Next.
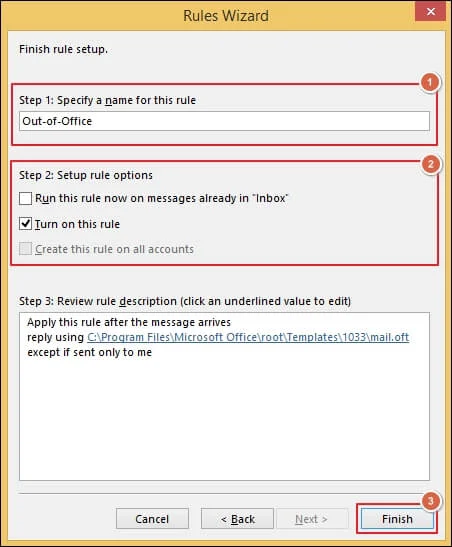
Step 10. Name your rule, Set up rule options and click Finish.
Important to Know: Outlook must stay open and running for this method to work.
Instant Solutions: Fix Common Issues in Minutes!
Solve common errors related to out of office feature with these simple tips:
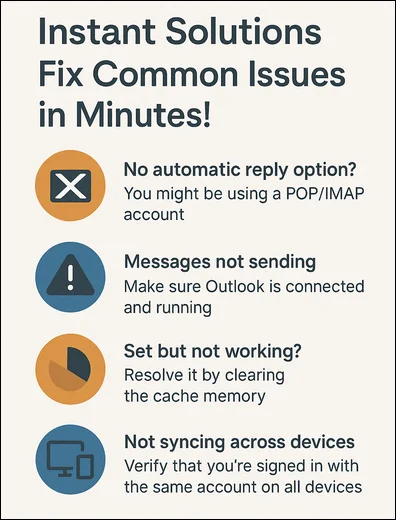
- No automatic reply option? You might be using a POP/IMAP account. This service is available for Exchange and Microsoft 365 accounts only.
- Messages not sending? Make sure Outlook is connected and running if you are using rules.
- Set but not working? Resolve it by clearing the cache memory or restarting the Outlook application.
- Not syncing across devices? Verify that you’re signed in with the same account on all devices. Changes in one account don’t mean they apply to all.
Set Out of Office in Outlook App: Know Do’s & Don’ts
Make your automatic replies perfect with these smart tips. Explore them now:
- Messages should be concise and clear to the recipients.
- Include backup contact details for important clients or vendors.
- Avoid sharing personal information like travel plans & flight bookings.
- Test your message to confirm whether it is working before leaving.
The Ending Note
Here, we discussed a detailed process on how to set up out of office in Outlook and its different versions. You can ensure that your email contacts receive timely information even in your absence.
However, the service is only available for Exchange and Microsoft 365 accounts. If you use different accounts like Yahoo, Gmail, and others, then you have to switch your email service.
For smooth migration, you can opt for advanced tools like Recoveryfix IMAP to Office 365. The IMAP to Office 365 software migrates your emails in just a few steps.

FAQs: Your Own Curious Corner!
Q1. Can I set custom messages for internal and external contacts?
A- Yes, you can set custom messages for internal and external contacts individually.
Q2. Will I still receive emails during my absence?
A- Yes, emails will be received in your inbox unless you create additional rules to handle them.
Q3. What if I forget to set a time range?
A- If you forget to set a time range, then your message will remain active until you manually turn it off.
Q4. Can I update my out-of-office message remotely?
A- Yes, you can update automatic replies through Outlook on the web or mobile application. But the remote service is only available for Exchange and Microsoft 365 accounts.
Q5. How to set up Out of Office in Outlook 365?
A- You can easily set up automatic replies in your Outlook 365 with the following steps:
Step 1. Go to File>Automatic Replies (Out of Office).
Step 2. Set the required details as you need them.
Step 3. Click OK to execute it.