How to Export Multiple MBOX Files to Office 365? [Best Ways]

Updated On - May 18, 2026
- Folder hierarchy mismatched.
- Mailboxes became inconsistent.
- Some attachments failed to import.
- Duplicate folders appeared after repeated imports.
With this unusual experience, one thing is very clear: bulk MBOX file migration needs a structured approach. Get along with this easy-to-understand article for all the needed information, with the practical approaches to accomplish it successfully.
Note: Mozilla Thunderbird, Apple Mail, SeaMonkey, Opera Mail, Entourage, Eudora, etc., are some examples of the email clients that store mailbox data in MBOX format.
Why Do Organizations Transfer Multiple MBOX Files to Office 365?
Check out the reasons & its corresponding benefits for exporting MBOX files to Office 365.
| Reasons | Benefit |
|---|---|
|
Centralized mailbox management |
Easier administration |
|
Cloud accessibility |
Remote email access |
|
Better scalability |
Enterprise-level infrastructure |
|
Improved security |
Microsoft cloud protection |
Important Considerations Before Migration
Here are some considerations that users need to follow before migration, as it reduces the chances of data loss & makes the process smooth.
- Backup of all MBOX files.
- Validate mailbox consistency.
- Verify attachment accessibility.
- Check Office 365 storage availability.
- Organize the mailbox naming structure.
Manual Methods to Export Multiple MBOX files to Office 365
We’ve explained the easy methods with which you can export your MBOX files to Office 365. Let’s learn about them in detail:
Solution 1. With the Help of the Intermediate Format [Best One]
Here, we will perform this method in two parts. First, we will configure the MBOX-supported email client in Outlook & then use Outlook’s Import/Export feature to convert it into PST format. After that, take the help of the Azure AzCopy tool to upload the PST file to Office 365.
Part-1: Convert MBOX files to PST format
- Configure your MBOX file-supported email client [Like Thunderbird] with the Add Account option in Outlook.
- Then, make it the default & go to the File tab.
- Tap on the Open & Export > Import/Export option.
- Choose the Export to a file > Next option.
- Select the Outlook Data File (.pst) & then hit Next.
- Choose the folders to export from with the necessary filters. Tap on the Next option.
- Browse the destination with suitable options. Select the Finish option.
Part-2: Move the Resultant PST File to Office 365
Here we will use Microsoft’s Azure AzCopy utility to upload a PST file to Office 365:
- Install Microsoft Azure AzCopy in your system and make a copy of the SAS URL.
- Launch it and upload the newly created PST files.
- Preview the uploaded PST files.
- Now, click on ‘New Import Job,’ and you will see ‘Ready to import to Office 365.’ Wait until all the processes are 100% done.
Solution 2. Configure the Office 365 Account in MBOX Associated Email Client
In this method, we will import multiple MBOX files into the Thunderbird email client. Then, we transfer mailbox folders manually into the configured Microsoft 365 mailbox [within Thunderbird email client]. Here are the steps for its complete implementation:
- Install & open Thunderbird email client. Configure it.
- Add mailbox files into Thunderbird profile.
- Configure a Microsoft 365 account using IMAP settings.
- Move imported folders into Microsoft 365 mailbox folders.
Know the Limitations of Manual Methods
Although manual methods can help you achieve successful results, they come with certain limitations. Look at them carefully:
- Large mailbox sizes increase transfer time.
- Multiple MBOX files complicate organization.
- Folder mapping becomes inconsistent.
- Attachment handling varies across clients.
- Need proper tech skills for successful results.
Automated Method to Export Multiple MBOX files to Office 365
Till now, we have understood that exporting MBOX files to Office 365 can involve different complexities & data loss situations if performed manually.
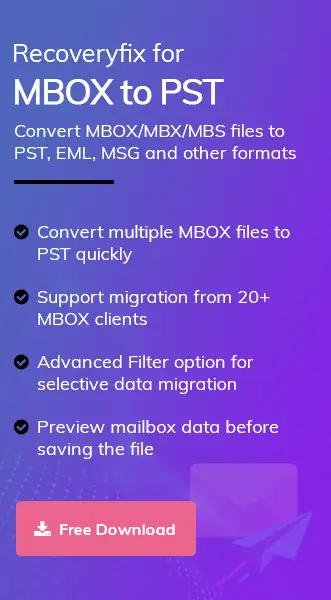
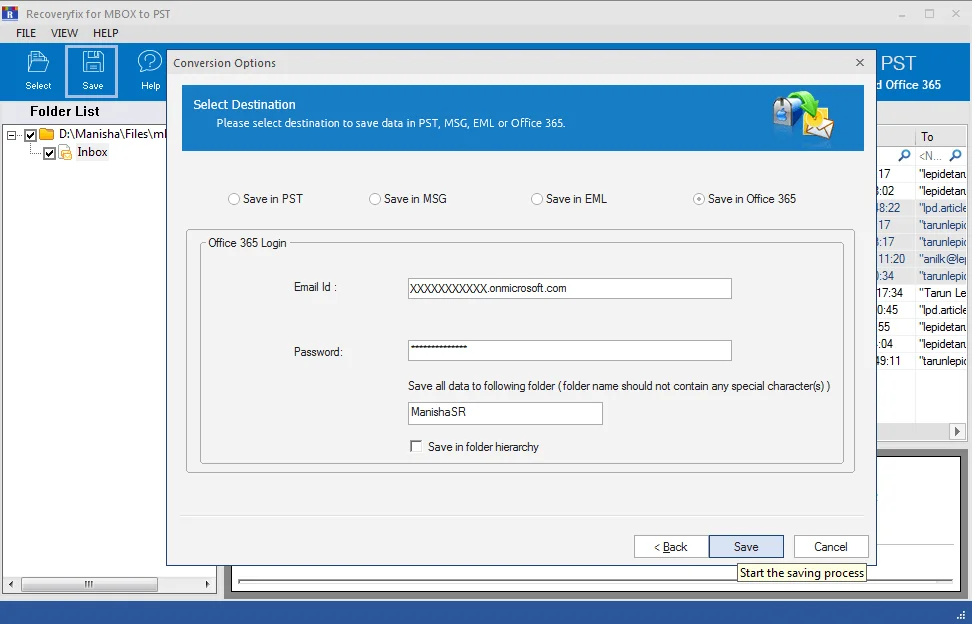
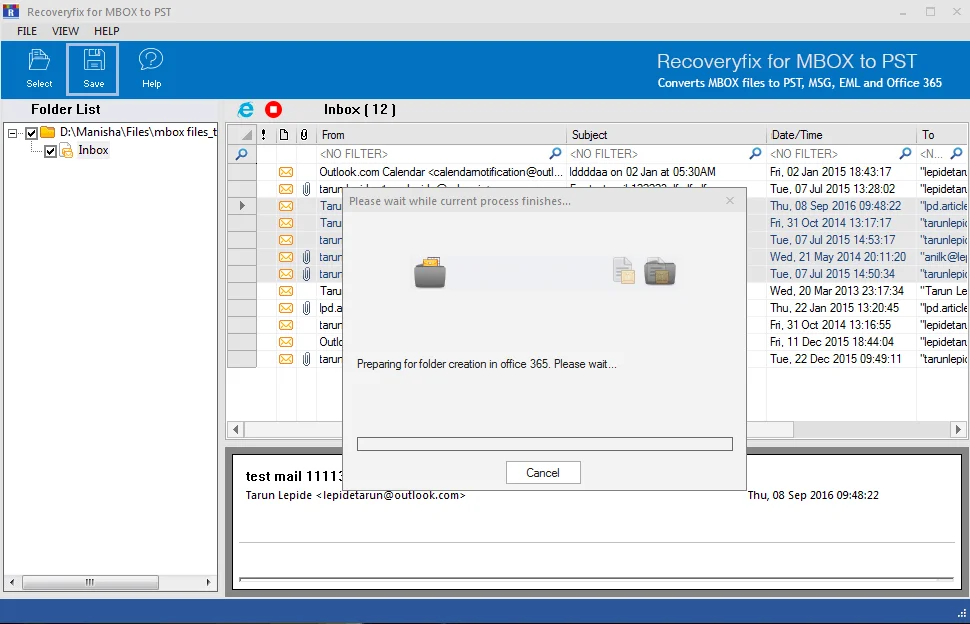
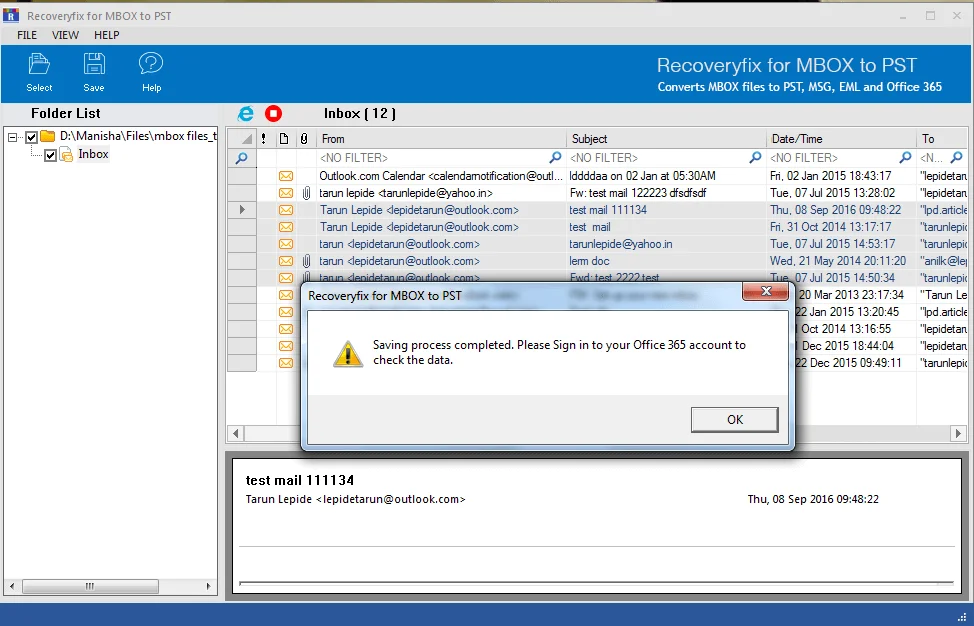
That’s why IT experts or professionals always prefer an advanced solution for this migration that offers quick & accurate results. Recoveryfix is always their first priority as it offers user-focused & efficient software. Its MBOX to PST converter is one of them.
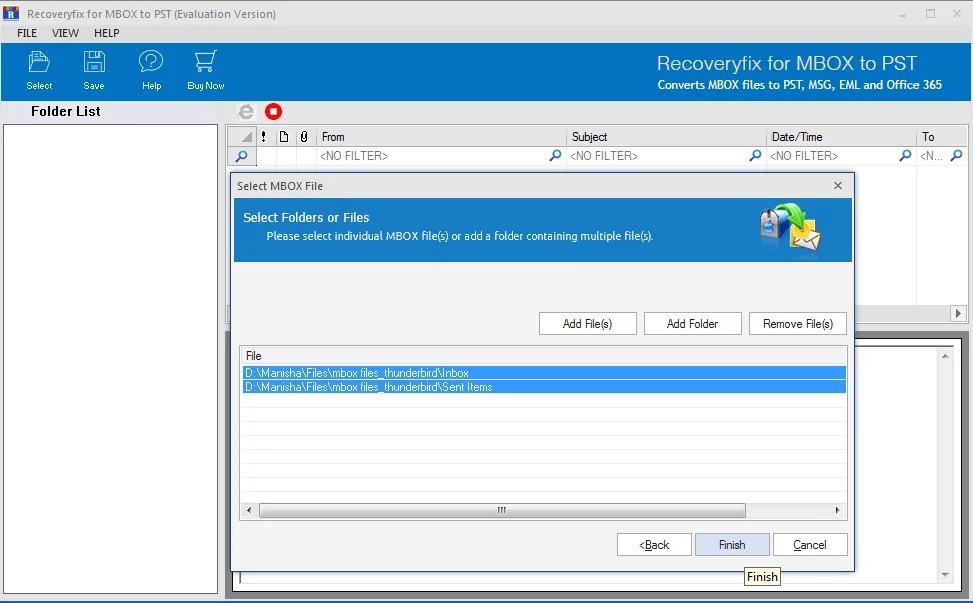
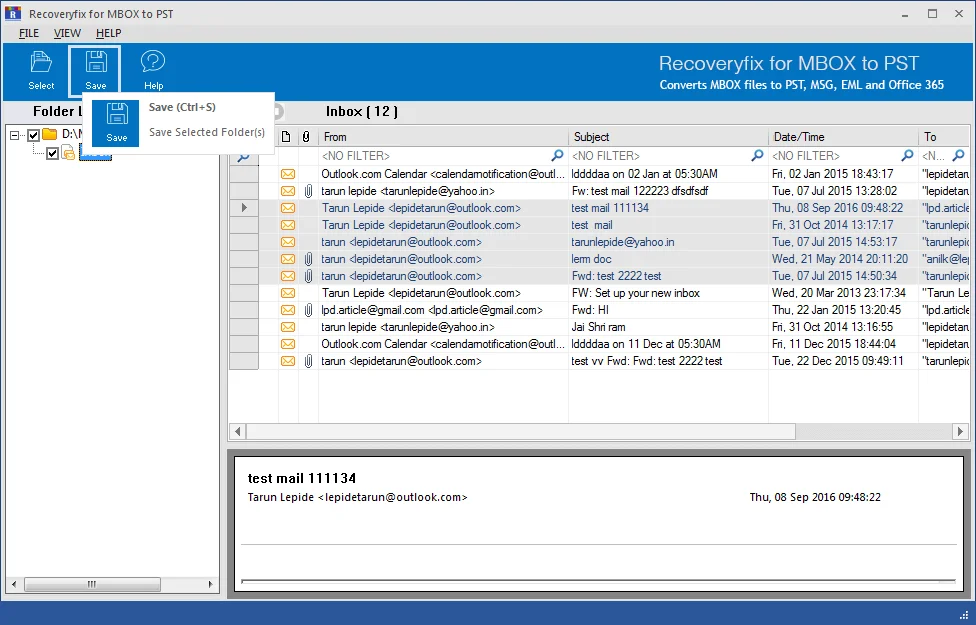
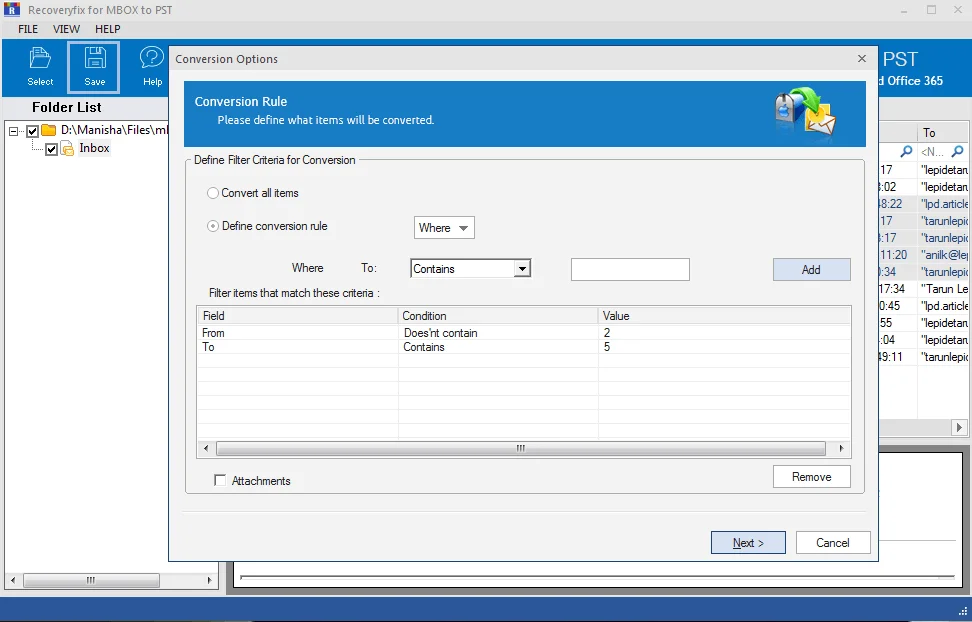
The software is technically advanced, which helps in migrating different email clients to Office 365 without any hassle. This tool is designed using advanced technology and hence has a rich GUI and self-descriptive features, which make it a cakewalk even for beginners to operate it. Let’s see how it works:

Last Words to Export Multiple MBOX Files to Office 365
Transfer multiple MBOX files to Office 365 with the discussed manual methods. Even though manual methods help in migrating from different email clients to Office 365, they may result in data loss or corruption. Hence, you can go with the suggested automated software. Download the tool’s free trial version to test its core features.
FAQs
Q- Why do some attachments fail during MBOX migration?
A- Encoding inconsistencies or incomplete mailbox exports can interrupt the attachment migration process.
Q- Does Office 365 support direct MBOX imports?
A- No. Microsoft 365 does not natively support direct MBOX mailbox imports. You need to take the help of the recommended smart tool for the direct import process.