HostGator to Office 365 Migration: How can I do it?

Updated On - March 18, 2026
HostGator can be referred to as an umbrella of the multiple services. Web hosting is one of its most used services, providing users with an email hosting facility. With the help of HostGator, users can manage email accounts associated with their domain names.
Due to a wide range of features & services, Office 365 is the leading web platform among users. It drives users to migrate HostGator emails to Microsoft 365.
So, the blog will address all the information about this migration. Besides, it provides a complete stepwise approach foreasily migrating HostGator email to Office 365 manually or using an advanced solution.
Reasons for HostGator to Office 365 Migration!
Instead of good email management facilities, Office 365 stands out over HostGator with the following points:
- Office 365 overpowers HostGator in terms of enhanced or real-time collaboration.
- Advanced security & regular updates with security enhancements increase users’ trust in Office 365 instead of HostGator.
- Easy accessibility with flexible subscription plans & centralized IT management meets users’ needs with Office 365.
- After migrating towards Office 365, users benefit from other Microsoft products such as Word, Excel, & PowerPoint, etc.
How to migrate HostGator email to Microsoft 365?
To transfer email from HostGator to Office 365 manually, you need to go through a long process. So, we have divided the whole process into different parts. Make sure that each step should be followed accurately:
Part 1: Get the email client details from HostGator!
Follow the steps to get the email client settings details:
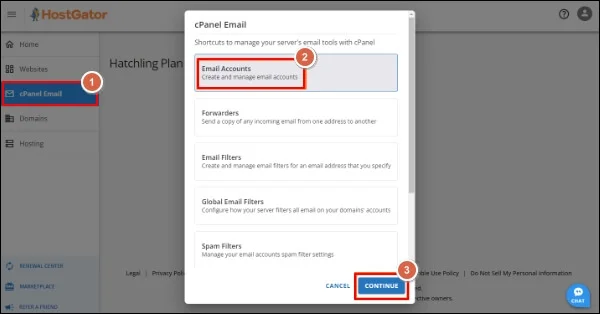
Step 1. Sign in to the HostGator portal & tap on the cPanel Email.
Step 2. Choose the Email Accounts & hit on the Continue option further.
Step 3. Under the Email Accounts page, choose the desired email accounts from the list & tap on Connect Devices.
Step 4. Search for the Mail Client Manual Settings and note down the provided information in the Secure SSL/TLS Settings (Recommended) section. Server settings may vary depending on your account.
Part 2: Add your HostGator-associated email account in Outlook!
Add your account in the Outlook with the following ways:
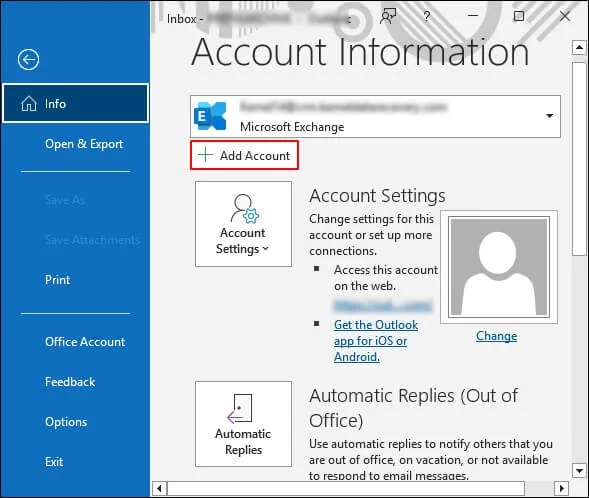
Step 1. Access the Outlook application & go to the File> Add Account option.
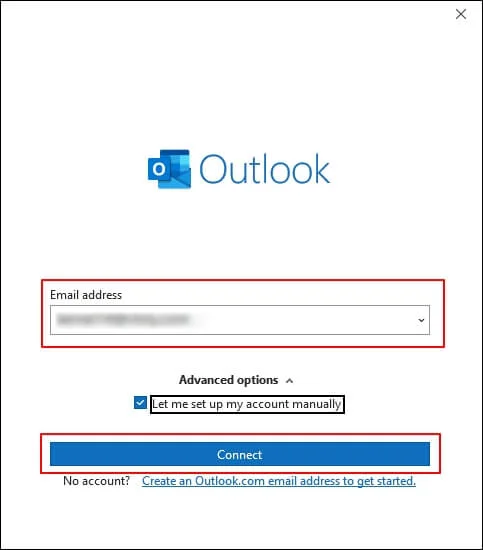
Step 2. Provide your HostGator email address. Check the displayed section & hit Connect.
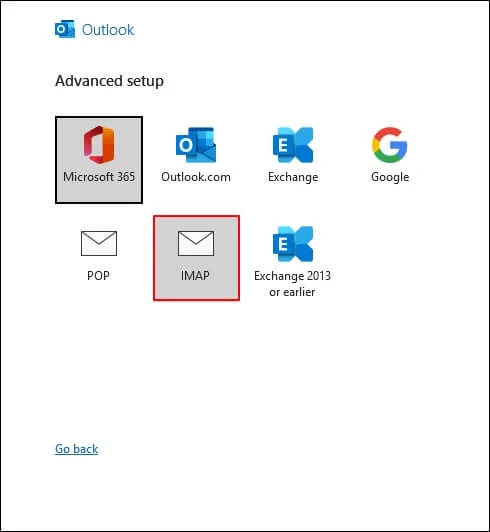
Step 3. Select the IMAP option in the account type section.
Step 4. Provide the secure SSL/TLS Settings information of your HostGator email client on the next page. Click Next.
Step 5. Fill in the password prompt on the last screen & tap on the Done option.
Step 6. Now, you will see your HostGator emails in the Outlook application.
Part 3: Export the HostGator emails in the PST format using the Outlook Import/Export utility!
Look at the following steps to move further in the process of migration:
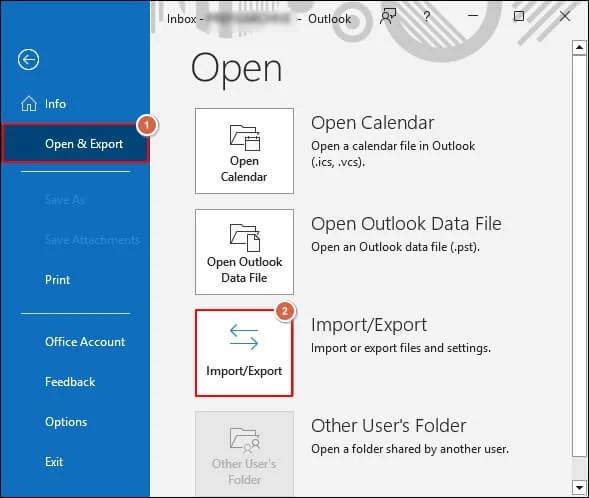
Step 1. Open the Outlook application & hit the File tab.
Step 2. Go to the Open & Export > Import/Export option.
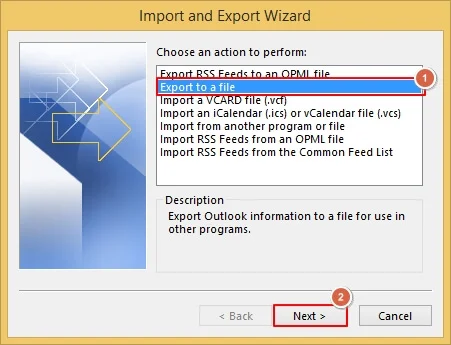
Step 3. Select the Export to a file option. Hit Next.
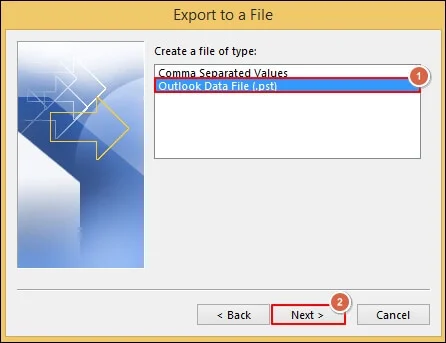
Step 4. Tap on Outlook data file (.pst) & click on the Next option.
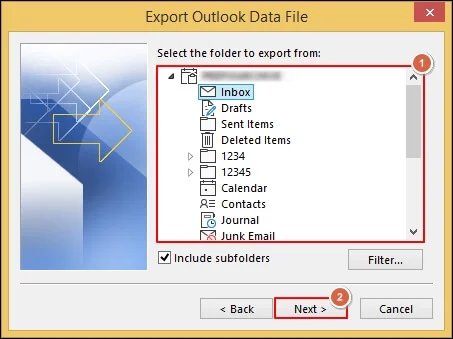
Step 5. Select the desired folders you want to export & tap Next.
Step 6. Browse the saving location with suitable Options. Tap on the Finish option.
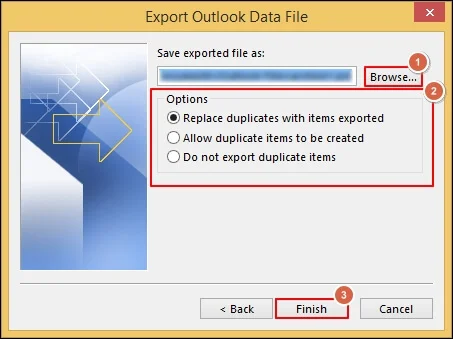
Step 7. Provide passwords once prompted to secure your PST file. Hit OK.
Step 8. Now, your HostGator emails are saved in the PST format. You need to use the eDiscovery tool to import the PST file into Office 365.
Step 9. Otherwise, you can use your Microsoft account in Outlook like HostGator, but after removing it & further import that PST file in the desired folder by using the Import/Export feature.
Step 10. Once the process is completed, you will successfully use the HostGator-associated emails in Office 365.
Why is using the manual method not suggested?
Here are some concerns with the manual method that you should be aware of:
- Lengthy process makes it time-consuming & tedious for users.
- Manual transfer of emails needs an Outlook application.
- High risk of data loss during transfer of HostGator email to Microsoft 365.
- Improper server settings might disturb your complete migration.
- No guarantee of data integrity of the transferred emails.
- Tech-skills are required to execute the process accurately.
Recommended Advanced Solution for HostGator to Office 365 Migration!
As you can see, the manual method has many limitations and can impact more if any steps are missed or wrongly performed. So, to avoid these limitations & make the migration easy, you need to go with the automated IMAP to Office 365 solution.
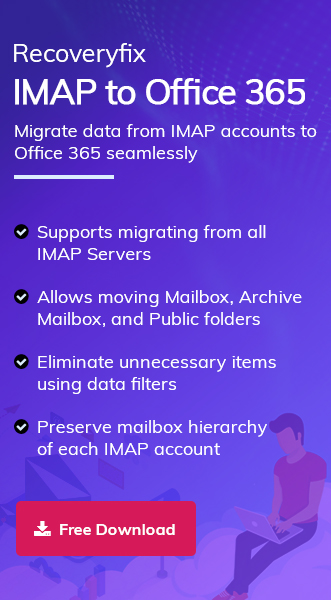
Considering the customer feedback or professionals’ recommendations, Recoveryfix IMAP to Office 365 tool is the most suitable one. The tool’s advanced algorithms allow users to migrate from bulk IMAP server accounts to Office 365 hassle-free. Those IMAP server accounts can be AOL, Amazon Work Mail, ZOHO, Gmail, Yahoo, HostGator, etc.
Explore the tools advanced facilities that make it most handpicked:
- Boost the migration process with automated mapping using the CSV file.
- Wide range of filters make the migration more structured & quicker.
- Migrate specific folders to Office 365, such as mailboxes, archive mailboxes, or public folders.
- Offers incremental migration facility that avoids data redundancy in the results.
- Track the HostGator to the Office 365 mailbox migration with the generated final report in CSV format.
Conclusion!
This easy write-up has covered all the aspects regarding transfer of HostGator email account to Office 365. Along with the reasons, we have also discussed both manual and advanced approaches to perform the migration.
But involved limitations of the manual method make it less preferred than the recommended advanced one. For hands-on experience, you can check out its free trial version.