Create a Distribution List in Outlook! [100% Info]

Updated On - September 11, 2025
Email communication is the key factor of any growing organization. It needs to be done smartly with clarity. Whether you’re emailing your team, clients, or club members, typing in multiple email addresses every time can be a hassle. That’s where Outlook distribution lists come into the picture to make it smooth.
Our expert guide will focus on this to know how you can create a distribution list in Outlook with the manual methods. Besides, we will provide you with information about the importance of email backup for the long term.
Important to Know: A distribution list in Outlook is an ideal feature for those who regularly contact a team, department, or external group. After that, users can send an email to a group of people using a single contact entry. Outlook Desktop, Web, & even Mac versions have this feature.
Top benefits of using the Distribution List in Outlook!
Check out the following benefits that you get by using the Distribution lists:
- Email multiple recipients without retyping each address, save time & effort.
- Prevent missing contacts or avoiding mistakes by centralizing addresses.
- Helps to keep your communication streamlined within the organization.
- Offers consistent & efficient email communication with ease.
How to Create a Distribution List in Outlook?
Let’s look at the stepwise approach to create a distribution list in different Outlook forms. Choose as per your requirements. However, ensure that steps are followed in the correct order:
Condition 1. In Outlook Desktop
Follow the steps to execute the process in Outlook Desktop version:
- Open the Outlook application and go to the bottom left corner. Click on the People icon.
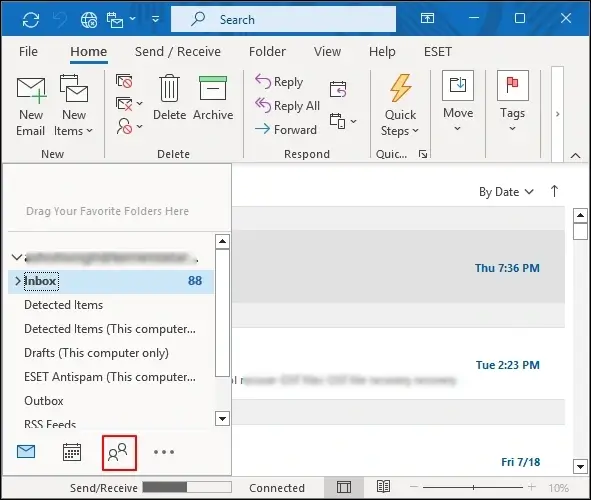
- Right-click on the space & choose the New Contact Group option.
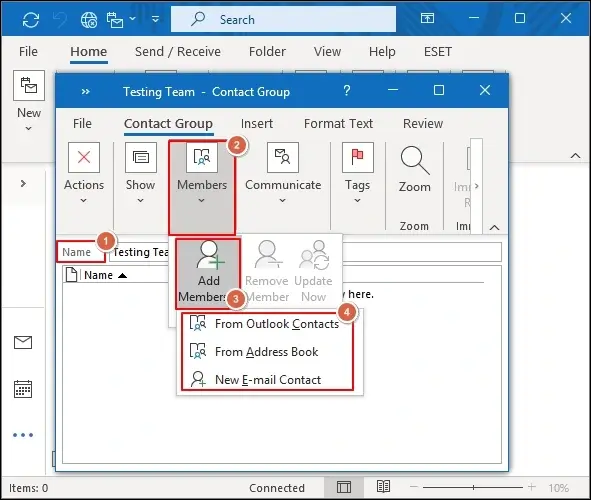
- In the Contact Group, provide the name of the group. Go to the Members > Add Member & then choose any of the following:
- From Outlook Contacts: Add from existing address book.
- From Address Book: Add people in your organization.
- New Email Contact: Manually add an email address.
- Click OK & then tap on the “Save & Close” option.
- Your distribution list is now ready to use. Just type the group name in the To/CC/BCC field when composing an email.
Condition 2. In Outlook Web [Office 365]
Look at the steps to implement the process correctly:
- Go to Outlook.com and log in with your credentials.
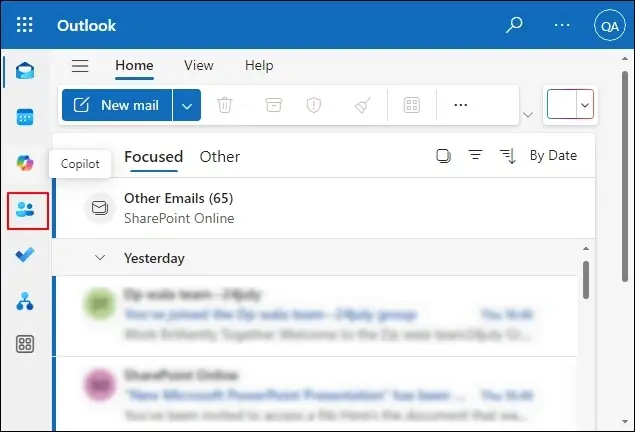
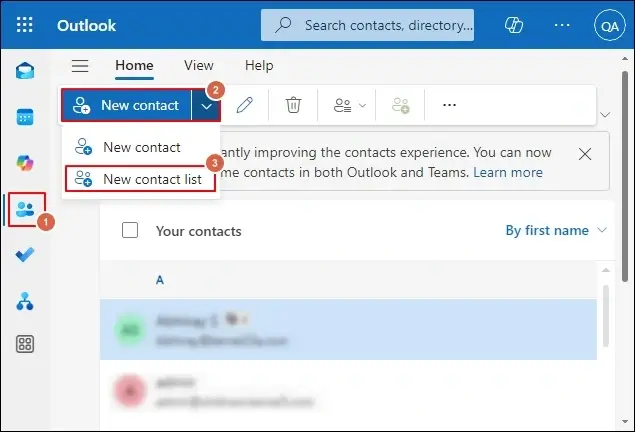
- Click the App Launcher in the top-left corner and open People.
- Click on New Contact > New Contact List.
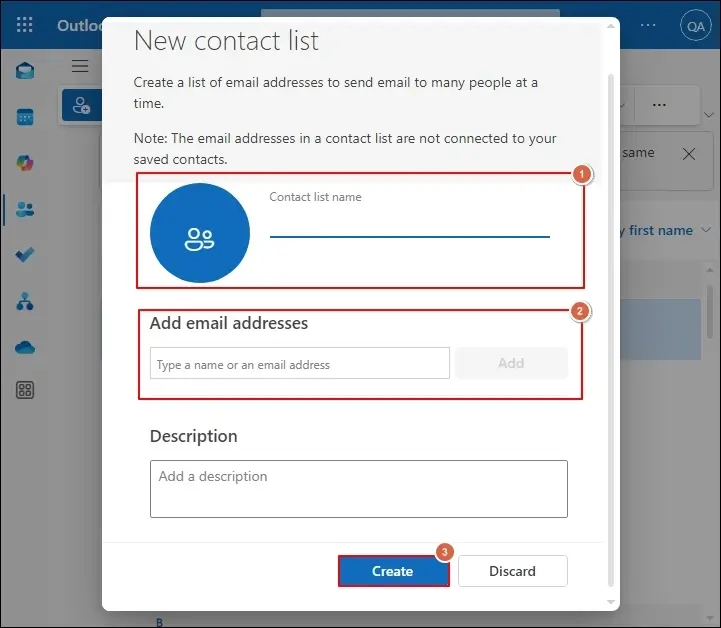
- Provide the name of your list, add the desired email addresses & then tap on the Create Option.
Condition 3. In Outlook for Mac
Are you looking to manage distribution list Outlook for Mac? Try out the following steps:
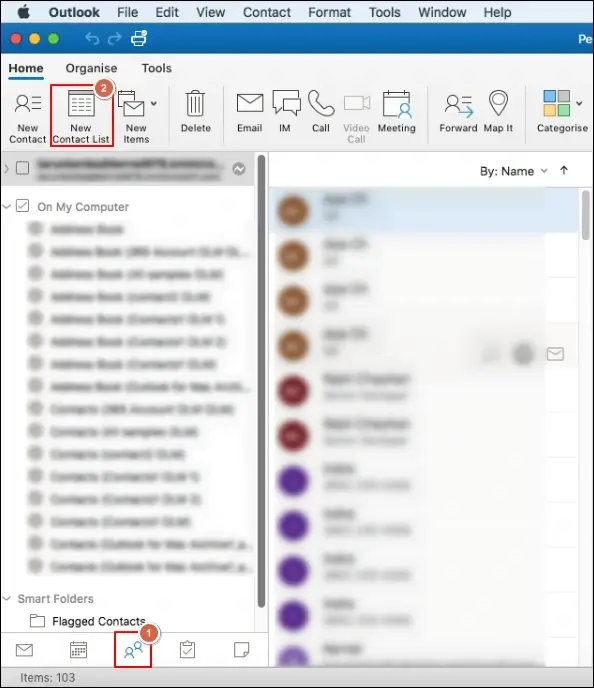
- Open Outlook and click on the People icon> New Contact List.
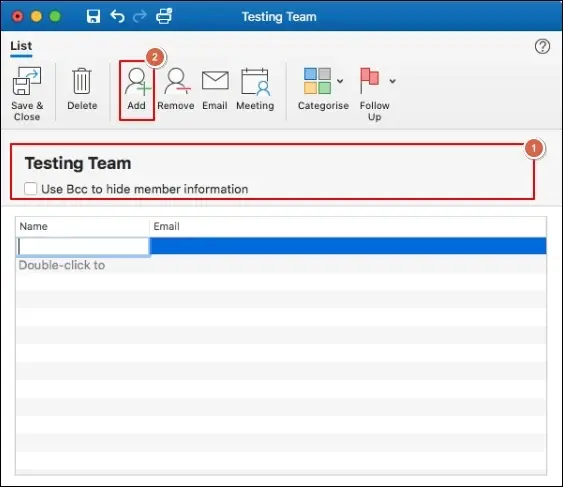
- Enter a name for the group. Add the Members & click on Save & Close to create the group.
- Max recipient limits apply (e.g., 500 for Outlook.com).
- Distribution lists are not synced across all devices automatically.
- Consider Microsoft 365 Groups for more robust collaboration.
Want to share the Distribution list? Check Out Now!
To share the distribution list with someone, you need to follow the steps as mentioned below:
- Open Outlook and search for the Contacts.
- Double-click on the distribution list that you want to share.
- Then, tap on the Forward Group > As Outlook Contact options.
- Compose a new message and send it to the intended recipient.
Modify the Distribution list accordingly:
To Edit: Open the list, click Add Members, or select existing ones to delete.
To Rename: Open the list, change the name in the title bar.
To Delete: Right-click on the list and click on Delete.
Additional tips to get 100% successful results!
Consider the following tips to tackle future inconveniences:
- Refresh or restart Outlook if the lists are not appearing.
- Check email formats when you find that sending/receiving emails is not working.
- Ensure you’re signed into the correct Microsoft account to avoid sync issues.
- Regularly review and revise to keep the list updated.
- Use descriptive names that will help you recognize groups easily.
- Don’t overpopulate lists. Segment them as needed for structured communication.
Fear of losing the emails? Try the advanced solution!
The chances of a cyber-attack increase as the technological boom increases. It can be avoided only by taking precautionary actions, such as data backup at different locations. By taking a backup of your emails in the local system, you can save your data for the long term. Besides, use that data offline for personal uses such as auditing. Worried about the methods for data backup?
You can go with the manual methods for the data backup, but their involved limitation & restricted facilities can’t give you satisfactory results. So, professionals recommend an advanced OST converter over them.

Recoveryfix OST converter stands out in this category due to high-tech features & advanced filters. You just need this software for all your OST-related issues. Be it securing them for the long term, removing their corruption, or converting them into other file formats.
Final Thoughts
We have provided a complete knowledge about how to create an email group in Outlook with the manual methods, along with its effectiveness in real-world scenarios.
But still, protecting emails can be a safer option for future purposes. Hence, consider the recommended OST to PST conversion tool to take a backup of crucial information so that you can stand firmly even in odd situations.
FAQs
Q1- Can I include external email addresses in a distribution list?
Ans- Yes! You need to use the “New Email Contact” option when adding members.
Q1- What’s the difference between Contact Groups and Microsoft 365 Groups?
Ans- Contact Groups are simpler and client-based, while 365 Groups offer collaboration features like shared calendars and files.
Q1- Can I create nested distribution lists?
Ans- Yes. For this, you have to add another contact group as a member to make nested lists.