4 Methods to Backup Thunderbird Emails

Updated On - February 14, 2025

Mozilla Thunderbird is a free and open-source email client that many professionals and individuals use to send or receive emails to transfer essential data. Thunderbird is easy to set up and customize. Nowadays, data security has become a necessity in changing technology day by day. So, data theft, data integrity, and information loss have become a significant concern among users.
It becomes very advantageous when the user knows about the back up Thunderbird mail to the external hard drive process. It is quite important to back up Thunderbird email client’s emails and save the information on the system’s hard drive to prevent data loss in the future. In this blog, we will go through the various reasons and methods to back up Thunderbird emails on the hard drive.
Reasons for backup up Mozilla Thunderbird emails to hard drive
Data backup plays a significant role in ensuring data safety and integrity for the organization’s purposes. Generally, there could be various reasons for the backup Thunderbird emails. Some of these are:
- Backup upgrades performance by deleting the old bulky emails.
- Ensures continuous business by eliminating the risk of local server interruptions.
- Prevents data loss.
- Makes data migration easier.
After seeing the advantages of backup Thunderbird email on a hard drive, let’s move towards backup methods.
Methods to backup Thunderbird emails on the external hard drive
After extensive research, we have come up with the best possible manual solutions that help users to back up Thunderbird mail on a local hard drive easily. Follow the methods carefully for the desired results.
Method 1. Using Save As utility to backup Thunderbird emails
It is one of the best built-in utilities of this application that helps you execute the backup Thunderbird emails operation easily. However, it needs to be performed carefully for better results. Hence, follow the given steps to accomplish the task:
- Start the Thunderbird email client and click on the desired folder, which stores the items you want to back up.
- Now, select the emails you want to backup, right-click on the mouse, and tap on Save as from the options.
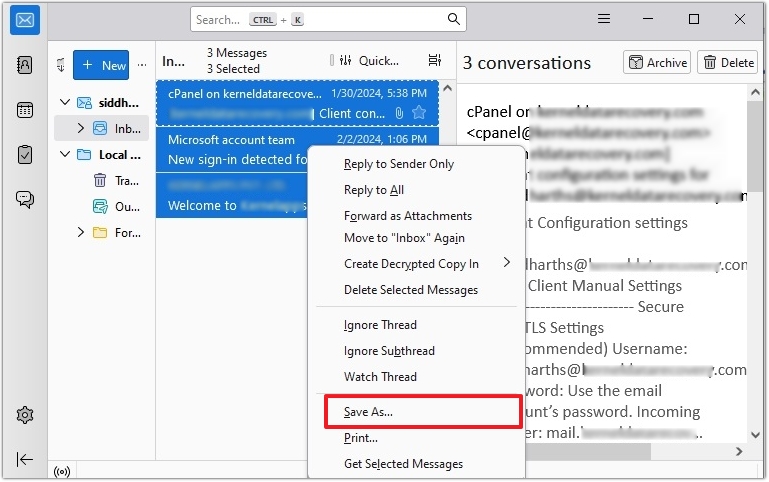
- Select the desired folder location in File Explorer and click on Save.
This method will save your emails in EML files separately. Now, you can open these email files in any email client.
Method 2. Backup Thunderbird emails using Add-ons in MBOX format
This method will save the whole email folder in MBOX file format, which can be accessed by different email clients later. For Thunderbird backup all emails to MBOX file format, follow the steps below:
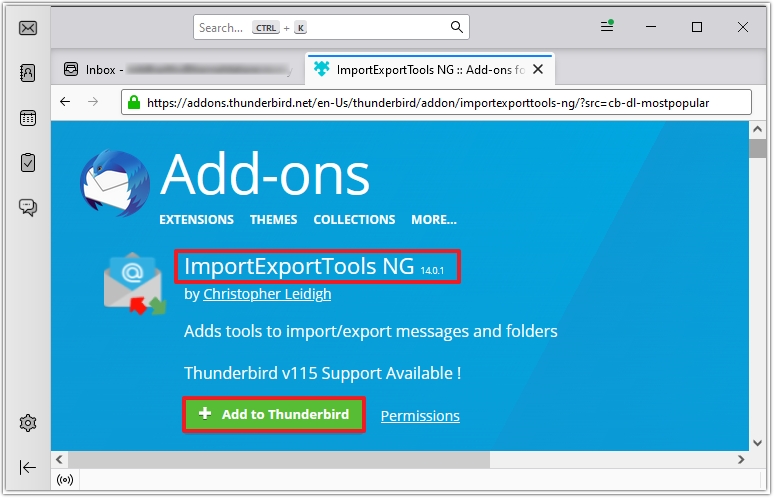
- Launch Thunderbird, add the ImportExportTools NG add-on and restart the application.
- Right-click on the email folder you wish to backup.
- Choose ImportExportTools NG and tap the Folder Export (MBOX).
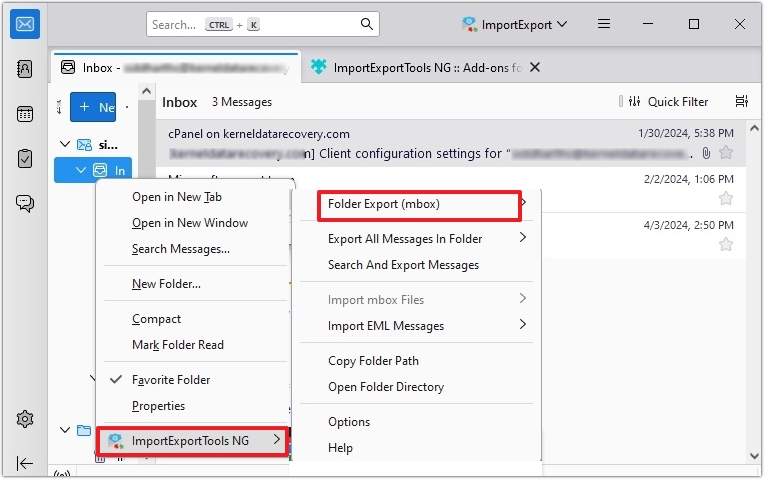
- Click on as MBOX file and pick the desired location, then tap the Select folder option.
In this way, you can perform the Thunderbird export emails operation successfully. The mailbox folder will be saved on an external hard drive with an MBOX file extension.
Method 3. Thunderbird profile backup
After going through the above methods, you will get your desired output. You can also execute the same operation by taking backup of Thunderbird profile without even leaving the application. It saves the whole profile or the desired folder. Here are the steps through which you can reach your destination. Let’s delve into the steps:
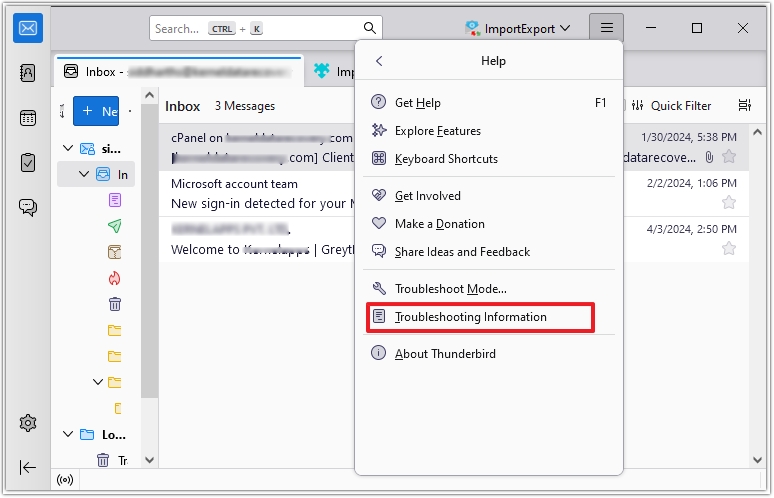
- Start Thunderbird and click on three horizontal lines.
- Under the Help menu, choose Troubleshooting Information.
- Navigate to the Open Folder from the Applications Basics section. It will launch the profile directory.
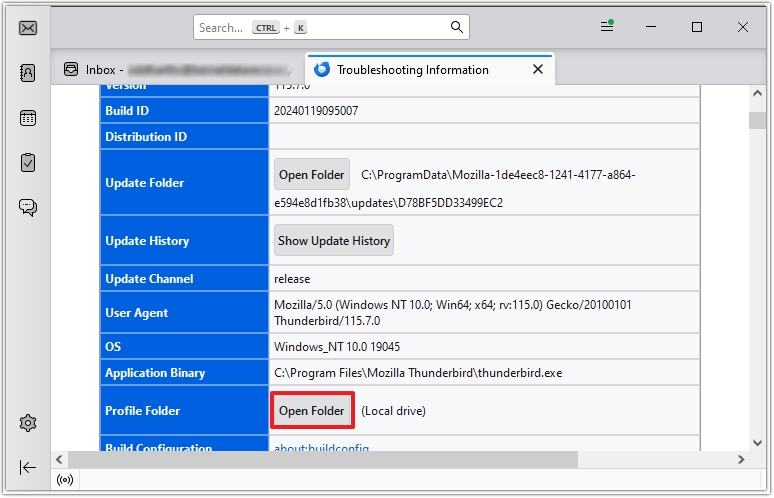
- Copy the required folder from the opened file explore window and paste it to another desired location.
Method 4. Use an automated tool to backup Thunderbird emails
Back up Thunderbird mail can be possible by following the above-mentioned methods. But while performing them, you might face several complexities that might make your experience bitter. Additionally, manual methods won’t ensure data safety & its integrity after backup. Hence, experts always recommend choosing the automated Thunderbird backup tool for accomplishing the Thunderbird backup all mails task.
Recoveryfix for MBOX to PST Converter is one such advanced software that helps users to convert there MBOX files into PST, EML, and MSG files without data loss. Its robust algorithms allow users to perform precise MBOX data migration from 20 email clients, including Apple Mail, Thunderbird, Zoho Mail, Eudora, etc.
Additional features of MBOX to PST converter:
- Migrate single and multiple MBOX files to PST files.
- Execute selective data conversion from the MBOX file to the desired format.
- Migrate Thunderbird files to Office 365.
- Preview of selected MBOX files.
- Splits large PST files.
Conclusion
Data security is a fundamental requirement of every organization, and it can be achieved by regularly backing up their content. In this regard, we have discussed different manual methods to execute back up Thunderbird mail on the hard drive process. But, to avoid any ambiguity & make your data secure, opting for recommended automated software will save you from all unusual mishaps like Cannot send messages Thunderbird SMTP error.