Have you ever found yourself unable to access your old Outlook emails after switching systems, losing an Exchange profile, or moving to Office 365? Many users face this situation and need a reliable way to bring their OST files into the cloud.
The blog will walk you through available manual methods, challenges, and the best software to import OST files to Office 365. Let’s begin with the possible reasons behind this transition.
Why Might You Need to Import OST Files to Office 365?
There are many reasons that may lead users to import their OST files to Office 365. Here we have mentioned some of them:
- Migrating from an on-premises Exchange setup to Office 365.
- The Outlook profile linked with the OST file no longer exists.
- A sudden system crash has corrupted the OST file.
- Need to recover emails from a backup or archived OST file.
- Access mailbox contents from anywhere and anytime.
Import OST File to Office 365 – Is it even Possible?
OST files are designed for local data caching and are tightly bound to the Outlook profile. Therefore, Microsoft doesn’t support importing OST files directly to Office 365.
In order to do that, users first need to convert their OST files into PST format. Then, they will be able to import Outlook OST to Office 365.
For this, you will have multiple approaches:
- Import/Export utility of Outlook
- Microsoft Network Upload Method
- Drive Shipping Method for PST files
Why don’t Manual Methods Work for Everyone?
Manual solutions will help you to import emails to Office 365. However, it comes with several limitations that may question its applications for every user. These are as follows:
- Require adequate knowledge of the Azure platform.
- Time-consuming for bulk or large mailbox migration.
- The process needs Outlook and an original Exchange profile.
- Risk of incomplete data or missing attachments after migration.
- Complex steps of manual procedure make it difficult for non-tech users.
If Manual Methods Don’t work for You, then What? – Try Professional Tool Now!
Now, you are fully aware of the limitations and complexities of manual solutions. Therefore, the best option is to choose automated tools like Recoveryfix Microsoft 365 Backup tool.
It helps you import Outlook OST to Office 365 in just a few clicks. The Microsoft 365 backup tool is capable of importing multiple files to Office 365 without any size restriction.
Besides that, it also offers several other features to make the migration process smooth:
- Preserves folder structure, metadata, and formatting.
- Bulk migration with zero downtime or interruptions.
- Skip previously migrated items with the Increment feature.
- Smart filters to migrate selected data to an Office 365 account.
- Import OST or PST files directly to Exchange Online components, including Office 365 Groups or Shared Mailboxes.
Step-by-Step: Import OST emails to Office 365 using the automated tool
Follow the given instructions once you have successfully downloaded and installed the software in your system:
Step 1. Launch the software and click on the Restore option.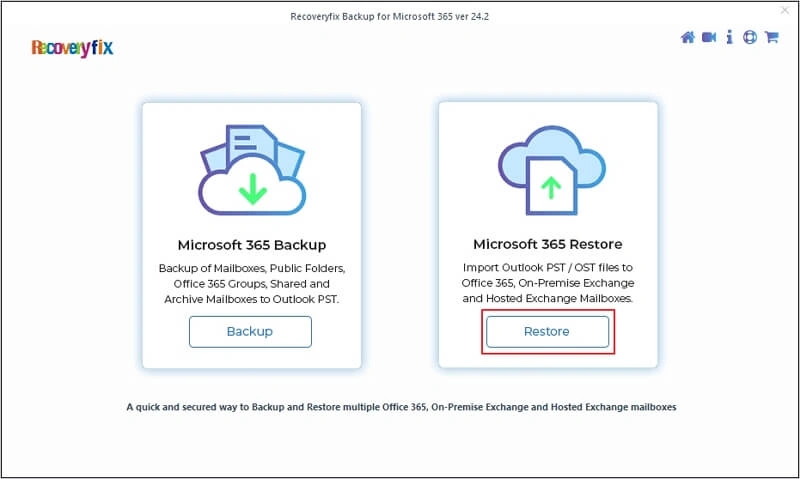
Step 2. Tap on +Add to choose the desired OST files for import process.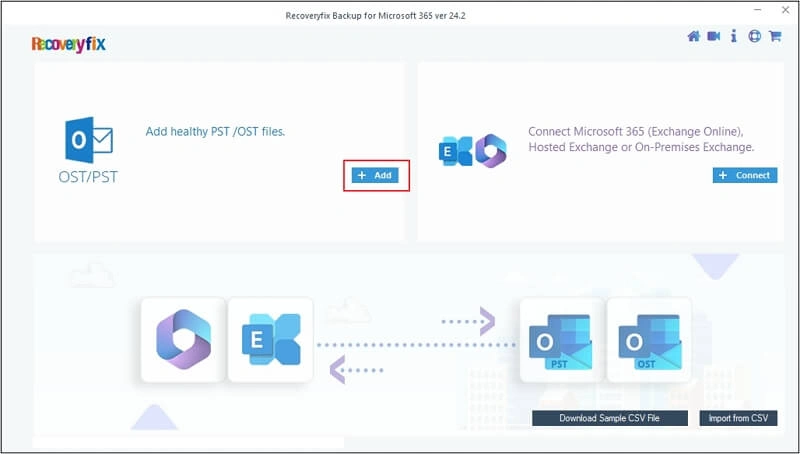
Step 3. Once you have added the files, click on the + Connect option to add an Office 365 account.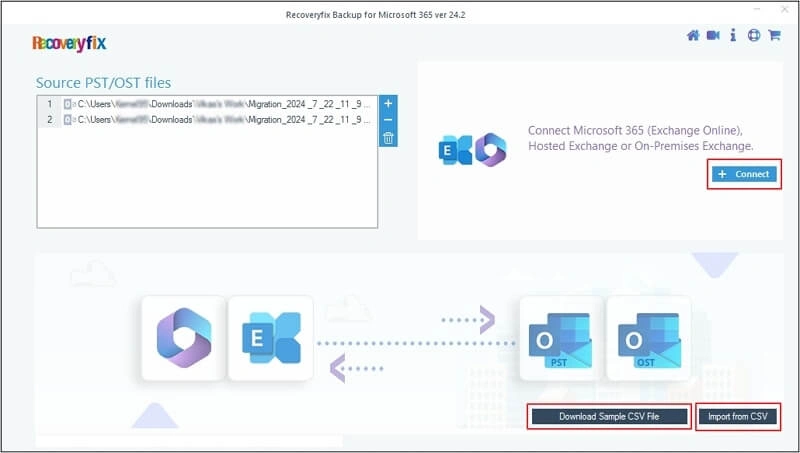
Step 4. Select Modern Authentication and proceed to OK.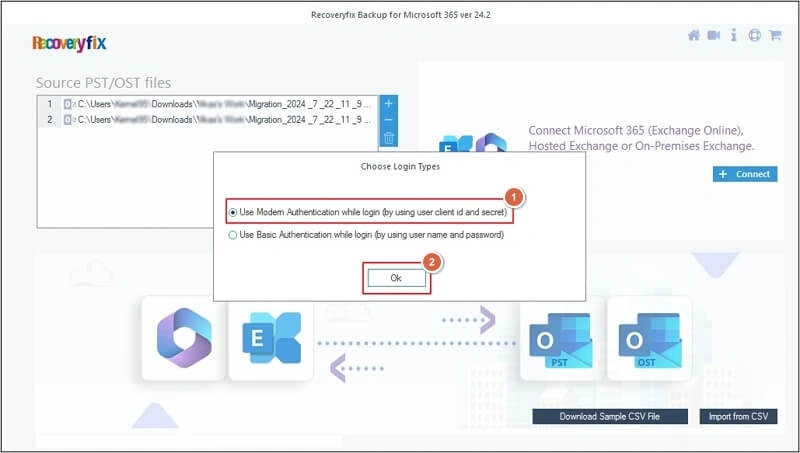
Step 5. Enter your Office 365 account credentials, such as Tenant ID, Client ID, and Client Secret Value. Then, check the List all Mailboxes using above credentials option and tap on Get User Mailbox(es) to select the required ones. Finally, click Add.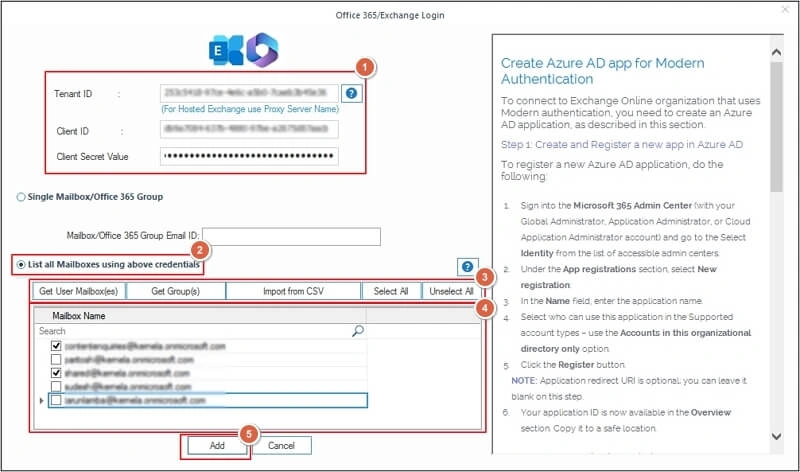
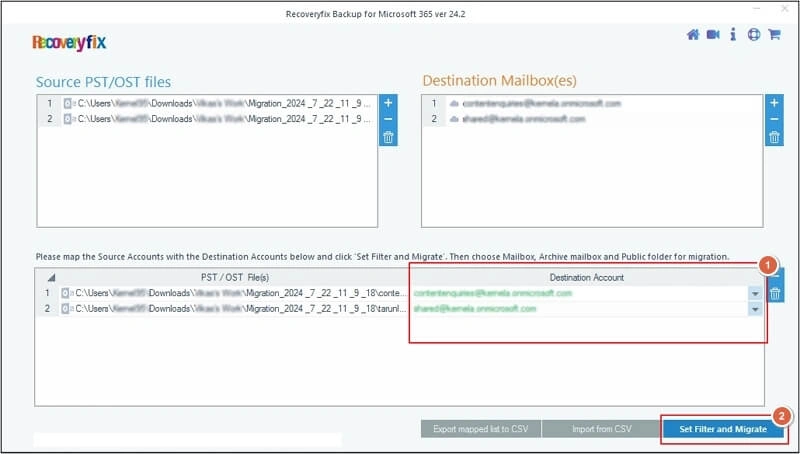
Step 6. Use the drop-down list to choose Destination Accounts and proceed to Set Filter and Migrate.
Note: You can Export mapped list to CSV format to speed up the process in case of frequent imports.
Step 7. Select migration type between Mailbox, Archive Mailbox, or Public Folder and click Migrate.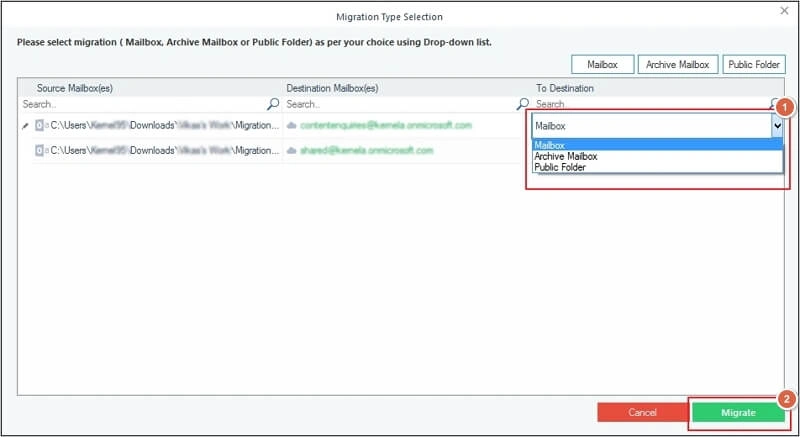
Step 8. On the Filter Selection wizard, apply the appropriate filers and proceed to I am OK, Start Migration.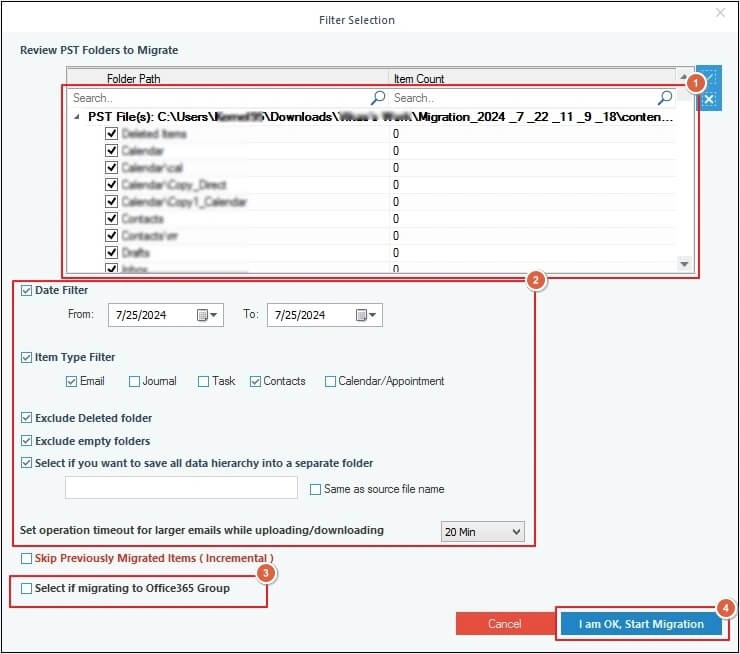
Step 9. It will start importing your OST files to Office 365.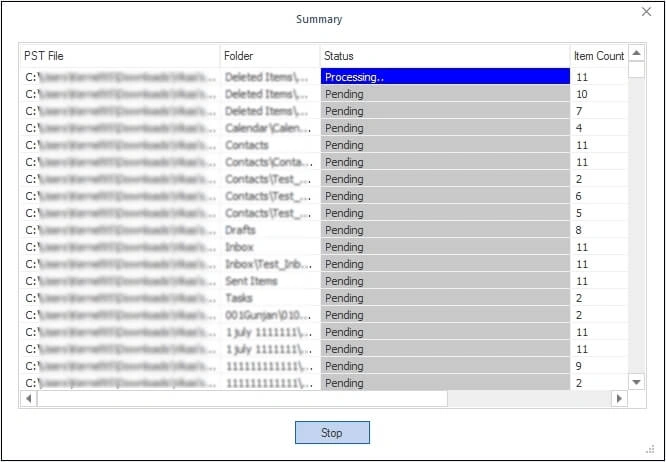
Step 10. Once the migration is completed, a pop-up message "Process completed. Please save the report to CSV" will appear on the screen. Then, click OK to end the process.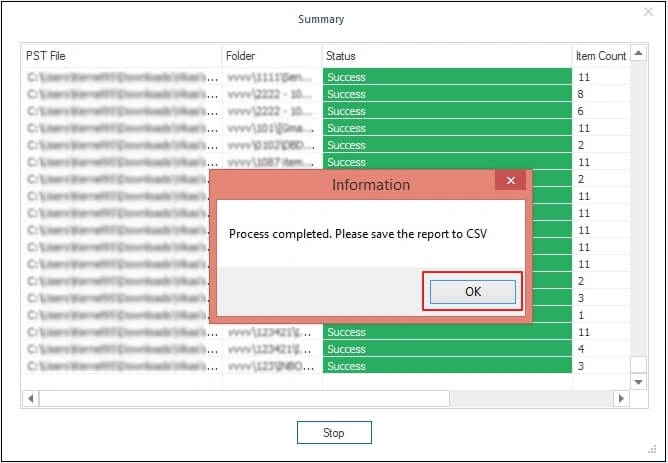
Step 11. Save report to CSV to get the detailed summary of migration procedure.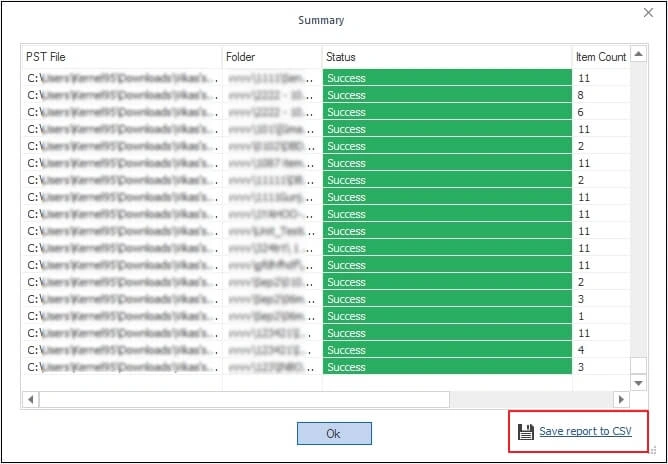
Implement These Tips for Smooth Import of OST Files!
By taking small measures, you can significantly improve the accuracy and efficiency of the process. These measures are as follows:
- Always backup your OST file before migration.
- Run test migrations before moving large volumes of data.
- Make sure you have sufficient Office 365 mailbox storage.
- Prefer automated tools for better accuracy and data safety.
- Skip unnecessary folders like Junk or Deleted Items by using filters.
Conclusion
Here, we have discussed the best method to import OST emails to Office 365. Whether you want to migrate limited OST files or large data sets, the software is suitable for both. Its user-friendly interface allows even non-technical users to accomplish the whole process independently. Also, the software helps you archive Office 365 emails in multiple formats.