Inbox repair tool – Microsoft utility complete guide

Updated On - November 27, 2024

Personal Storage Table (PST) is a file format used by Outlook. This file is used to store copies of messages, calendar events, and other items as a backup. PST files are very secure and reliable for holding crucial data. But often, these PST files suffer from various issue like inconsistency or corruption due to a variety of reasons like the failure of storage device, hardware issue, power failure, attack of malicious virus or other software, abnormal Outlook handling, exceeding the size of PST file, etc.
Such adverse conditions result in inaccessibility of Outlook and loss of your data. Therefore, any issue requires an immediate solution. Fortunately, Microsoft provides an Inbox Repair tool just for that. This tool can fix minor issues related to PST files. But it is not recommended for PST files of size greater than 2GB. In case of severe corruption experts recommend using a 3rd party tool for recover data from damaged or corrupted PST files.
What does the Inbox Repair tool do?
Scanpst.exe, commonly known as Inbox Repair tool, is a first-aid tool to diagnose and repair errors related to Outlook Data files.
- It analyses directory structure of Personal Folders (PST) file and item headers to recover PST folders and items.
- It validates and corrects errors in the internal data structure of the PST file.
- It creates a backup copy of the PST before attempting to repair it.
- It recovers PST files after repairing them to the possible extent.
- It tries to change any .pst file (even renamed files) to a mountable PST file.
Repairing PST file
Now let’s see how to scan and repair a PST file with issue. But before doing that we first need to find the location of your PST file and the Inbox Repair tool.
Part 1- Locate PST Files
You can find PST file location easily using Outlook. Follow the steps below to find it:
- Open Outlook 2010/2013 and click the File tab on the ribbon; click the Info tab on the menu.
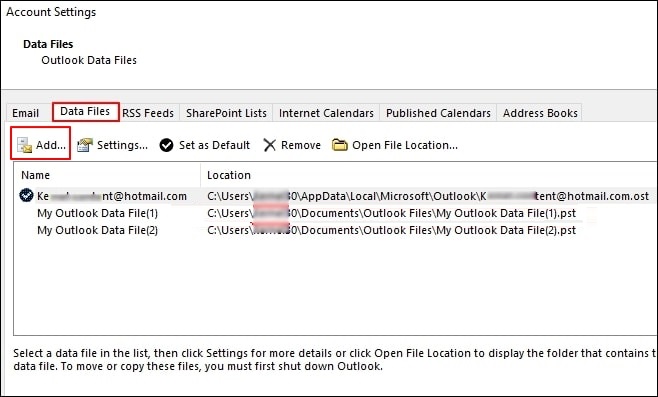
- Click the Account Settings tab.
- Again click Account Settings.
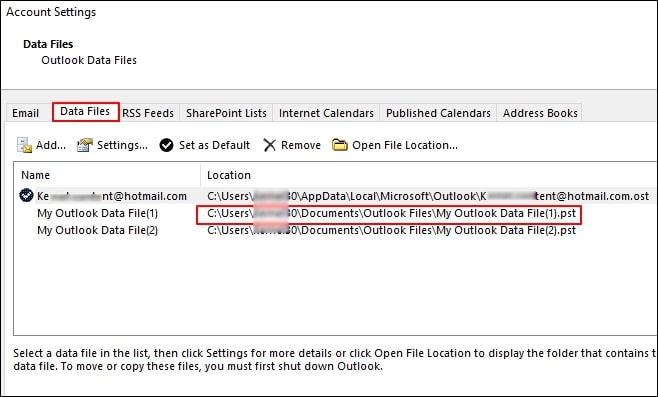
- Click Data Files tab and note the path of the PST file.
Part 2- Locate the Inbox Repair Tool?
After figuring out where your PST file is now, look for the tool we need. Default locations of Inbox Repair tool for different Outlook versions are here:
Outlook 2016 and later versions
\Program Files\Microsoft Office\root\office16 \Program Files(x86)\Microsoft Office\root\office16
Outlook 2013
\Program Files\Microsoft Office 15\root\office15 \Program Files(x86)\Microsoft Office 15\root\office15
Outlook 2010
\Program Files\Microsoft Office\Office14 - disk drive>\Program Files\Microsoft Office(x86)\Office14
Outlook 2007
\Program Files\Microsoft Office\Office12 \Program Files\Microsoft Office(x86)\Office12
Note: If you can’t find it, then maybe Scanpst.exe is hidden. To unhide it, enable Show hidden files and folders settings on your computer before searching for it (steps are given below).
- Go to Start and type Folder Options / Control Folders; click OK.
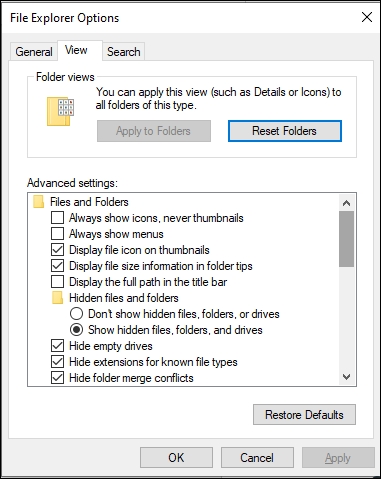
- Click the View tab
- Select Show hidden files and folders under Hidden files and folders, and click OK.
(For Vista, right click on Control Folders and click Run as administrator, double-click Folder Options)
For windows 10/11:
- Navigate to the folder where tool is present.
- Click the View tab from the menu ribbon.
- Check the Hidden items option and refresh the folder.
Part 3- Starting the repairing process
Before running the Inbox Repair tool, please exit Microsoft Outlook.
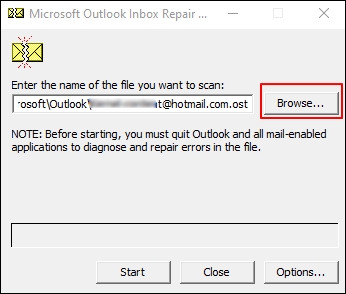
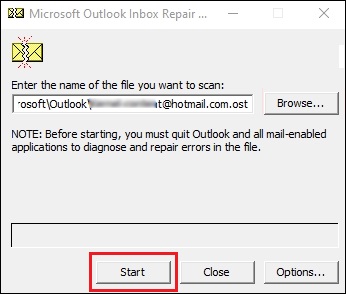
- Locate Scanpst.exe (Inbox Repair tool) and double-click it.
- Select the PST file using the Browse button (or you can enter the PST file name in Enter the name of the file you want to scan).
- Click Options and select specify the scan log option.

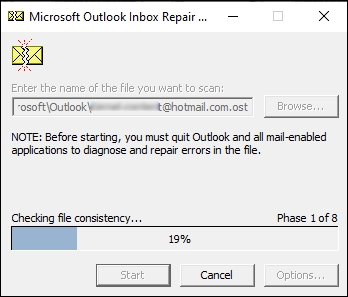
- Click Start.
- Let the processing complete.
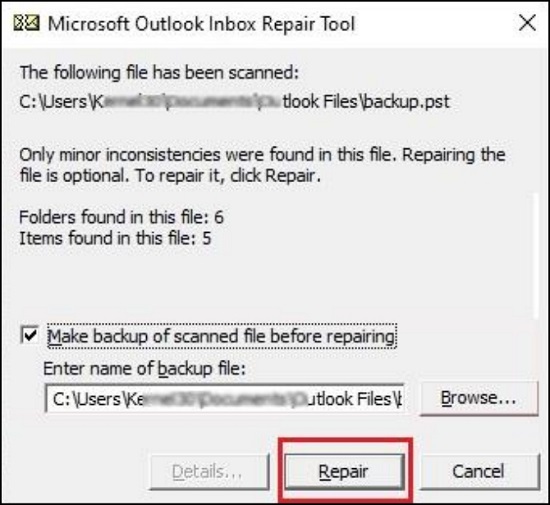
- If errors are found, click Repair.
- Click OK to finish.
Note: You can change the name or location of the backup file created by the Inbox Repair tool (Use the Browse button to select the file or enter new name in Enter name of backup file box).
What to do if some folders are empty?
Sometimes the repaired PST file contains empty folders with no data. It mostly happens when Inbox Repair tool after done repairing cannot decide where to put some files. These files can be recovered from the ‘Lost & Found’ folder. The user can select and drag the files required.
How to recover the files from Lost & Found
To do so, the user must create a new Outlook profile and move the data from the repaired PST file to the new one. Follow the steps below:
- Create new Outlook profile
- For Outlook 2003 or 2007, PST file can be created using following steps:
- Open Outlook and click File.
- Select Data File management tab to open Account Settings, select Data Files, click Add.
- Specify name and location of the file. Click OK.
- To create new PST file in Outlook 2010 or later:
- Open Outlook and click the File tab on the ribbon; click the Info tab on the menu.
- Click the Account Settings tab. Again, click Account Settings.
- Click Data Files tab. Click Add
- Enter a file name when the Create or Open Outlook Data File dialogue box appears; click OK.
- Move the data
- Open the Outlook profile with repaired PST and the new Outlook profile simultaneously.
- Select the missing files from the Lost & Found folder. Folder would be available on the left pane, or you could press Ctrl + 6 to access it.
- Drag those files to the new Outlook profile.
- Users may delete the content of Lost & Folder post moving.
What to do if Scanpst.exe cannot solve your issue?
If such a situation is met, then most probably your PST file is severely corrupted. Optimal solution for this will be using a professional recovery software Recoveryfix for Outlook PST Repair.
Advantages of Recoveryfix tool
- Uses advanced algorithms for data restoration.
- Deliver results with 100% data integrity.
- Require minimal technical expertise.
- Provides quick delivery of result
- User-friendly interface for less confusion.
- Can extract email from password-protected, compressed and encrypted PST files.
Conclusion
Smooth transaction of email maintains the workflow for a productive environment. The above-mentioned method will help you with that. Scanpst.exe is quite convenient when it comes to solving minor issues related to PST files. But the inbuilt tool has its limitations. If your PST file is severely corrupted, Inbox Repair tool will not be able to repair, and it will lead to data loss. For repairing files with severe corruption, you must use Recoveryfix for Outlook PST Repair. It ensures full data retention and offers user friendly interface for less confusion. It is optimized for swiftly handling recover data from a large corrupted PST file.