How to perform Namecheap email to Office 365 migration? – A Complete Guide!

Published On - July 9, 2025
Your business is growing, but the Namecheap email setup isn’t able to match the requirements of your organization. You are using multiple tools, facing deliverability issues, or simply need better collaboration features.
In this situation, Office 365 becomes the best choice for users. But, the Namecheap email to Office 365 migration sounds technical or risky. So, this guide will break down all the necessary steps and make the migration process simple for you.
Why Migrate Emails from Namecheap to Office 365?
Here are the top reasons why users are migrating from Namecheap to Microsoft 365:
- Provides better productivity tools, such as Teams, OneDrive, SharePoint, and more.
- Microsoft 365 comes with advanced spam filtering, data encryption, and threat protection.
- Easily add or remove users, upgrade plans, and manage access centrally as your business grows.
- Access your emails and files from anywhere on any device or location.
- Microsoft guarantees 99.9% uptime, along with 24/7 support, to provide uninterrupted communication services.
- Smooth integration with other Microsoft services to collaborate easily with team members.
- Get regular updates and new features without any manual intervention.
Pre-Migration Checklist: Namecheap Email to Office 365 Migration!
Make sure to perform these key steps before you migrate your emails:
- Backup all the important emails from Namecheap.
- Create Microsoft 365 accounts for each Namecheap user.
- Confirm domain ownership in the Microsoft 365 Admin Center.
- Disable any firewall rules that may block the migration process.
- Keep your email settings, such as IMAP server, port, and other Namecheap settings, secure.
How to Migrate Emails from Namecheap to Office 365 Manually?
Here are the detailed steps to manually migrate Namecheap emails to Office 365:
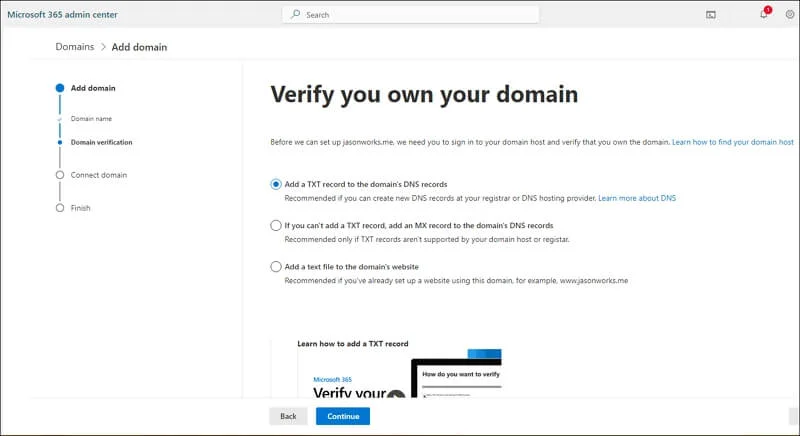
Step I. Verify Domain in Microsoft 365
- Go to Microsoft 365 Admin Center.
- Navigate to Settings > Domains.
- Click Add Domain and enter your Namecheap domain.
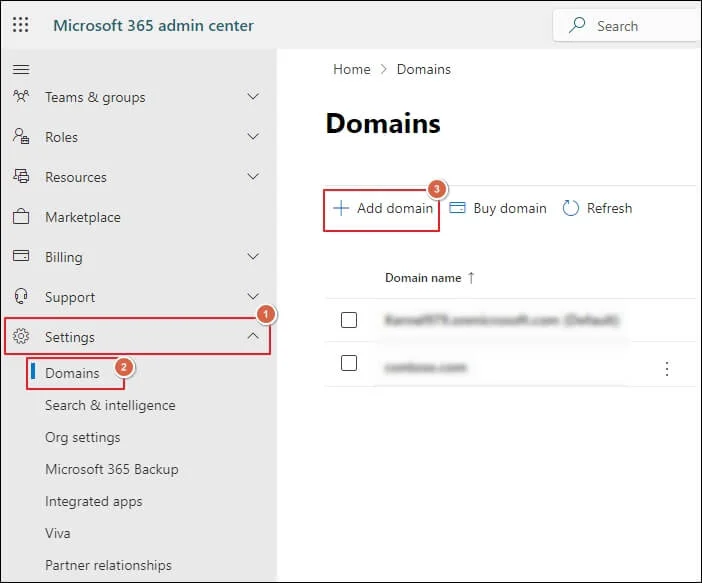
- Update Namecheap DNS with the TXT verification record.
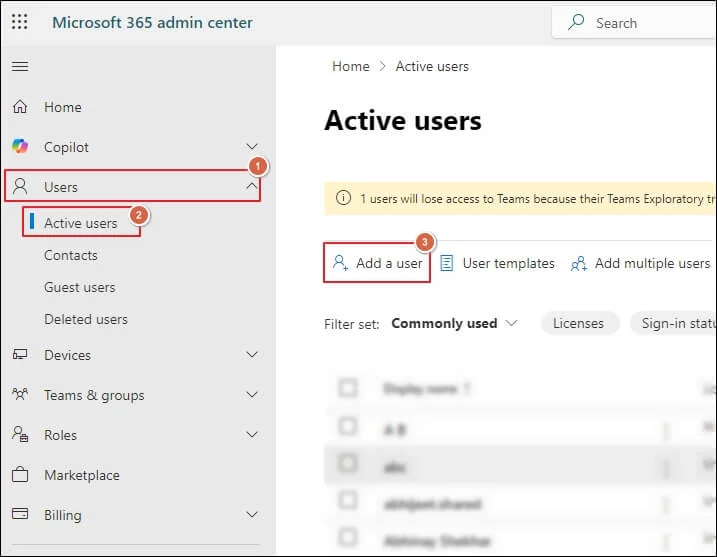
Step II. Create Users and Mailboxes in Microsoft 365
- Go to Users > Active users in Microsoft 365.
- Click Add a user and assign the appropriate licenses.
Step III. Prepare a CSV File for Migration
- Include all the users that you want to migrate.
- Use the given format to enter details in a CSV file. E.g.
|
Email Address |
UserName |
Password |
UserRoot |
| albert@yourdomain.com | mailadmin | P@ssw0rd | /users/albert |
| mathew@yourdomain.com | mailadmin | P@ssw0rd | /users/mathew |
| irwin@yourdomain.com | mailadmin | P@ssw0rd | /users/irwin |
Step IV. Start the IMAP Migration
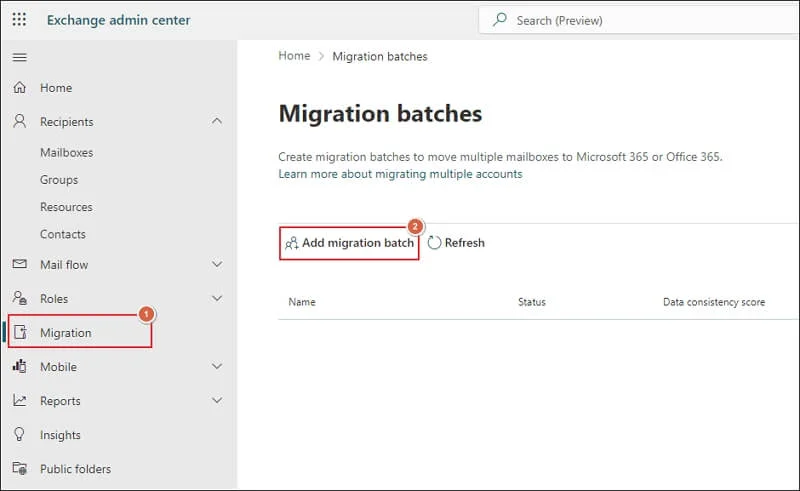
- Go to Exchange Admin Center.
- Navigate to Migration > Add Migration Batch.
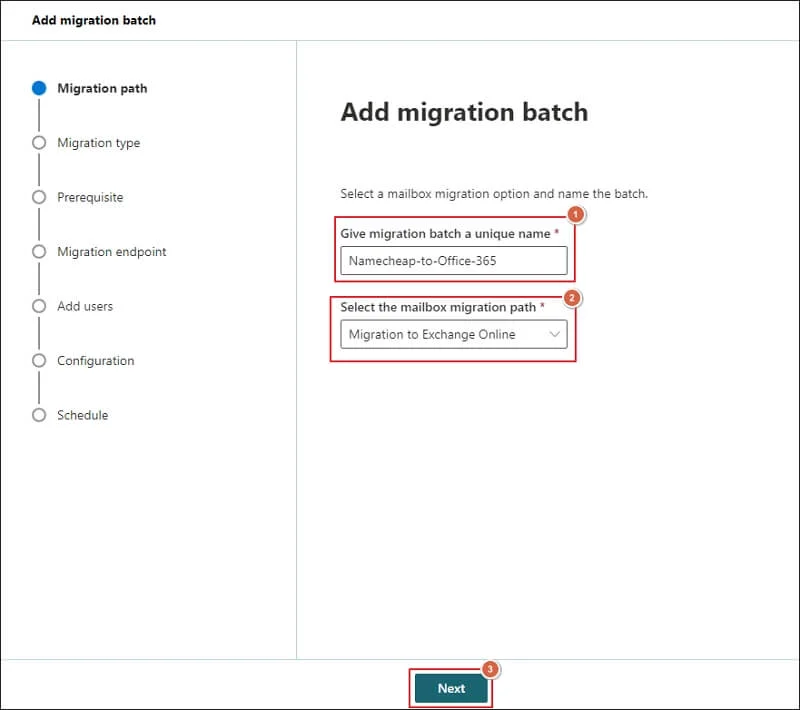
- Give a name to the migration batch and select the path. Then, click Next.
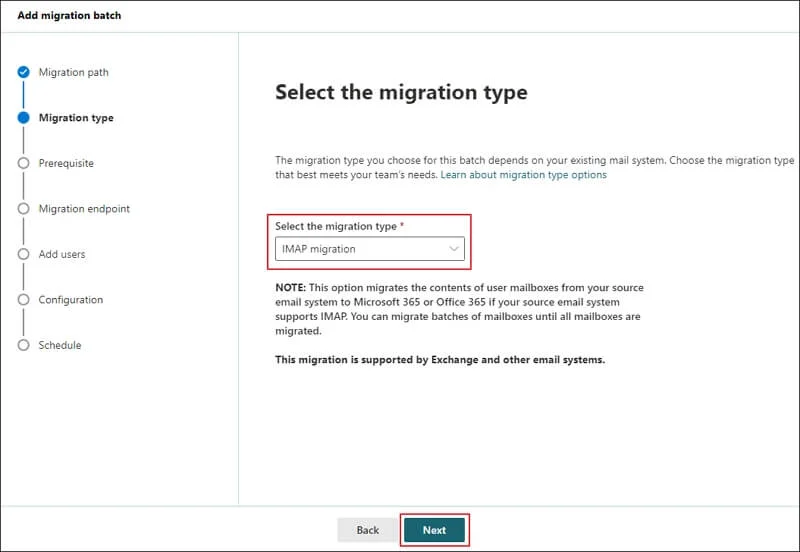
- Select IMAP Migration and tap on Next.
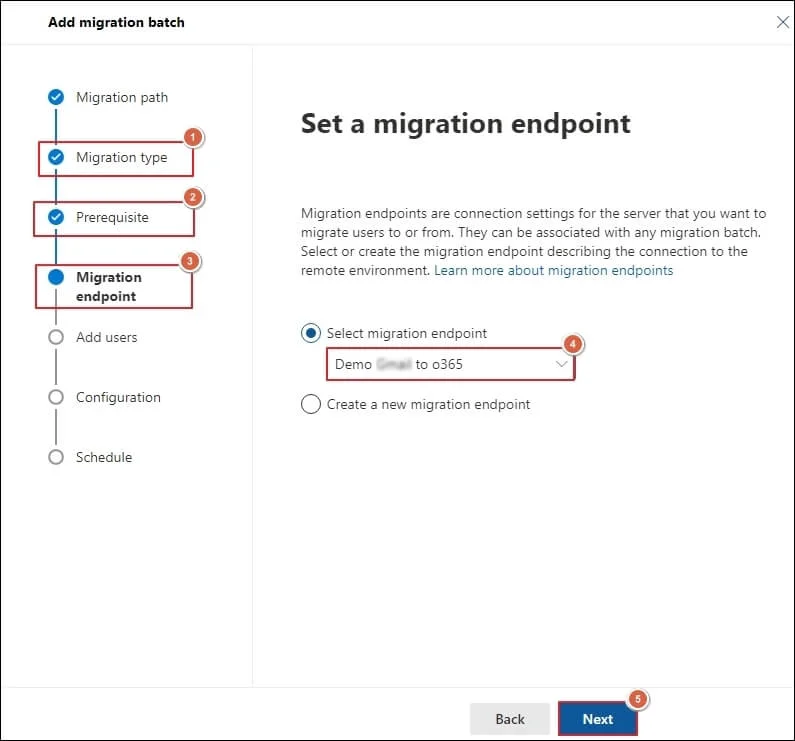
- Select the migration endpoint and proceed to Next.
- Upload your CSV file and click Next.
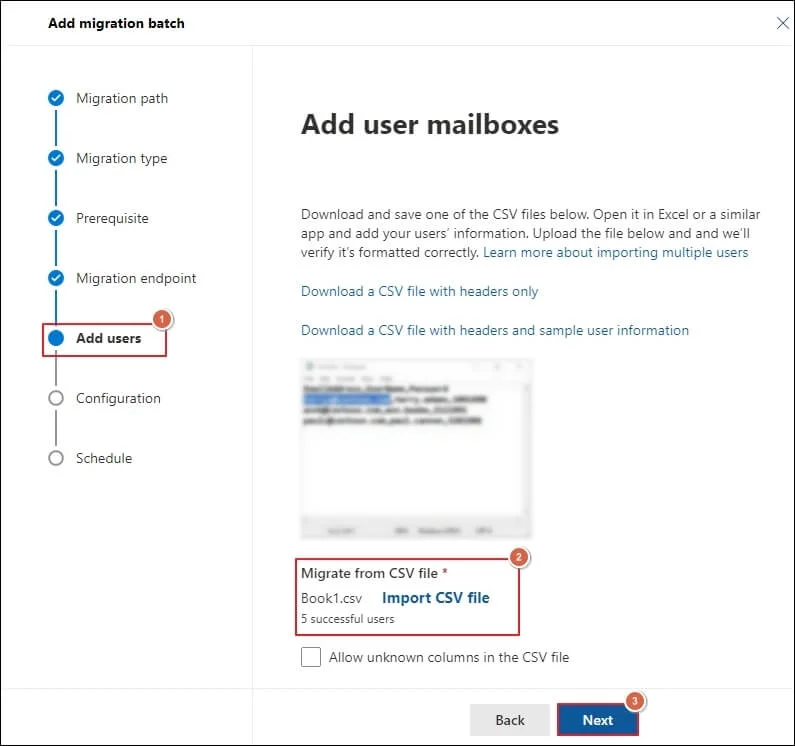
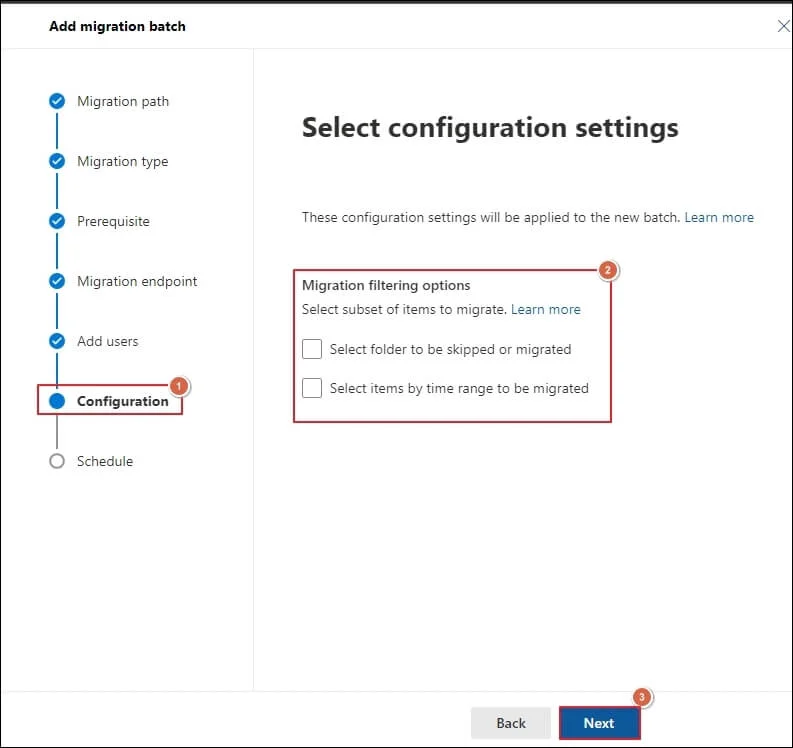
- Choose the required configuration settings and proceed to Next.
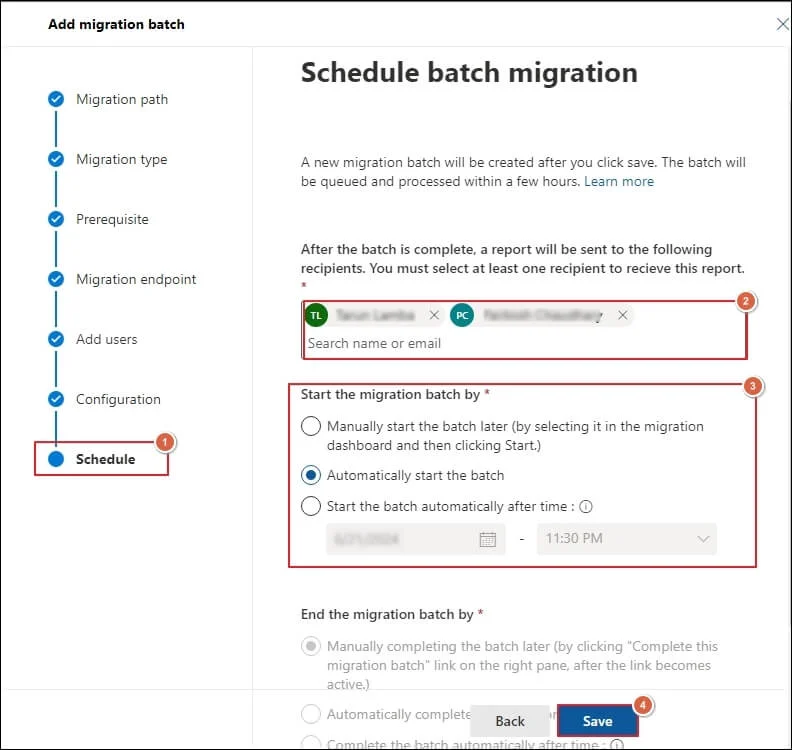
- Schedule batch migration and click Save.
Step V. Update DNS Records in Namecheap
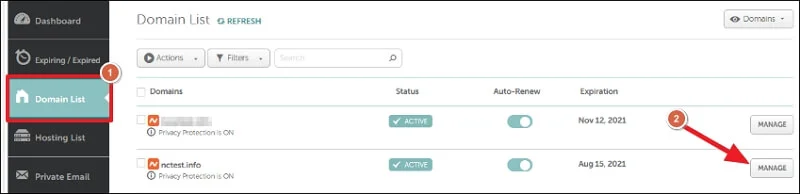
- Sign in to Namecheap and go to Domain List > Manage > Advanced DNS.
- Add the required MX, CNAME, TXT, and SRV records as shown in the Microsoft 365 Admin Center.
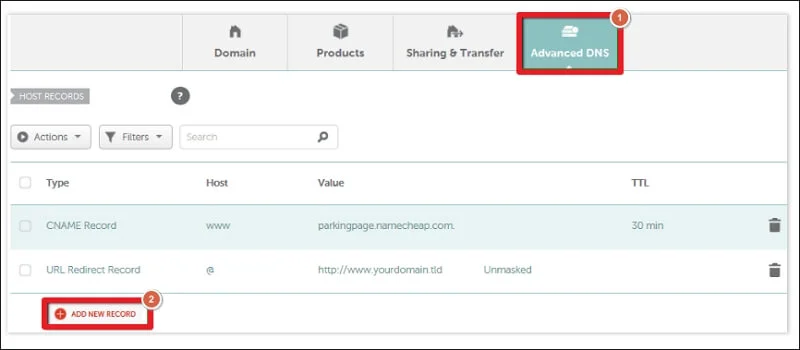
- Save all the records.
Step VI. Complete the Migration
- Once the migration is complete, stop syncing.
- Change MX records to direct new emails to Office 365.
- Remove old migration batches.
Post-Migration Steps: Secure, Verify, & Finalize Your Office 365 Setup!
Complete these final steps for smooth Namecheap to Office 365 mailbox migration:
- Test logins and email flow for all users.
- Verify and monitor MX record propagation.
- Confirm data integrity in Office 365 mailboxes.
- Reconfigure Outlook or mobile apps to access Office 365 mailboxes.
Common Migration Hurdles & Errors: Fix them with Instant Solutions!
You might face some challenges while manually transferring emails from Namecheap to Microsoft 365 account. Here is the list of these errors:
|
Issue |
Solution |
| Emails are missing after migration. | Make sure folders are subscribed in Outlook. |
| Migration batch stuck in the middle. | Restart or split the batch into smaller files. |
| Facing authentication error. | Use app passwords or enable 2FA in Office 365. |
Direct Solution: Try the Professional Tool Now!
You can use the above-mentioned method to migrate Namecheap email to Office 365 account manually. However, the complexities of the native approach limit beginners or non-tech users from performing migration.
Therefore, to avoid risk and uncertainty, users look towards alternate solutions or automated tools like Recoveryfix IMAP to Office 365. The IMAP to Office 365 Migration software enables users to migrate mailbox contents to different locations within Microsoft 365 in just a few clicks.

Final Thoughts
Hopefully, this guide has helped you understand the complete process of Namecheap email to Office 365 migration. Its step-by-step illustration will help you migrate your emails easily to Microsoft 365.
However, if you want a direct solution, then go with the recommended solution. Its advanced data filtering options will migrate selected emails to an Office 365 account in a few simple steps.
FAQs: Before You Ask, Read This!
Q- How to migrate from Namecheap private email to Office 365?
A- You can use the following steps to transfer mails from Namecheap to Office 365 account:
Step 1. Enter and verify the domain in Office 365.
Step 2. Create the same user mailboxes in Office 365.
Step 3. Prepare a CSV file for migration.
Step 4. Add migration batch and begin the process.
Step 5. Change the DNS Records on the Namecheap portal.
Step 6. Stop mailbox syncing and direct new emails to Office 365.
Q- Can I migrate my Namecheap contacts and calendars?
A- No, the Microsoft 365 IMAP migration service only supports email migration. You can use Outlook export/import utility to move calendars and contacts.
Q- Is there any downtime during migration?
A- No, users can continue using Namecheap email until the final MX Record switch.
Q- How long does migration take?
A- It depends on mailbox size and number of users. Usually, it takes a few hours to a day to complete the migration.
Q- What if I face issues during migration?
A- You can contact Microsoft support for further assistance or use automated tools like Recoveryfix to avoid the potential risks.