How to Migrate Comcast Email to Office 365? – Instant Migration Guide

Published On - April 2, 2026
Comcast email service may work for basic needs, but it fails to meet the demands of users with growing communication needs. Its limitations, such as lack of advanced collaboration, security concerns, and restricted storage, are the main reasons behind the email switch.
However, fears like data loss, missing emails, or incorrect configurations make the migration process complicated. The migration process can also disrupt your entire workflow if not done properly.
So, go through the blog to migrate Comcast email to Office 365 using the right approaches. Read the blog carefully to find the most effective solutions now.
Why Migrate Comcast Email to Office 365? – Find Key Benefits
Here are the benefits you can get by performing comcast email transfer for more flexibility and control.
- Advanced security and spam protection.
- Centralized admin control for businesses.
- Better capacity with larger mailbox storage.
- Multi-device support with cross compatibility.
- Integrated apps like Teams, OneDrive & SharePoint.
Pre-Checklist: Things to Prepare Before You Start Migration
Make sure to prepare the following steps before you migrate Comcast email to Office 365.
- Enable IMAP settings in Comcast email.
- Backup important emails for additional safety.
- You must have an active Comcast email account.
- Check internet stability for uninterrupted migration.
- Verify Microsoft 365 subscription and admin access.
Native Solutions to Migrate Comcast Email to Office 365 [Tried Ones]
We searched on the internet, and after trying several methods, only the provided ones gave us the best results. Try them now to identify the most appropriate solutions for yourself.
Way 1. Comcast Email Transfer Using Exchange Admin Center (EAC)
You can use this method for migrating emails to Office 365 accounts using the EAC portal. Here are the detailed steps:
Note: This method only migrates emails from the Comcast email service.
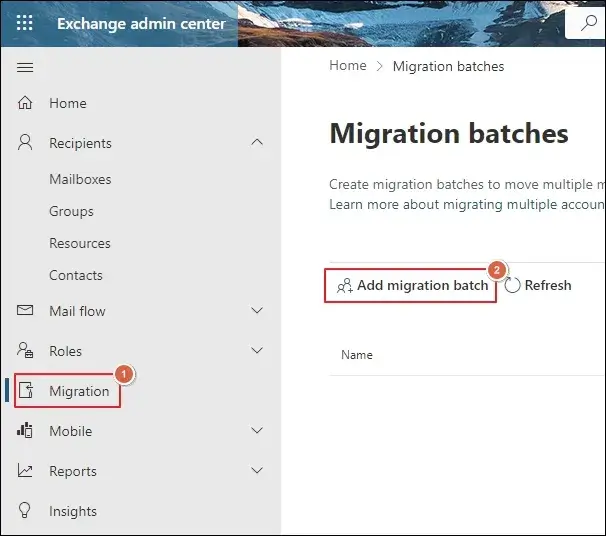
- Sign in to Microsoft 365 Admin Center.
- Go to the Migration tab under the Exchange Admin Center.
- Add migration batch to continue further.
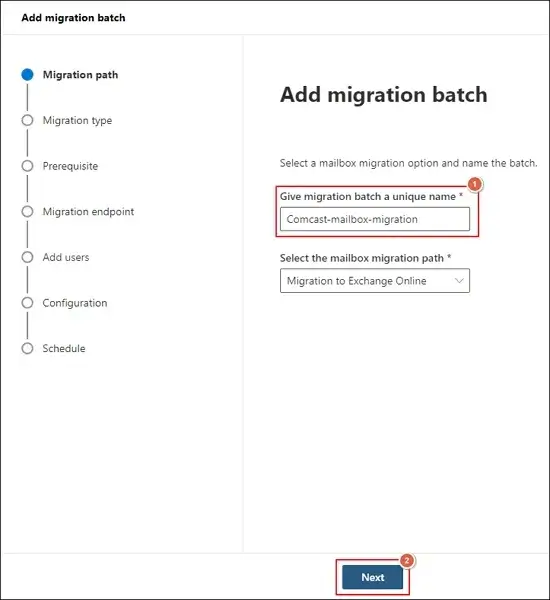
- Enter the migration batch name and click Next.
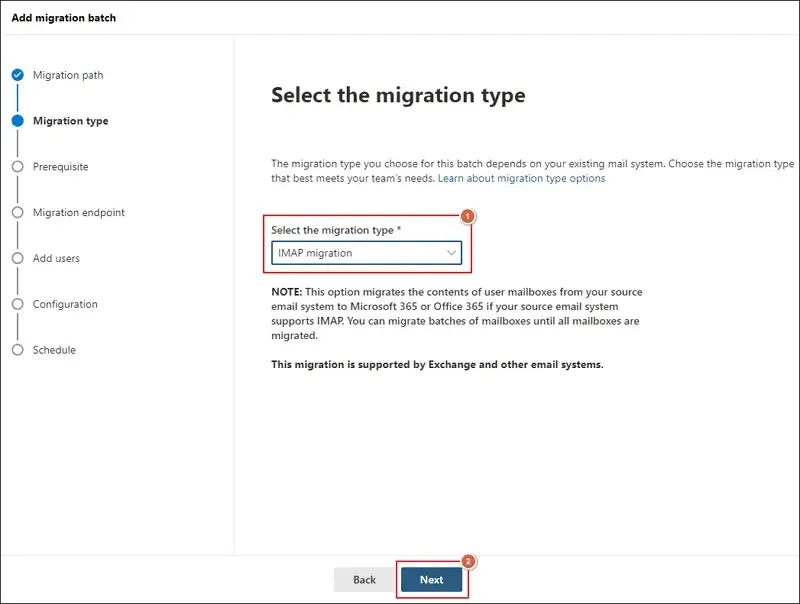
- Select IMAP as migration type and proceed to Next.
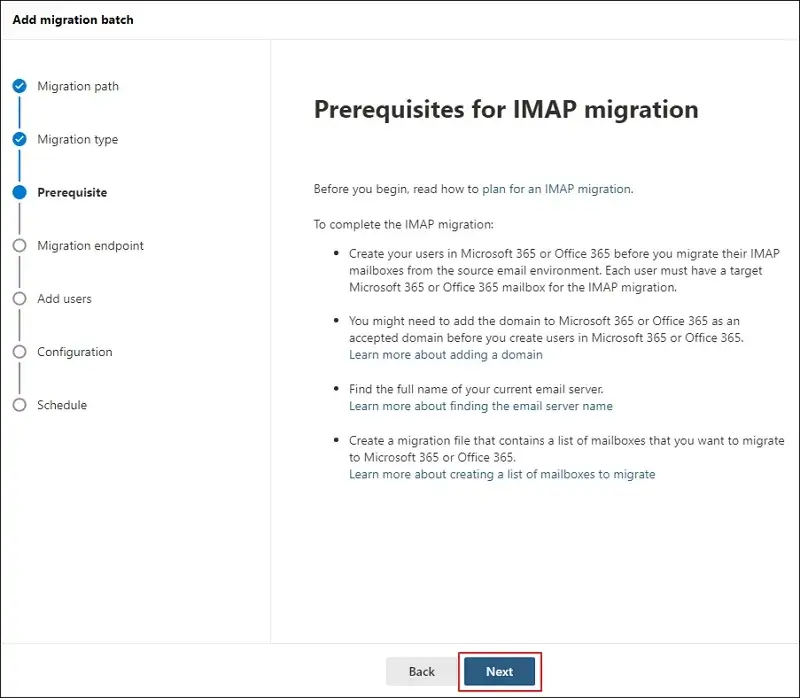
- Complete all the prerequisites and click Next.
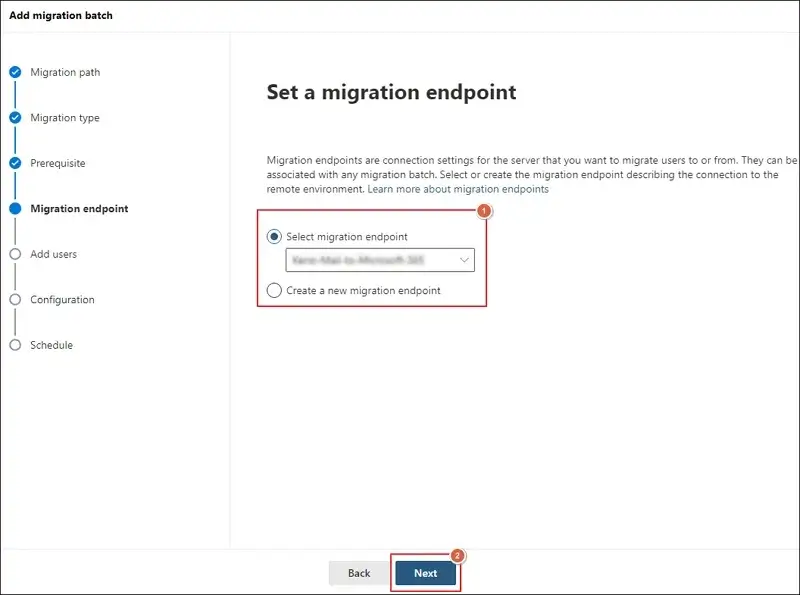
- Choose a migration endpoint or create a new one. Then, tap on Next.
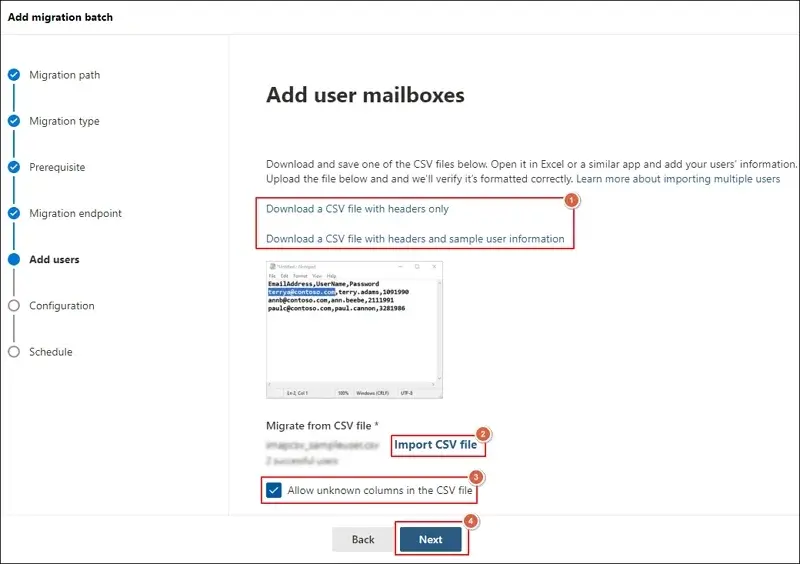
- Download sample CSV file and fill in all the necessary details.
- Import CSV file and proceed to Next.
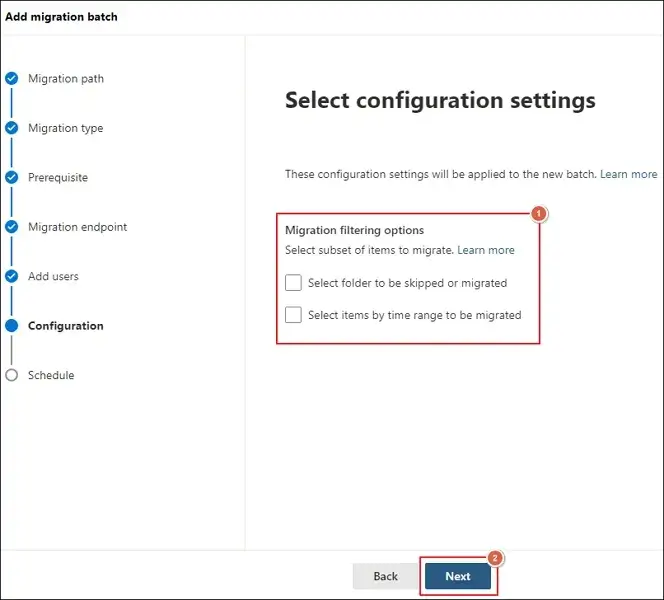
- Apply filters if needed and click Next.
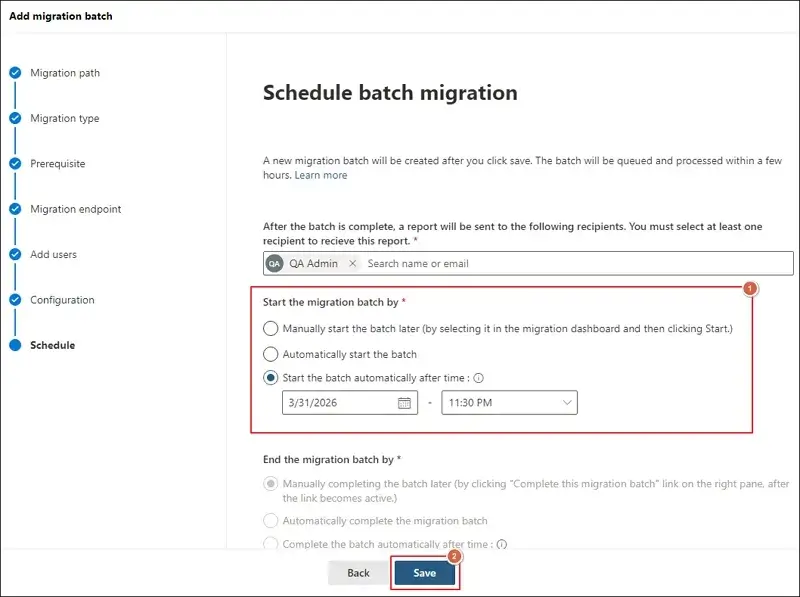
- Schedule batch migration as needed and tap on Next.
- Track status of migration from the dashboard.
- Verify all emails after the process completion.
Way 2. Use Outlook to Move Emails to Microsoft 365 Account
In the second method, you will be able to transfer complete data including contacts and calendars. Here’s how to transfer data with Outlook:
Section 1. Configure the Comcast Account & Export Mailboxes
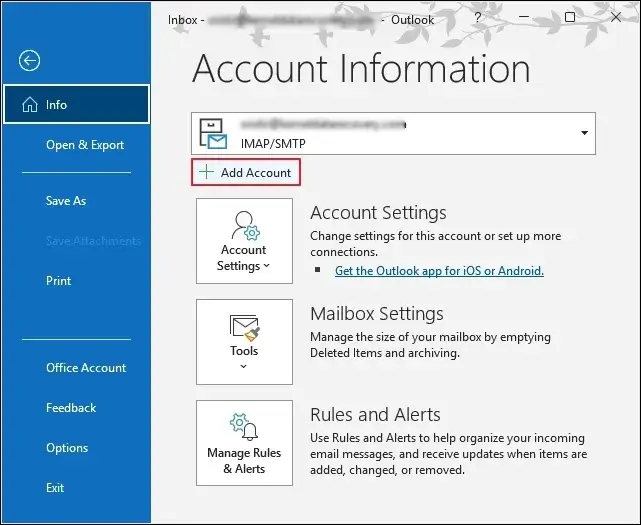
- Go to the File menu and proceed to Add Account.
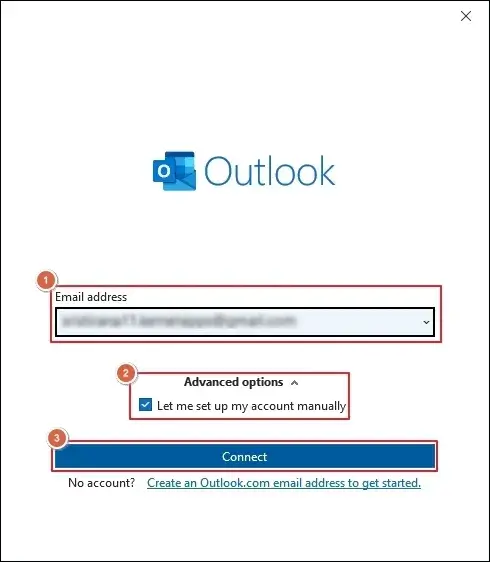
- Type your Email address and select Let me set up my account manually.
- Then, tap on Connect option.
- Select the IMAP account under Advanced setup.
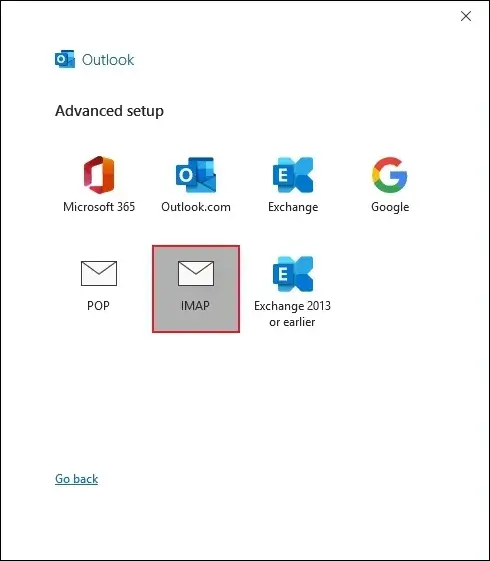
- Follow the on-screen instructions to complete the process.
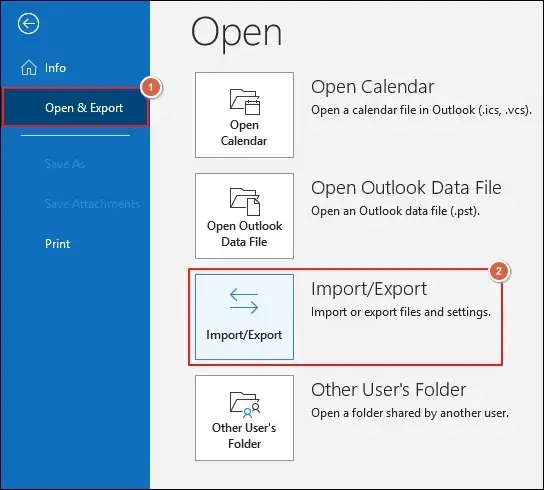
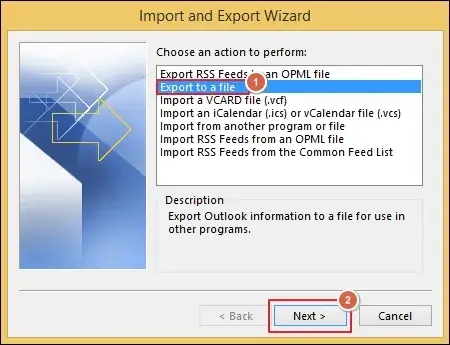
- Navigate to the Import/Export option.
- Choose Export to a file and click Next.
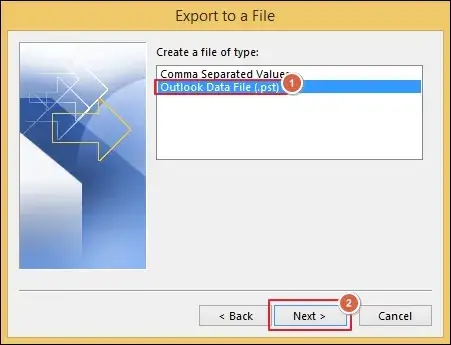
- Select Outlook Data File (.pst) and proceed to Next.
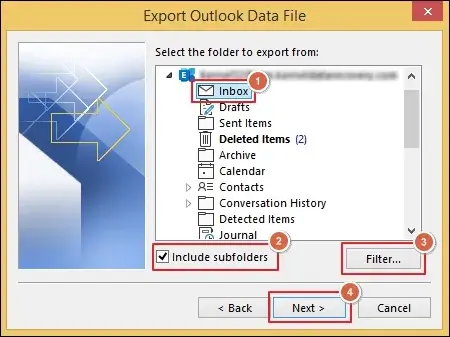
- Choose the mailbox folder and check Include subfolders.
- Apply filter if needed and click Next.
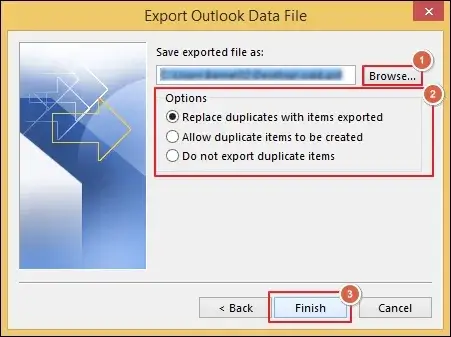
- Browse to select the folder>Options>Finish.
Section 2. Import the Mailbox Data to Microsoft Account
- Download the AzCopy tool by using the SAS URL.
- Upload PST files to Office 365 with the help of the AzCopy tool.
- Check the uploaded PST files after the upload process is completed successfully.
- Create the PST Import mapping file to define the user mailboxes.
- Start a new PST Import job under the Microsoft 365 Import service.
- Evaluate and filter out data from PST files to begin the PST Import job.
- All the PST files have been successfully uploaded to the Office 365 account.
Important to know: Learn the detailed process upload PST files to Office 365 here.
Common Issues You May Face During Comcast Email Transfer
Here is the list of frequent problems that you can face during the manual migration process.
|
Common Issues |
Solutions |
|---|---|
|
Connection Issues |
Check server settings. Make sure the firewall is not blocking ports. |
|
Authentication Errors |
Double-check login credentials. Enable IMAP & third-party app access. |
|
Slow Migration Speed |
Reduce the batch size of mailboxes. Use a fast and stable internet connection. |
|
Missing Emails After Migration |
Start the migration batch again. Verify the mapping of mailbox folders. |
Want A Direct Solution? – Try Professional Tool Now
You have gone through the steps of native solutions, but they seem quite lengthy. Also, the methods require careful execution to obtain the desired results. Now, you want a direct solution to eliminate all these constraints of manual ones.
So, use the automated solutions like Recoveryfix to migrate Comcast email to Office 365 directly. The IMAP Migration to Office 365 tool helps to move bulk mailboxes to different Microsoft 365 locations.
Proven Tips for Smooth Comcast Email Transfer [Experts’ Recommended]
You can follow the listed instructions to get a smooth mailbox migration experience.
- Monitor logs closely during the migration.
- Select tools wisely for migrating critical data.
- Keep a backup copy of your data for extra security.
- Avoid migration during peak hours to improve speed.
- Run a test migration before full-fledged data transfer.
End Thoughts
Comcast email transfer is a brilliant strategy, but the success depends on the chosen method. Here, we have provided both manual and automated solutions to migrate Comcast email to Office 365. You can use the native solutions when the mailbox number is limited.
For large-scale migration, go with the recommended solution to get precise and accurate results. The software also supports the migration of IMAP emails to different Exchange Server environments.
FAQs: Resolve Queries Instantly
Q. How to migrate Comcast emails using the Xfinity export portal?
A. Here are the steps to migrate emails from Comcast to Microsoft 365:
- Go to the Xfinity export portal.
- Sign in with your comcast.net account.
- Select your existing Outlook email account.
- Choose from Email, Contacts, or Email and Contacts to export.
- Accept to authorize the ShuttleCloud platform.
- Start Export process to transfer email data.
- Track status with the help of the Export ID.
Q. Are Xfinity and ShuttleCloud the same thing?
A. The Xfinity portal is designed to transfer and backup Comcast emails. On the other side, ShuttleCloud is a migration platform used by several email providers, including Comcast.
Q. How to save Comcast emails to computer’s local drive?
A. You can use the Xfinity portal to backup comcast emails in EML, MBOX, and PST formats. Also, you can save contacts into CSV, VCF, and PST formats.
Q. Is Comcast’s email service phasing out?
A. Yes, Comcast is phasing out @comcast.net and @xfinity.com addresses to Yahoo Mail from June 2025. An upgrade invitation will roll out gradually by Comcast through 2026.
Q. What are the Comcast (Xfinity) email server settings for manual configuration?
A. You can use the Xfinity portal to backup comcast emails in EML, MBOX, and PST formats. You will need the following configuration settings to set up your email account via IMAP protocol.
|
Settings |
Value |
|---|---|
|
IMAP Server |
imap.comcast.net |
|
Port |
993 |
|
Encryption |
SSL |
|
SMTP Server |
smtp.comcast.net |
|
Port |
587 |
|
Encryption |
TLS |
