Free Ways to Set Up Webmail in Outlook 2007 or later versions!

Published On - June 12, 2025
With the “setup Webmail in Outlook” process, users can discover Outlook’s advanced features that can help them boost their overall productivity. Whether you are managing a Gmail account, a Yahoo inbox, or a custom domain email, get expert guidance here to know the practical tips & ways to execute the process safely.
Why set up Webmail in Outlook? [Major Reasons]
By setting up Webmail in Outlook 2007 or different versions, you unlock several benefits:
- Centralized Inbox: Manage multiple email accounts without switching apps.
- Offline Access: Read and draft emails even without an internet connection.
- Productivity Tools: Stay organized by using Outlook’s calendar, tasks, and contacts.
- Enhanced Security: Benefit from Outlook’s robust security features for safe emailing.
Prerequisites for a smooth “set up Webmail in Outlook” process!
Before you start, make sure you have everything ready to avoid unwanted situations. Here is the list of the main ones:
- Webmail Credentials: Your full email address and password. You may need an app-specific password if your email provider uses two-factor authentication.
- Outlook Installed: Make sure that you have Microsoft Outlook on your local system.
- Stable Internet Connection: A reliable connection is essential for Outlook to fetch server settings and sync emails.
- Server Settings: Most Webmail services use IMAP to sync across devices or POP3 to download email. Check your provider’s support page for specific settings.
Top ways to set up Webmail in Outlook’s different versions!
Here, we will provide how to set up Webmail in Outlook in two different ways using the Outlook application: 1. Automatically 2. Manually. Go with the steps described below to get successful results.
Solution 1. Set up Webmail in Outlook Automatically!
Outlook’s “Add Account” feature allows you to set up Webmail in Outlook automatically. Follow the steps to know more:
- Open the Outlook application. If using Microsoft 365, make sure that you are signed in with your account.
- Click File in the top-left corner, then select Add Account.
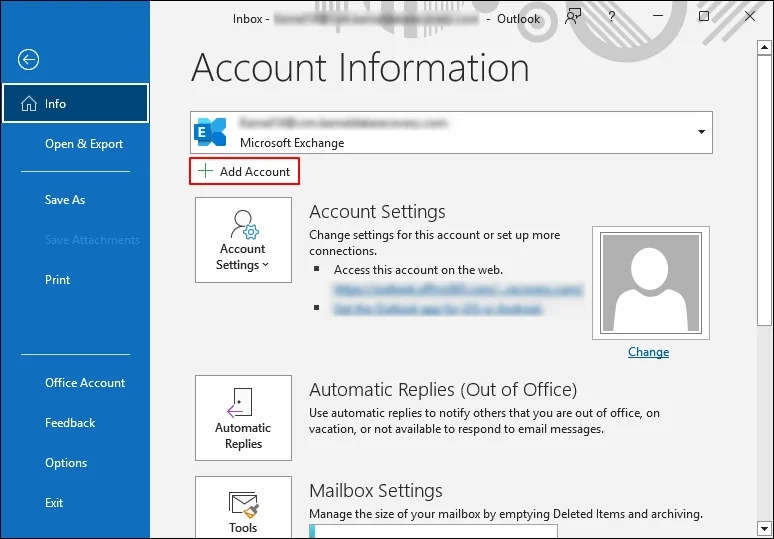
- In the “Add Account” window, type your full Webmail address & click on Connect.
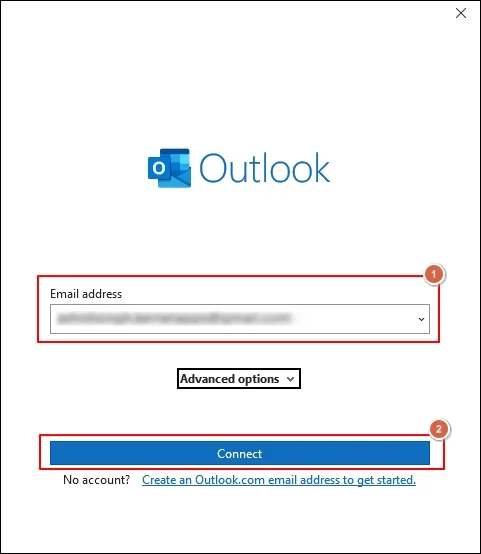
- Outlook detects your email provider’s settings automatically.
- Enter the password associated with your Webmail account.
- If the credentials are correct, Outlook should complete the setup automatically, and your emails will start syncing.
Solution 2. Manually set up Webmail in Outlook!
If Outlook can’t automatically configure your account, you will need to set it up manually. It is common for custom domain emails or less common providers. Here’s how:
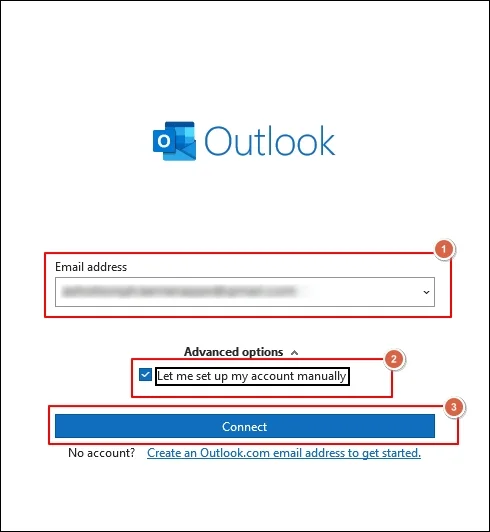
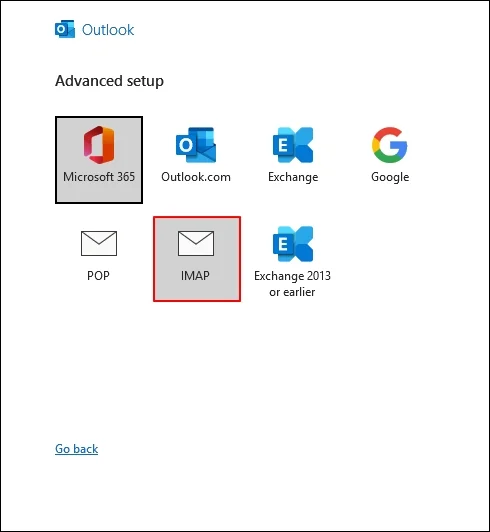
- Access Outlook, click on the File > Add Account option. In the Advanced section, check the Let me set up my account manually option. Tap on Connect.
- Choose POP or IMAP (IMAP is recommended for syncing across devices) unless your provider uses Exchange.
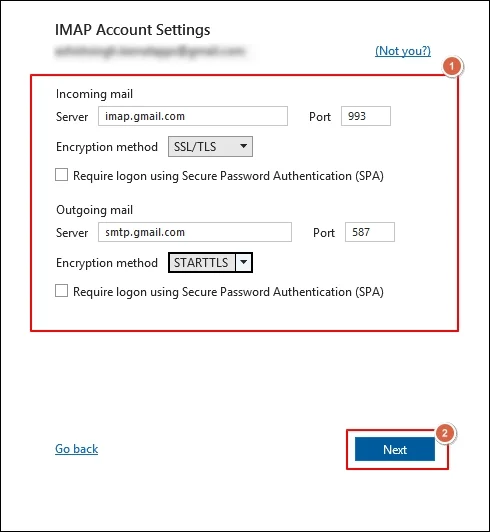
- Fill the following details on the IMAP Account Settings page such as:
- Incoming Mail Server, its Port & Encryption method.
- Outgoing mail Server, its Port & Encryption method.
Click Next.
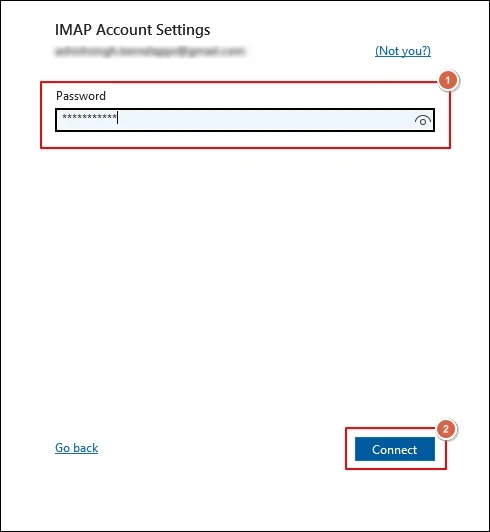
- Provide the email-associated Password & click on the Connect option.
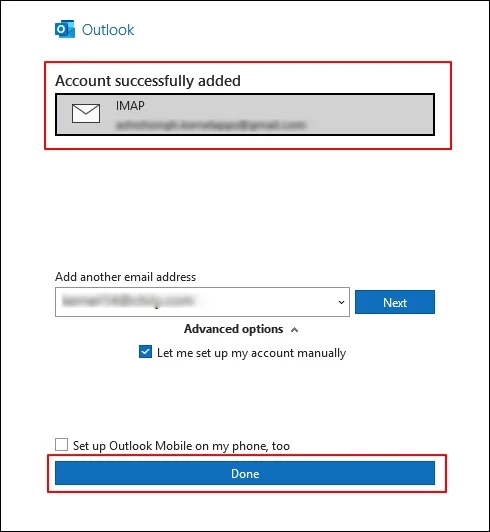
- Once the process is completed, you will be prompted with the message of Account successfully added. If you are concerned with another one, set it up. Otherwise, click on the Done option to end the setup process.
Common Server Settings for Popular Webmail Providers
|
Provider |
Incoming Server (IMAP) |
Port |
Encryption |
Outgoing Server (SMTP) |
Port |
Encryption |
| Gmail | imap.gmail.com | 993 | SSL/TLS | smtp.gmail.com | 587 | STARTTLS |
| Yahoo | imap.mail.yahoo.com | 993 | SSL/TLS | smtp.mail.yahoo.com | 587 | STARTTLS |
| Outlook.com | imap-mail.outlook.com | 993 | SSL/TLS | smtp-mail.outlook.com | 587 | STARTTLS |
Note: Always verify settings with your provider, as they may change.
Verify the changes now!
It is needed to verify the changes for a smooth & transparent workflow. You can check with the following ones:
- Send a Test Email: Open Outlook, click New Email, and send a message to yourself or a friend.
- Check Incoming Mail: Wait for a few minutes and refresh your inbox to check whether your emails are syncing correctly or not.
Your setup is completed if you see the test email in your sent folder and receive new emails.
Need to Know: To verify the correct synchronization of your folders in the mailbox, First, select the added account & then follow the provided layout:
Go to File> Account Settings> Account Name and Sync Settings. Provide the Root Folder path & click on the Next> Done option.
Troubleshoot common issues [Most Overlooked]
Here, we have provided some common resolutions to the most overlooked issues that might have a large-scale impact if untouched.
- Incorrect Password: Double-check your password. For two-factor authentication, make sure that you’re using an app-specific password.
- Wrong Server Settings: Verify your provider’s IMAP/POP3 settings on their support page. Incorrect ports or encryption settings are common causes of issues.
- Firewall/Antivirus Blocking: Some security software may block Outlook’s connection. Temporarily turn it off to test, then adjust settings to allow Outlook.
- Sync Issues: If emails aren’t syncing, go to File > Account Settings > Account Settings, select your account, and click Repair to reset the connection.
Need to Know:
Before making any changes, consider backing up your existing emails, especially if you’re using POP3, which may remove emails from the server. Use Outlook’s Import & export feature to save data in PST format.
Using POP3 account. Worried about its data safety?
POP3 associated account uses PST file format to save data. Since it is stored locally, there are high chances of its misconfiguration or conflicts with the storage that lead to its corruption. In that scenario, manual methods might not help give you PST file data access as earlier. So, it is better to go with the advanced PST repair solution to tackle all PST-related concerns hassle-free.
Recoveryfix Outlook PST repair is one such name that professionals recommend when concerned with the PST file. It not only helps with the repair process but also helps save the resultant file at different locations. Its versatile filters, like split PST files, also help manage storage space effectively.

Conclusion
Hopefully, you’ve successfully set up your Webmail in Outlook, creating a centralized hub for all your email needs. With Outlook’s powerful features, you can now manage your inbox and schedule tasks simultaneously.
Moreover, opt for the recommended advanced solution to secure important emails for a long time with complete integrity.
Frequently Asked Questions!
Q- Is setting up Webmail in Outlook 2007 possible?
A- Go with the following steps to execute it:
- Open Outlook 2007.
- Go to Tools > Account Settings.
- Click New and select E-mail Account.
- Enter your email address and password, then click Next.
- If automatic setup fails, select Manually configure server settings, choose Internet E-mail, and enter your provider’s IMAP/POP3 settings.
- Click Next> Finish.
Q- How to set up Webmail in Outlook 2010?
- Open Outlook 2010.
- Go to File > Add Account.
- Enter your email address and click Next.
- If automatic setup fails, select Manually configure server settings or additional server types, then choose Internet E-mail.
- Enter your provider’s server settings and click Next to finish to setup.
Q- How to set up Webmail in Outlook 2013?
- Open Outlook 2013.
- Go to File > Add Account.
- Enter your email address and click Connect.
- If prompted, enter your password.
- If automatic setup fails, select Manual setup or additional server types, choose POP or IMAP, and input your provider’s settings.