Best Free Methods to Convert OST Files

Published On - February 6, 2026
Microsoft Outlook stores mailbox data in mainly two file formats: PST [Personal Storage Table] & OST [Offline Storage Table].
OST file: It is created when Outlook is connected to an Exchange, Microsoft 365, or IMAP account, which helps users to work offline. The changes are automatically synchronized once the connection is restored. As a result, they are specifically associated with the original email profile.
PST file: When users connect Outlook with a POP3 account, the PST file is used to store the users’ mailboxes. It allows users to store Outlook data locally & can be accessed in any Outlook profile.
Since PST files are more easily accessible or shareable than the OST file, this basic difference compels users to convert OST file to the PST format. Thinking of the same? Need free methods to convert OST files! Read the blog carefully.
Reasons to convert OST files [Major Ones]
It is considered the safest approach to secure yourself in situations like:
- Long-term email backup.
- Outlook profile corruption.
- Job change or organization migration.
- Moving Outlook data to the new system.
- Exchange or Microsoft 365 account deletion.
Want manual methods to convert OST file? Fulfill these Prerequisites
Follow the prerequisites before trying the free methods to convert OST file to PST.
- Outlook should be installed in your local system.
- The associated email account is still active & syncing.
- Make sure you have sufficient space for the PST creation.
- The OST file is accessible through the original Outlook profile.
Free methods to convert OST files [Best Ones]
The section will help you to convert OST file manually with a complete step-by-step approach.
Method 1. Use Outlook’s built-in Import/Export utility
This is one of the most widely used & reliable free methods to convert OST file to PST. It is best for regular Outlook users as it offers complete mailbox export with folder-level conversion compatibility. Check out the complete stepwise approach to know how it works:
Step 1. Open the Outlook application & tap on the File tab.
Step 2. Go to the Open & Export > Import/Export option.

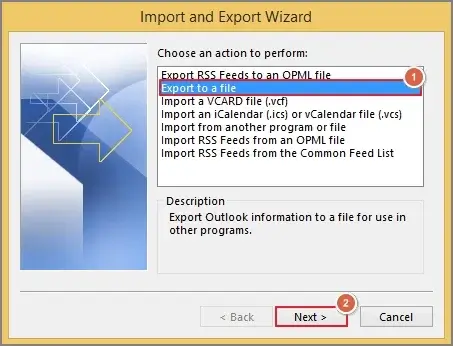
Step 3. Click on the Export to a file option & select the Next option.
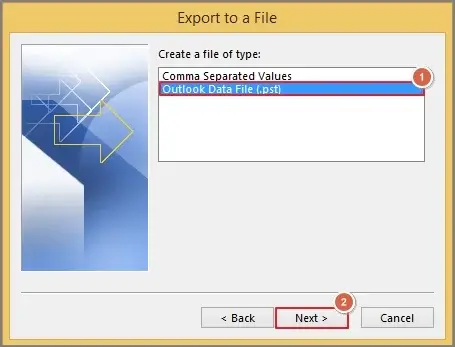
Step 4. Choose the Outlook Data File (.pst) & click Next.
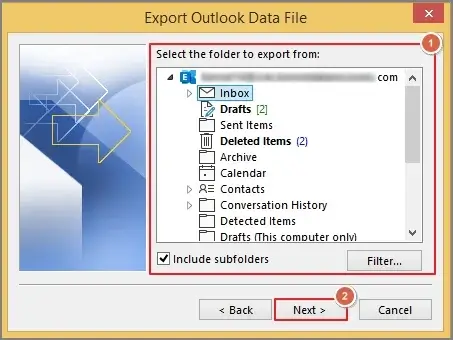
Step 5. Select the desired folder to export from with suitable filters & hit Next.
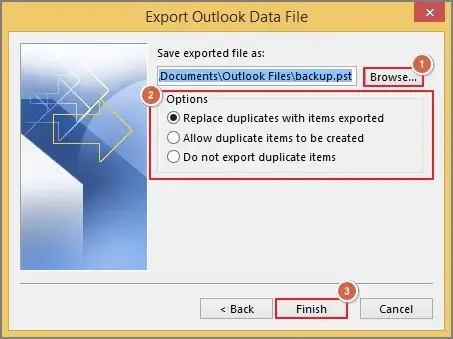
Step 6. Browse the saving location, select the suitable Options & hit Finish.
Method 2. Try the AutoArchive Settings feature
With the AutoArchive or manual archive approach, users can perform specific OST file conversion. Besides, it is helpful in reducing the mailbox size & archiving old emails. Let’s understand its complete stepwise approach:
Step 1. Launch Outlook & hit the File tab.
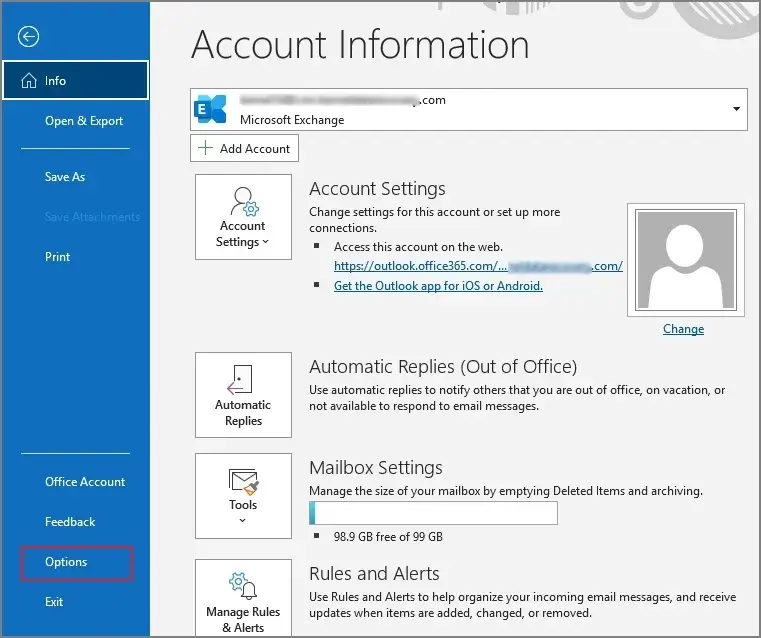
Step 2. Choose the Options on the next window.
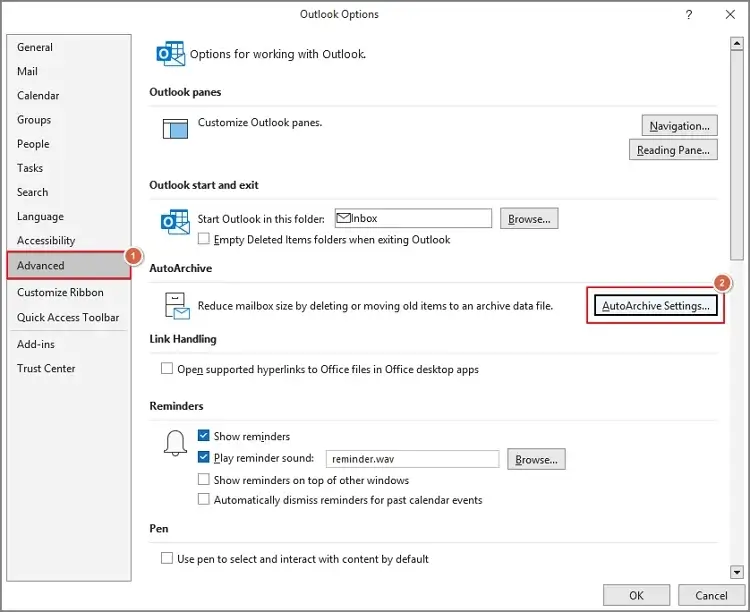
Step 3. Select the Advanced > AutoArchive Settings option.
Step 4. Apply the suitable filters like Run AutoArchive every, archive or delete old items, etc. Browse the location to save the archive file. Click OK.
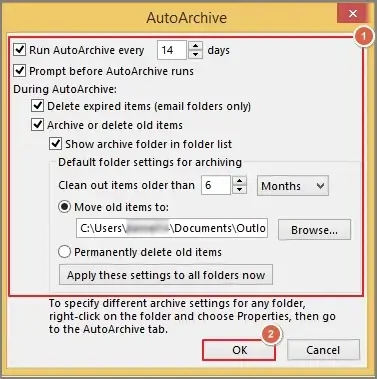
Step 5. Hit OK. It will initiate the archive process in PST file format as per the provided filters.
Method 3. Drag & drop OST items to PST file
It is one of the best possible ways that can help you convert OST file manually but in small volume. It offers selective & quick data movement. Let’s understand how it can be executed:
Step 1. Open Outlook from which you want to export OST data.
Step 2. Select the desired emails or items, drag & drop to the desktop. It will save them in the MSG format.
Note: You can also save the emails in MSG format by opening the email & then going to File > Save As > Save option.
Step 3. Configure the Outlook account through which the PST file is associated.
Step 4. Go to the specific folders where you want to save the OST data. Perform the same drag & drop operation with the saved MSG file.
Step 5. This way, you can access the OST data in a PST file.
Best practices to convert OST files smoothly
By following the provided guidelines, you can make your OST conversion smooth.
- Use the updated Outlook version.
- Verify the PST file integrity after the conversion.
- Export data folder by folder for large mailboxes.
- Keep a backup before starting the OST file conversion.
- Disable Outlook add-ins temporarily as they can cause conflicts.
Ending thoughts
With the free methods to convert OST files, users can access OST data into PST files successfully. It is applicable only when the OST file is accessible & connected to the active Outlook profile. The blog has covered all the possible methods for successful results. But if you are dealing with the complex, damaged, bulk OST files, going with the advanced free OST to PST converter can be the most suitable option.
FAQs
Q-I have no Outlook installed. Can I convert OST file manually?
A- No. Free methods are not applicable for conversion without Outlook. You need to go with the advanced tool options.
Q-2 Will the folder structure or hierarchy remain intact?
A- The chances of distorted integrity are less with the Outlook built-in features like Import/Export or AutoArchive if performed correctly.