Export Contacts from Salesforce: Get Best Methods!

Published On - July 28, 2025
Your marketing team needs a targeted contact list on immediate basis, but you are struggling to navigate the export option. Sounds familiar? Delays in exporting contacts can disrupt workflows and cost valuable opportunities.
Therefore, learning how to export contacts from Salesforce is crucial for any sales or marketing professional. So, the blog will provide the most reliable methods to export contacts and prepare you for a situation like this.
Salesforce Export Options: Understand All of Them!
It is important to understand the different ways to export contact list from Salesforce before knowing the steps:
- Salesforce Data Export Service – Best for scheduled backups.
- Salesforce Reports – Ideal for selective data exports in Excel or CSV.
- Data Loader – A powerful tool for bulk exports using custom queries.
- Marketing Cloud Contact Builder – Export contacts specifically for email campaigns.
- Third-Party Tools – Automate and increase export capabilities with external apps.
How to Export Contacts from Salesforce Manually?
We have analyzed several methods and found that only these are working. So, go through them individually to find the most suitable one for yourself.
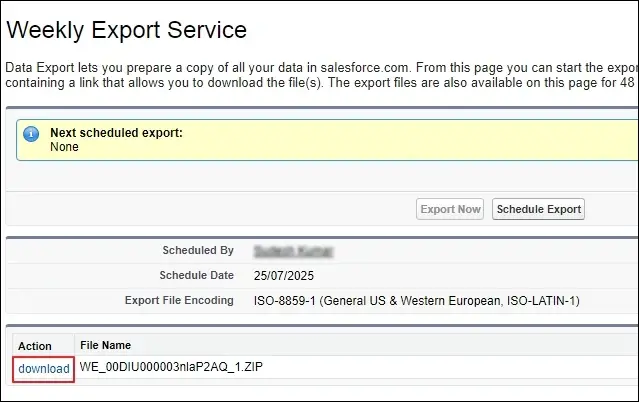
Method 1. Export Contacts Using Salesforce Data Export
Follow the detailed steps to export contacts from Salesforce using the Data Export utility:
Important to Know: Switch to Salesforce Classic before using this solution.
- Click on the Setup tab in Salesforce.
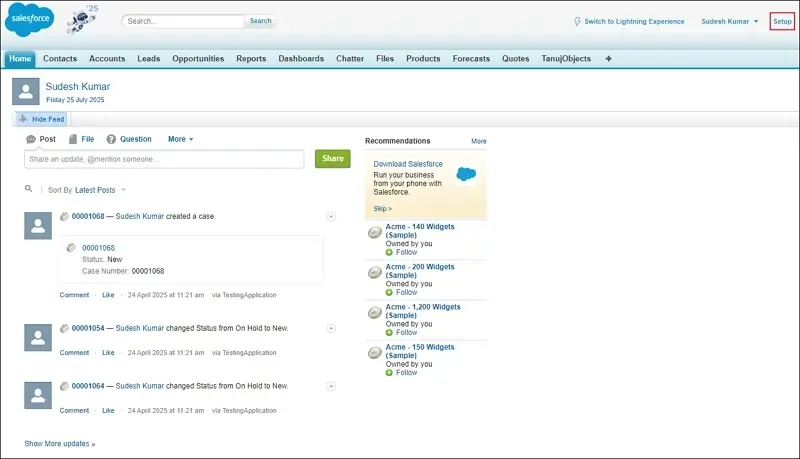
- Search for Data Export in the Quick Find box and open it.
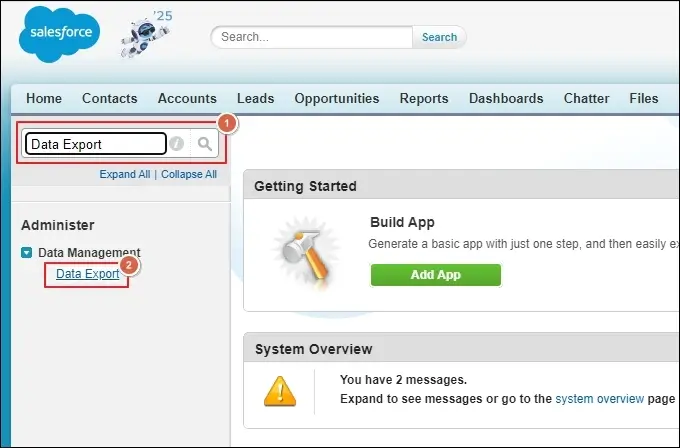
- Click Export Now or Schedule Export to proceed further.
- Select Contacts as data types to export and click on Save.
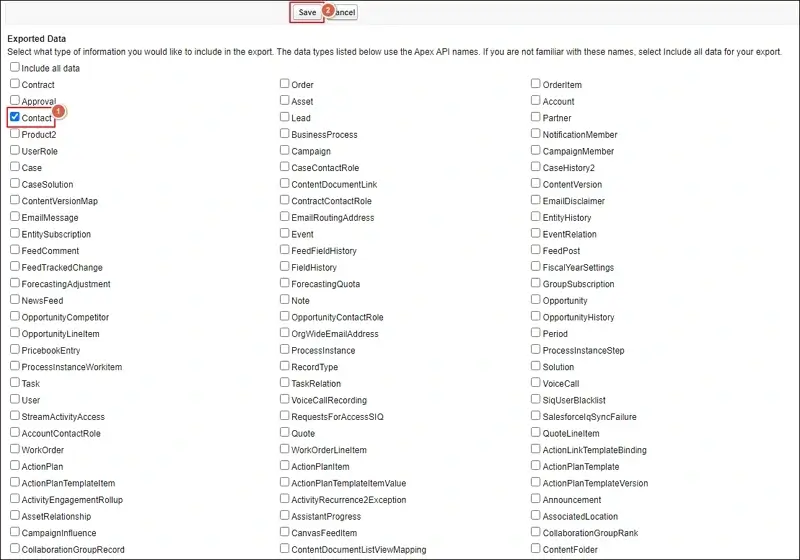
- It will generate a download once the data export process is completed.
- Download the ZIP file and extract it to get the CSV files.
Method 2. Use Salesforce Reports to Export Contacts
Here’s how to export contacts from Salesforce to Excel format:
- Go to Reports from the dashboard and click on New Report.
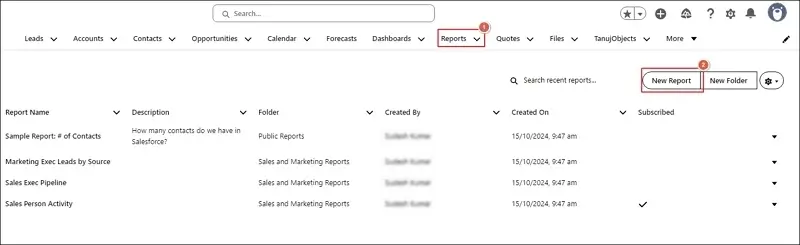
- Select the Accounts & Contacts > Contacts & Accounts. Then, Start Report.

- Use Filters to select specific contact groups and Run a report to preview the data.

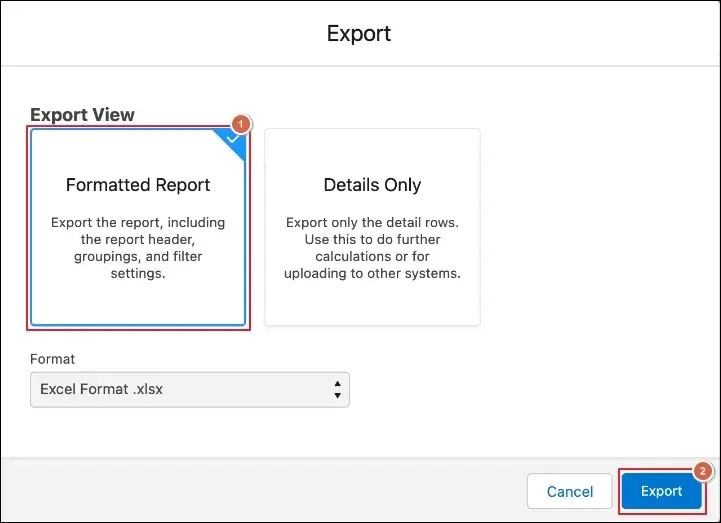
- Choose the Export option from the dropdown menu.
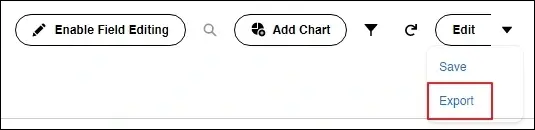
- Select Formatted Report and click Export.
Method 3. Export Contacts from Salesforce Marketing Cloud
If you are using Salesforce Marketing Cloud, the process of exporting contacts is slightly different. Here’s how to export contacts in Salesforce:
- Navigate to Contact Builder in Salesforce Marketing Cloud.
- Go to All Contacts and select the desired contact list.
- Click on Export and choose CSV as the preferred format.
- Save the file and use it for your marketing campaigns or backups.
Note: Use Automation Studio if you need to schedule recurring contact exports.
Method 4. Use Data Loader Utility to Export Contacts
Data Loader is the best tool to export contact list from Salesforce on a large scale. Here’s how to export contacts from Salesforce to CSV format:
- Download and install Salesforce Data Loader.
- Log in using your Salesforce credentials.
- Select Export and choose the Contact object.
- Create a SOQL Query to define the data you want to export.
- Choose an output file format (CSV) and click Finish.
Note: Use This method is recommended for admins and developers handling bulk data transfers.
Work Smarter & Save Hours: Automate Contact Exports!
Salesforce provides several ways to export contacts from Salesforce automatically. You can use the given methods to save your time and reduce errors:
- Schedule recurring exports using Salesforce Reports.
- Use API integrations to program data export automatically.
- Set up workflows with third-party tools for automated syncing to spreadsheets.
Quick Fixes: Resolve Common Export Glitches Now!
Here is the list of common errors and their suitable solutions that occur during the export process:
- Missing Export Option – Make sure you have all the necessary permissions to export data. If not, contact your Salesforce administrator.
- Exported Data Is Incomplete – Double-check your filters and selection criteria to make sure all contacts are included.
- File Format Issues – Select the appropriate format (CSV, Excel) based on your needs.
- Slow Export Process – Large data sets may take longer to export. Break them into smaller batches for a quick export process.
- Duplicates Items in Exported File – Check for duplicate records in Salesforce and apply rules to remove duplicate items.
- Export Button Not Working – Clear your browser cache or try using a different browser to see whether the issue is resolved or not.
- Data Formatting Issues in Excel – Use data cleaning tools or adjust column formats to ensure readability.
Final Thoughts
Hopefully, you have learned the complete steps to export contacts from Salesforce. You can select the best applicable method based on your current requirements.
However, to speed up the contact export process, you can use API integrations or third-party tools like Recoveryfix Salesforce Backup and Restore.
The Salesforce Backup software allows users to backup large-scale data in just a few minutes.

FAQs: Before You Ask, Read This!
Q- What’s the best way for uploading contacts to Salesforce in bulk?
Ans- Data Loader and Data Import Wizard are the best native solutions to upload contacts in bulk. However, they are time-consuming. So, use advanced tools like Recoveryfix. Here’s how to upload contacts into Salesforce:
- Download the software and add your contacts.
- Enter your Salesforce credentials and start the import process.
- It will upload the contacts to Salesforce in a few minutes.
Q- How can I import contacts in Salesforce without errors?
Ans- You can use the Data Import Wizard under the Setup menu to import contacts without issues. To do so, follow the given steps:
- Select the Contacts as an object and upload our CSV file.
- Map the fields correctly and start the import process.
- Review data to avoid duplicate or incomplete entries.