Migrate Dovecot to Office 365: Get Step-by-Step Guide!

Published On - July 10, 2025
Dovecot is an open-source, reliable mail hosting platform known for its easy setup, lightweight design, and high performance. It is primarily used in small businesses having Unix-like Operating systems.
However, to increase digital reach with enhanced security and features, using Office 365 is considered the prime option. Hence, the blog will guide you on how to migrate Dovecot email to Microsoft 365 manually or using an advanced solution.
Why do users migrate Dovecot to Office 365?
Users get the following advantages over the Dovecot that drive them to execute Dovecot to Office 365 migration:
- With Office 365, users can reduce downtime with automatic updates & technical support.
- Office 365 offers cloud-based access from anywhere, anytime, with an aligned productivity suite, including OneDrive, Teams, and SharePoint.
- Handle large volumes of emails & user accounts with Office 365, which can be challenging with Dovecot.
- Provides a centralized management facility to control and structure the infrastructure accordingly.
- Office 365 provides a seamless integration facility with other cloud services, such as Dropbox and Google Drive.
- Enhance professionalism or brand consistency with the business domain can be possible with Office 365.
Preparation steps to migrate Dovecot to an Office 365 account!
Consider following steps for smooth Dovecot to Office 365 migration:
- Get all the Office 365 admin credentials, along with all necessary permissions, for a seamless migration.
- Collect all the information about your IMAP server, such as the port number and server address.
- Plan and notify users about the migration process, including the steps you will take.
- Back up Dovecot Mail, i.e., Maildir/MBOX files, to avoid any unusual consequences.
- Check the internet connection before starting the migration, as it can lead to data loss situations as well.
Migrate Dovecot to Office 365: Use the IMAP Migration Facility!
Office 365 supports built-in IMAP migrations through the Admin Centre. You can migrate from IMAP server to the Office 365 with this facility. Let’s explore how it works:
Part 1. Complete the necessary steps for migration first!
Step 1. Gather all the required information for the migration, such as the desired Dovecot email address & Office 365 admin credentials.
Step 2. Structure the credentials in the CSV format & save it to the desired location.
|
Email Address [Dovecot] |
Username [Office 365] |
Password [Office 365 associated] |
| daniells.321@test.com | faf.651@example.com | Tu3n%were4 |
| johnson.S@test.com | stevestokes.3@example.com | Yhe1gyfvnjh9 |
Part 2. Create the Migration Endpoint in the Office 365!
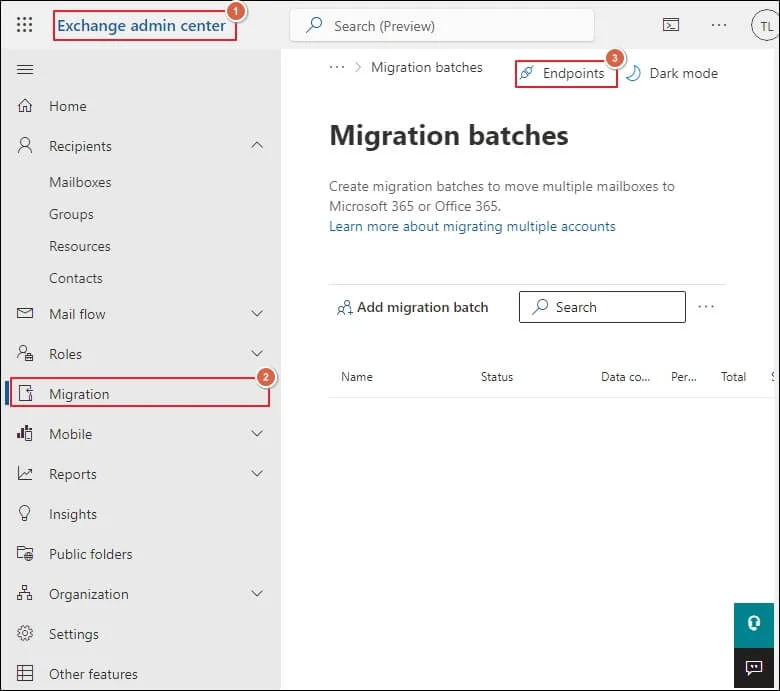
Step 1. Sign in to the Microsoft 365 Admin account with the required credentials.
Step 2. Open the Exchange Admin Centre and go to the Migration> Endpoints option. Click on the Add+ option.
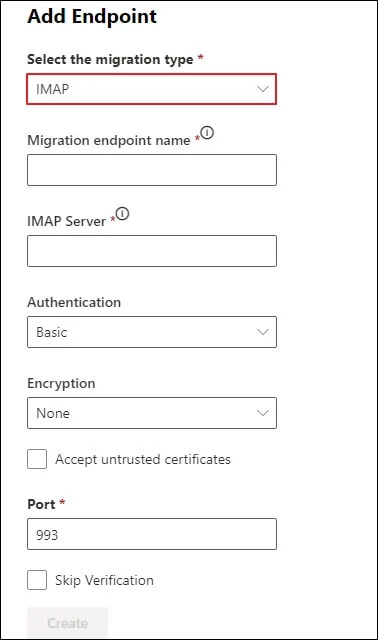
Step 3. On the next page, select IMAP from the migration type. Provide the required information in the following fields, such as Migration endpoint name and IMAP Server, and leave the rest of the settings unchanged from the default values. Tap on the Create tab.
Part 3. Set up Migration batch & further start the migration!
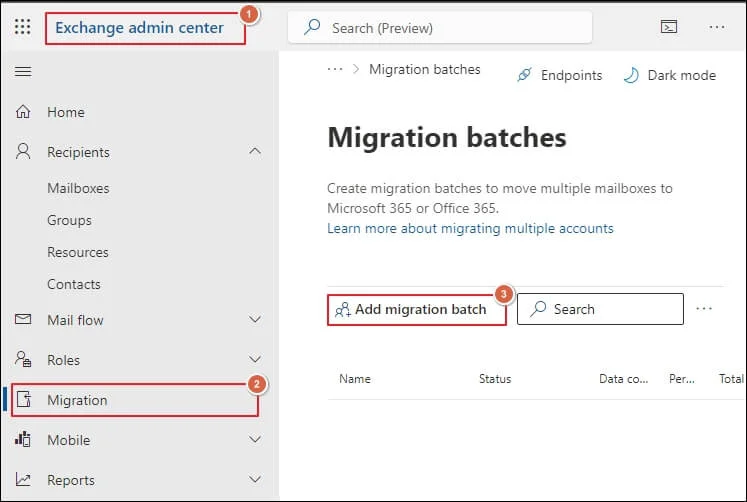
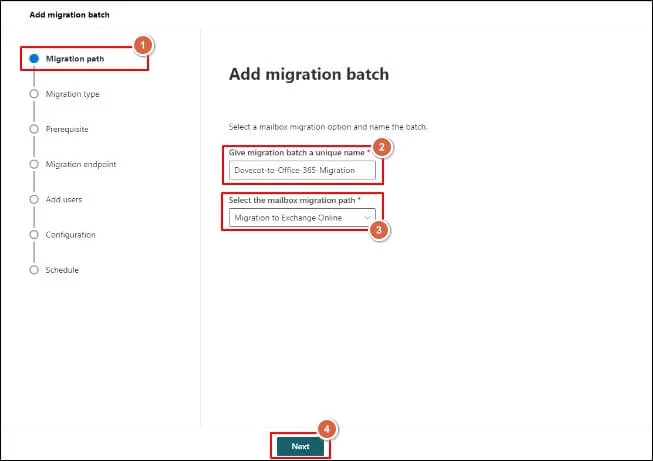
Step 1. Return to the Exchange Admin Centre home page and select the Migration> Add migration batch option.
Step 2. Provide a name for the migration batch and select ‘Migrate to Exchange Online‘ from the drop-down list of the migration path. Tap on the Next.
Step 3. Select the IMAP migration as the migration type & hit the Next option.
Step 4. After validating all the prerequisites, click on the Next option.
Step 5. Now, select the created migration endpoint in the Set migration endpoint section and click Next.
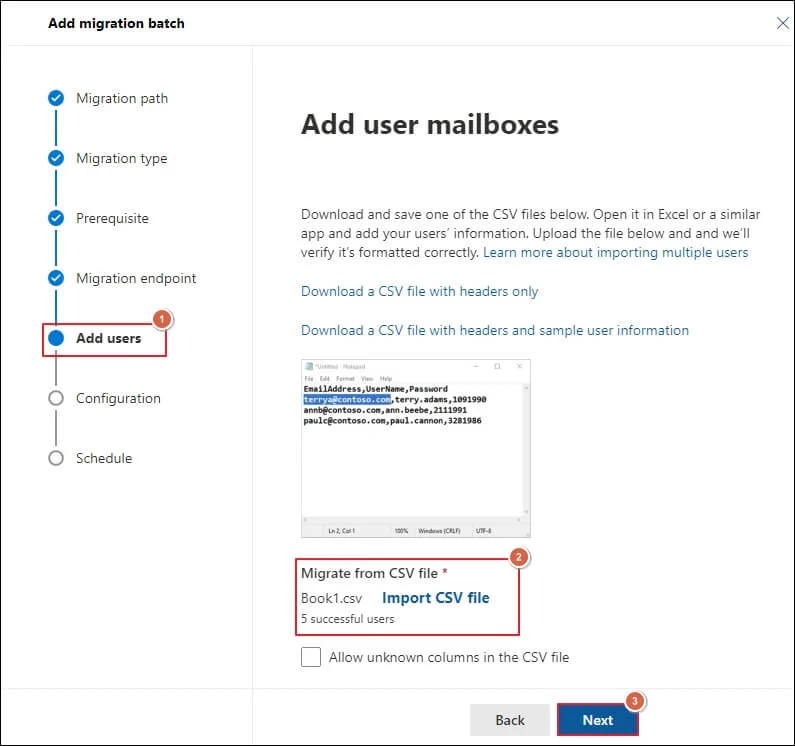
Step 6. On the Add User Mailboxes page, use the Import from CSV file option to upload the user’s information and then upload the saved CSV file. Tap on the Next.
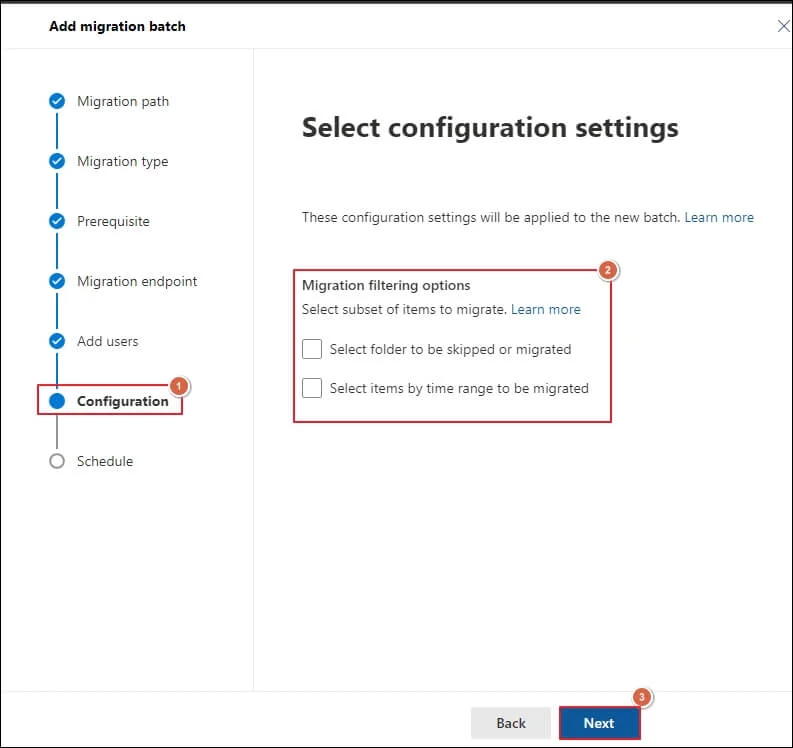
Step 7. Once the suitable options are chosen, click the Next option on the Select configuration settings page.
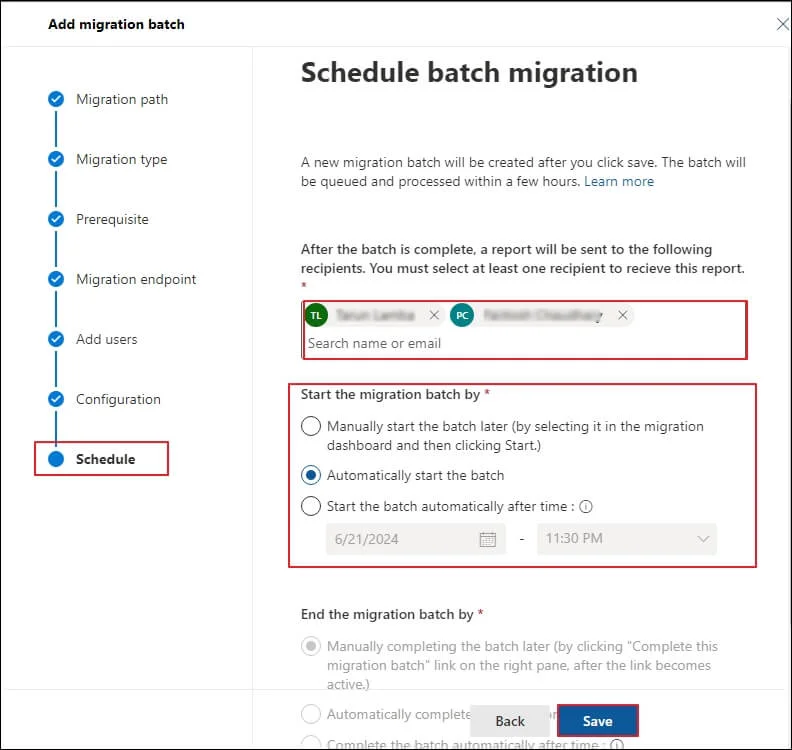
Step 8. Do the required things in the Schedule batch migration window. Go to the Save & then tap on the Done option. It will start the migration process.
Part 4: Manage Additional Settings for Efficient Results!
Once all the Dovecot emails are synced with the Office 365 account, follow the steps below:
- Update your MX record to Office 365 to route Dovecot email directly to Office 365.
- Do test sending and receiving emails after Dovecot to Office 365 migration.
- Keep Dovecot active for 72 hours, as it is needed to recognize the changed MX record.
Tips to migrate Dovecot to Office 365 Efficiently!
Here are some tips that can help you in the Dovecot to Office 365 migration process:
- Split into batches of 50-100 users to avoid oversize issues during migration.
- To avoid high traffic, lower DNS TTL earlier to smooth the MX switch.
- Use PowerShell to perform an IMAP migration to Microsoft 365.
- Delete the migration batch in Office 365 once the process is completed.
- Regularly monitor the system for any potential issues after migration.
[Bonus]Facing common issues: Troubleshoot them!
|
Problem |
Easy fixes |
| Some mailboxes show errors | Check credentials, SSL, and active ports. |
| Missing calendar/contacts | Export ICS/VCard from Dovecot manually. |
| Delays after cutover | Wait 48–72 hrs for DNS and sync completion. |
| Access denied on IMAP endpoint | Confirms whether user or admin credentials are valid. |
| Issue with oversized migration | Retry mailbox migration or split batches. |
Instant solution to migrate Dovecot to Office 365!
While going with the manual process, you have noticed that performing the Dovecot to Office 365 migration manually is both lengthy and tedious. Moreover, the chances of data loss or some data ambiguities are high with it.
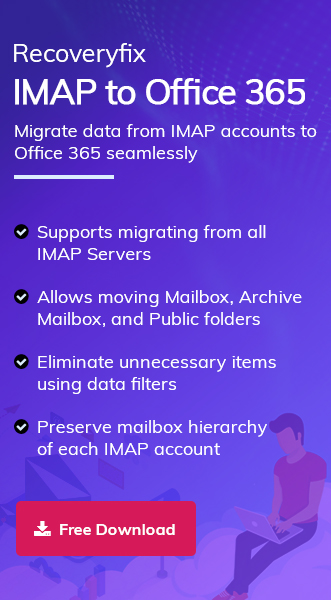
To convert all negative scenarios into positive ones, it is recommended to use the advanced IMAP to Office 365 migration solution. Recoveryfix IMAP to Office 365 is one option that stands out as the first preference for professionals due to its high-tech features. You can use multiple facilities with this single tool like:
- Convert multiple IMAP servers into Office 365 accounts in a few clicks.
- Perform selective IMAP to Office 365 migration.
- Reduce time with automated mapping using the CSV file feature.
- Migrate archive mailboxes, mailboxes, and public folders with advanced data filters.
- Avoid data cluttering or data redundancy with the incremental migration utility.

Conclusion!
Migrate Dovecot to an Office 365 account is a current need for organizations that want to scale up their business in any aspect. Considering this, we have covered each element, including reasons and a manual method, along with some common troubleshooting tips.
An advanced recommended approach can be the extra edge for those seeking instant and precise results.
FAQs: Frequent Asked Questions!
Q- Can I migrate encrypted Dovecot mail to Office 365?
A- Yes. A manual approach can help in this regard, but due to inherent limitations, it cannot be considered the preferred one.
Q- Will folder hierarchy remain intact?
A- By using the advanced IMAP to Office 365 tool, you can retain your folder or data integrity during or after the migration.