How to backup and restore emails using Outlook 2013, 2016 and 2019

Updated On - July 26, 2024
Outlook is a functional email application developed by Microsoft that allows users to manage their emails, contacts, calendars, and tasks all in one platform. Outlook contains critical data, and individuals need to take extra precautions to keep it safe. Following healthy data storage procedures can protect you from variety of uncertainties. Making a backup file is essential as you never know when that backup may come in handy and save you from losing crucial data forever.
Why backup and restore are essential?
Having a backup for your emails in Outlook is like providing more security for your information. You need backup to make sure you don’t lose any crucial data if something unexpected happens, like emails got deleted automatically or due to a technical glitch. There are many scenarios where a backup file may be the only resort to regain your data.
Similarly, restoring helps you bring all your data back into your device and lets you work as if nothing has happened. You may also need to backup and restore data when planning to switch between two devices or two accounts.
How to create a Backup?
A backup is like providing safety and security to your essential data files, like emails. Outlook provides import and export features with which one can create a backup. To backup Outlook emails using Outlook 2013, 2016, and 2019 follow the below-mentioned steps:
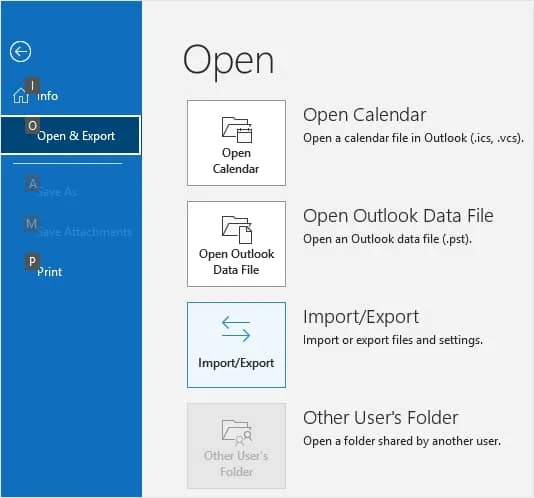
- Open Outlook and go to the File menu.
- Now, from the categories listed on the left side panel, select Open & Export.
- In the Open & Export category, select the Import/Export (Import or export files and settings) option.
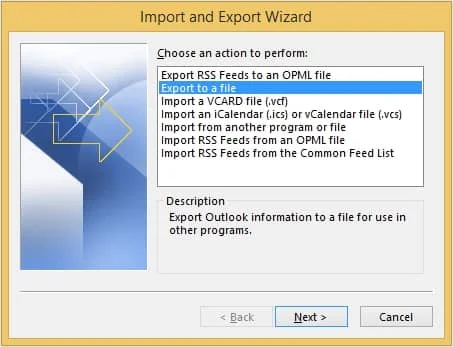
- In the Import and Export Wizard dialogue box, select Export to a file. Click Next.
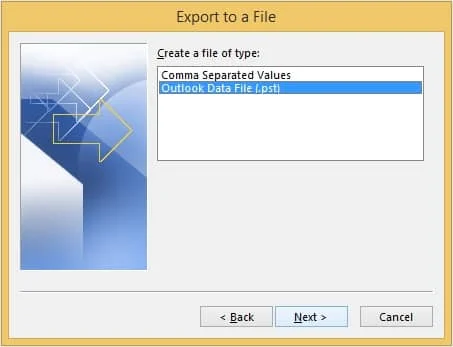
- Choose Outlook Data File (.pst). Click on Next once done.
- Now select the Inbox option, as shown in the image below. Click on the Next button to proceed.

- Click on the Browse button to provide a location to your newly created backup file. Provide a unique name to the File so that you can find it easily at the time of need. Once done, click on the Finish button.
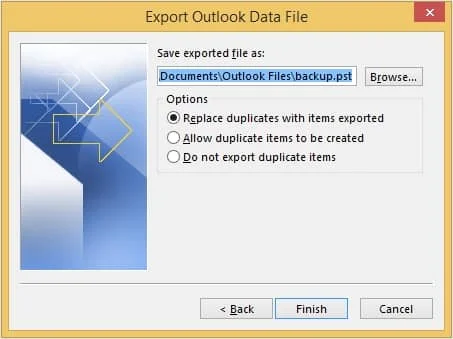
Note: If you want to include the sub-folders in your new backup file, check the box right next to the Include subfolders option.
Note: You will see that there are additional options available for your backup file at this phase. Decide which one best fits your requirements. We have selected Replace duplicates with items exported.
Once you have successfully completed all of the steps mentioned above, you can move further and check the newly created backup file in the same location that you saved it.
How to Restore a Backup file?
Restoring a backup file in Outlook is essential to protect your emails and ensure you can get them back in case of any mishappening. Having a backup won’t help if you don’t know how to recover a file. However, it’s very simple to restore a backup, just like creating it. Follow the below-mentioned steps to restore a backup file:
- Open Outlook and click on the File option.
- Select Open & Export option.
- Now select the Import/Export (Import or export files and settings) option.
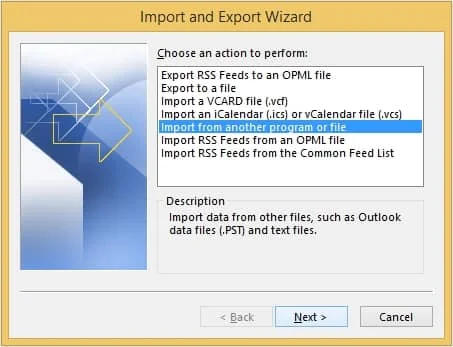
- A new dialogue box will pop up on your screen, there you will have to select Import from another program or File. Click on the Next button to proceed.
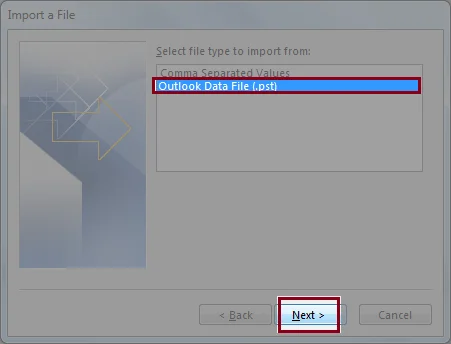
- Select Outlook Data File (.pst), click on the Next button to proceed.
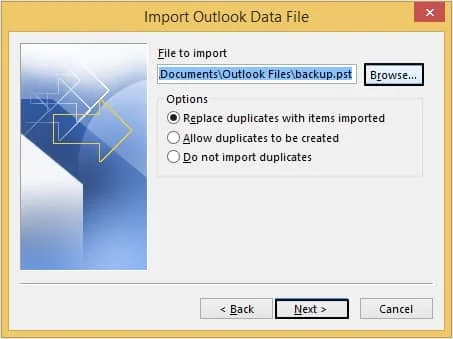
- Click on the Browse button to add the backup File that you want to restore. Go to the file location in your system, select it, and add it. Finally, click on the Next button.

Note: You can select any of the three options to customize your import process after adding the desired backup file to restore from. You can select it as per your requirements, like we have selected Replace duplicates with items imported.
Then, select the saving folder preference and proceed as indicated in the screenshot.
Wait for the import to finish completely. Once finished, all your emails will be restored to your account.
What if you don’t have a backup file to restore from?
If you don’t have a backup file to restore from, it will create many problems. In such situations, it’s a good idea to start backing up your emails regularly to avoid losing essential data in the future. However, if you have lost all your data and you do not even have a backup file to restore from, in such cases, you can take help from a third-party application. Recoveryfix for Outlook PST Repair is the answer to this question. With this tool, you can recover even deleted emails from a PST file. Not just emails, this tool recovers attachments with those emails too. Download the free trial version now to try it out.
Conclusion
Backing up and restoring emails in Microsoft Outlook is crucial because it provides security for your essential data. It ensures that you can quickly backup your emails in case of any difficult situation. In this blog, we discussed how one could create a backup and restore a backup file within Outlook. By having a backup system, you can protect your valuable information. In case of PST file corruption, we recommend using Recoveryfix for Outlook PST Repair tool, which is very reliable and makes your work easy.