Working of Recoveryfix for MBOX to PST SoftwareBuy Now
How It Works?
Recoveryfix for MBOX to PST is mailbox converter software, which converts unlimited MBOX files in MS Outlook accessible format like PST, EML and MSG. In addition, it provides migration of required files to cloud located Office 365. The tool is completely user centric and offers self-explanatory features.
Following are the steps, a user may take to operate the software systematically and accomplish the required task:
Step 1: Click Start button → All Programs option → Recoveryfix for MBOX to PST. The Welcome screen of the software will appear as:
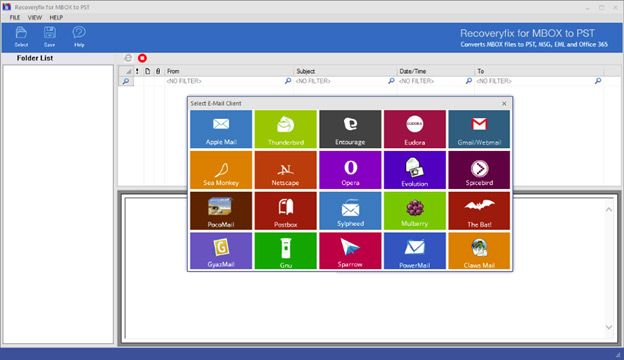
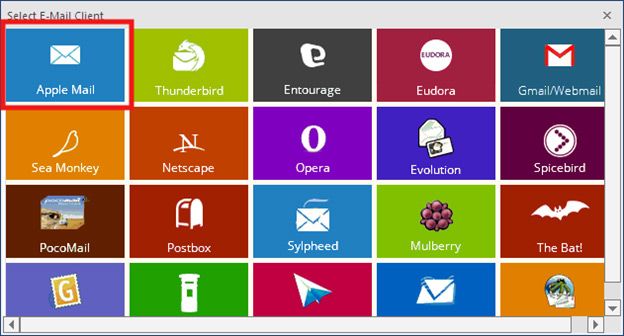
Step 2: Select the required MBOX email client among the displayed options on the pop up screen. (Here Apple Mail is selected to illustrate how the software works.)
Step 3: After the selection of MBOX email client, the software will prompt a new window with options to add file(s) or folder that are required to be converted. Click on “Add files” if the location of the required files is known else click “Add folder” to select the drive or folder carrying the MBOX files.
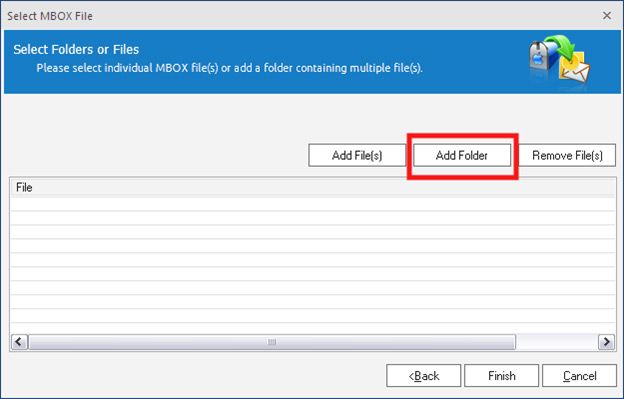
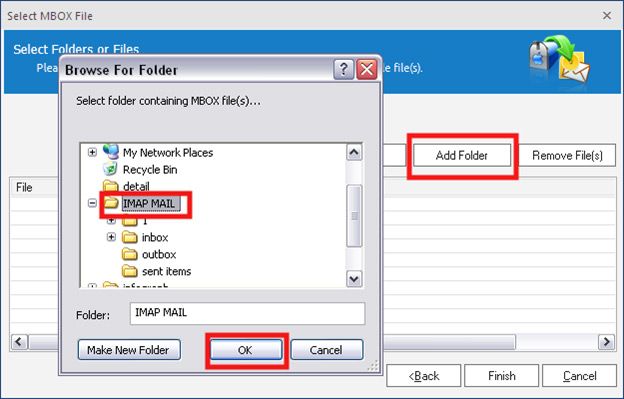
Step 4: A new pop up “Browse for folder” will appear on clicking the Add folder option. Select the folder containing MBOX files and click “OK” button
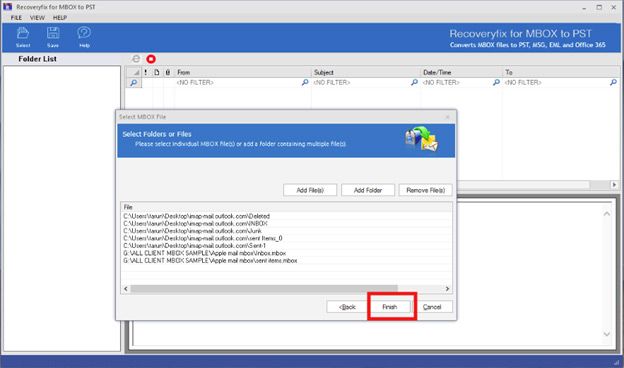
Step 5:The software will extract and enlist all the MBOX files carried by the folder. Select the unnecessary files and click “Remove File(s)” option for saving relevant files only. Click “Finish” button to proceed ahead.
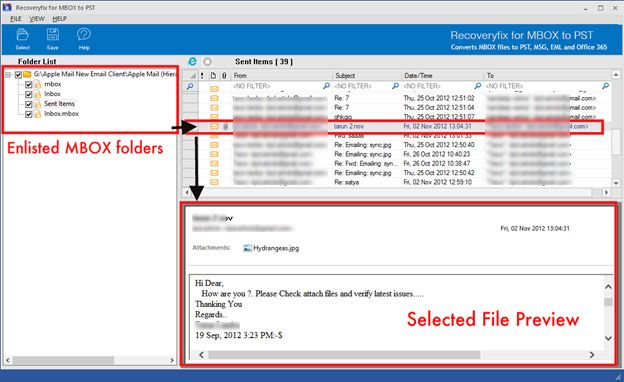
Step 6: The software will convert all the selected files and enlist them in hierarchy in the Folder List. Select any of the folders and verify its files in the upper right pane of the software. The lower right window displays the detailed content of the file selected in the upper right pane.
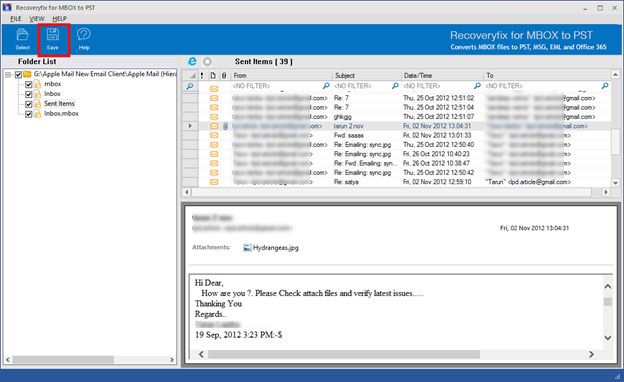
Step 7: Select the Save option from the ribbon to proceed with the conversion and restoration procedure.
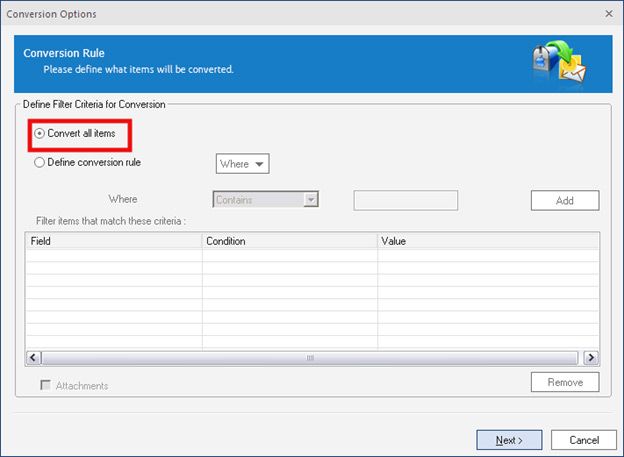
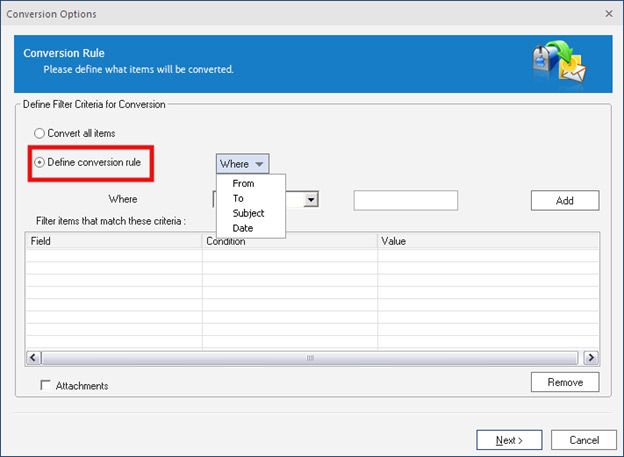
Step 8: A new window will appear, offering the file filtration options. Select “Convert all items” option in case you do not wish to filter the files and save all converted file items. Else, select “Define conversion rule” option if you wish to save refined file items.
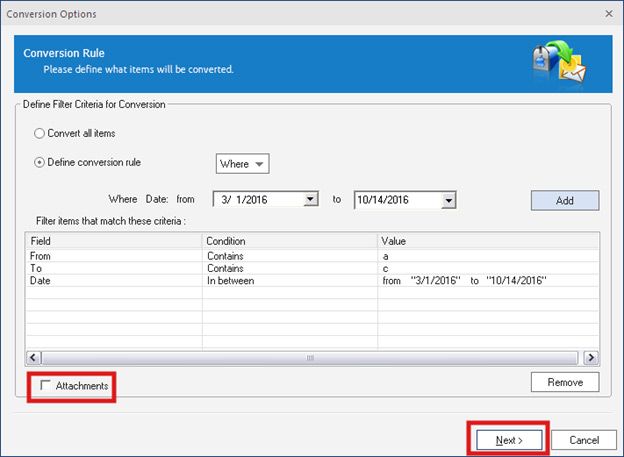
Step 9: To execute “Define conversion rule” option, provide the filter criteria to convert selective emails. Select the “Where” option with four different filter criteria: From, To, Subject and Date.
Step 10: Select the “From” field in case you want to refine the files by naming the Sender of the email item. Define “contains” or “not contains” values and click “Add” option.
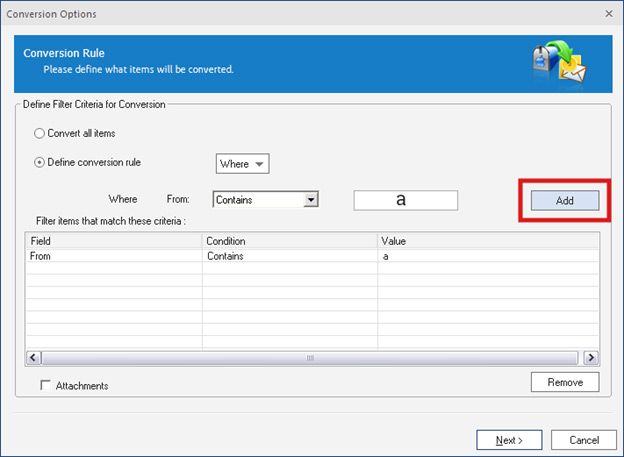
Note: Here letter “a” is mentioned as the “Contains” value, to extract the files whose sender name includes letter “a”.
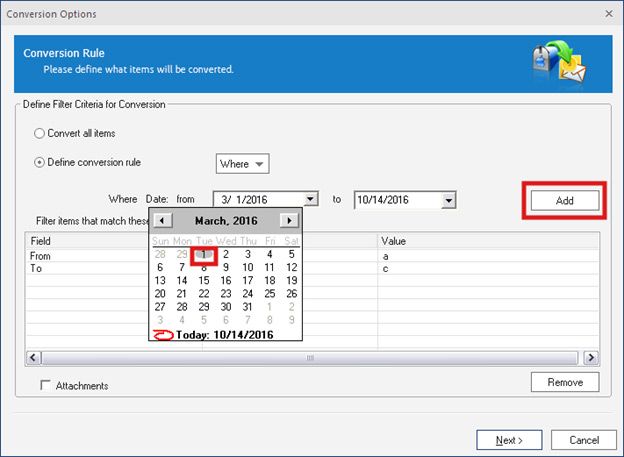
Step 11: The other two criteria “To” and “Subject” can be defined in the similar way as the “From” criteria have been defined. However, for defining the “Date” criteria select the date range from the pop up calendar and click “Add” button.
Step 12: Confirm the filter criteria and select the “Attachment” checkbox if you wish to convert attachments along with email items.
Use “Remove” button to deselect the criteria that you no longer wish to use. Click “Next” to obtain refined file items.
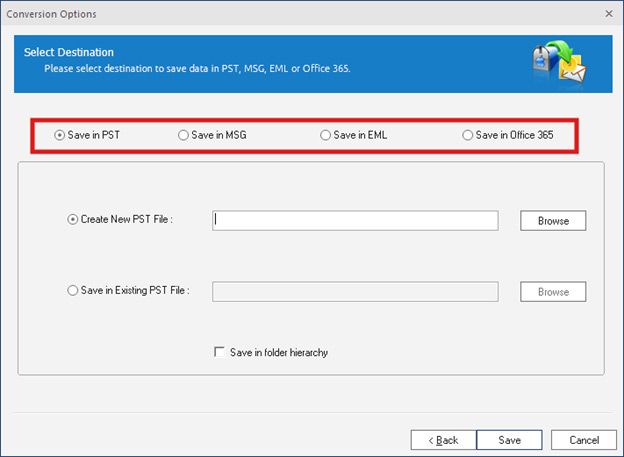
Step 13: After setting the filter criteria, the software will open new window providing the four destination options: Save in PST, Save in MSG, Save in EML and Office 365 to save the converted files.
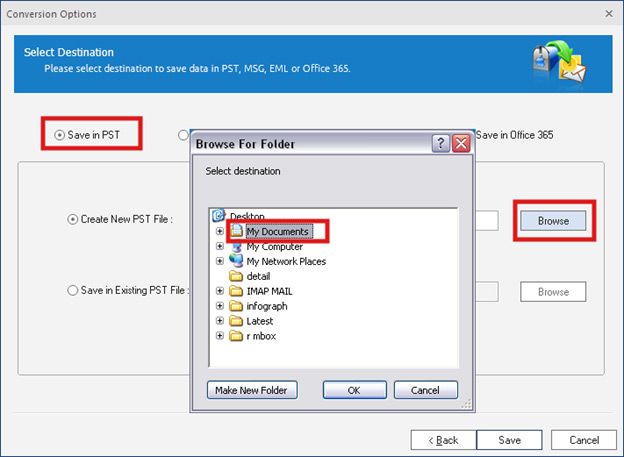
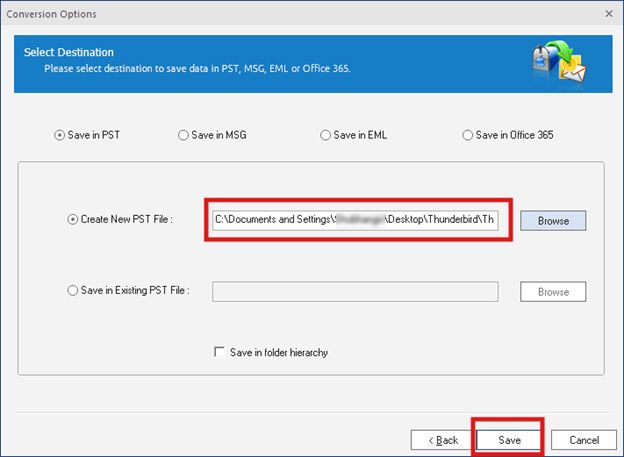
Step 14: Click “Save in PST” option if you want to save the MBOX files in PST format. On clicking this option, the software will ask you to choose between “Create New PST file” and “Save in Existing PST file” option. For saving the converted files as new files, click the first option and choose saving destination by using the “Browse” button. Select the saving destination and click “OK” button.
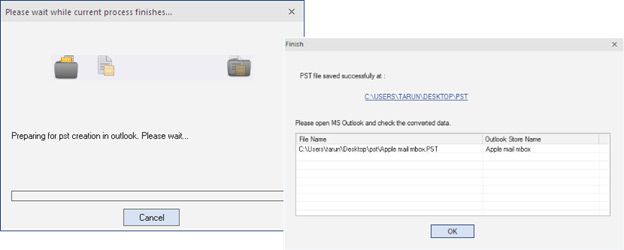
Step 15: Click on “Save” button after defining the saving path. The software saves the files with default name as Apple MailMBOX.pst. You can rename it afterwards if required.
Step 16: Select “Save in Existing PST file” option, if you want to save the converted files in local PST files. The procedure will be the same as followed for “Create New PST File” option. The software will display a successful saving option after the completion of saving process.
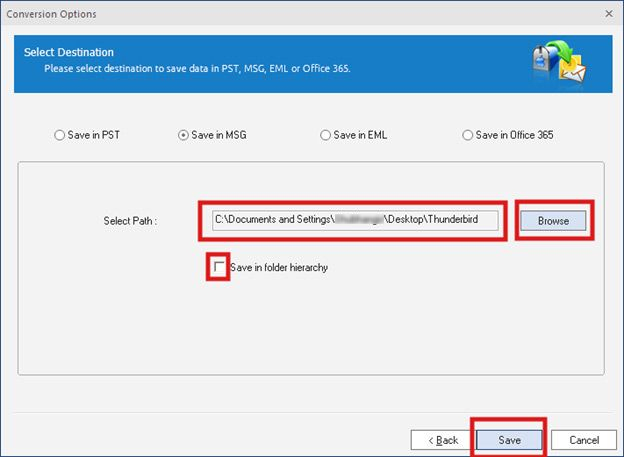
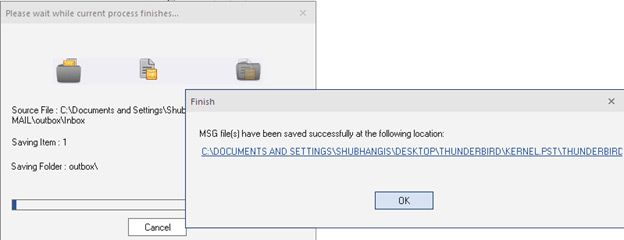
Step 17: Select “Save in MSG” option, if you wish to save the converted files in MSG format. Click the “Browse” option and define the saving path. Select the “Save in folder hierarchy” checkbox and click “Save”.
Step 18: The software will display a message upon successful restoration of the files.
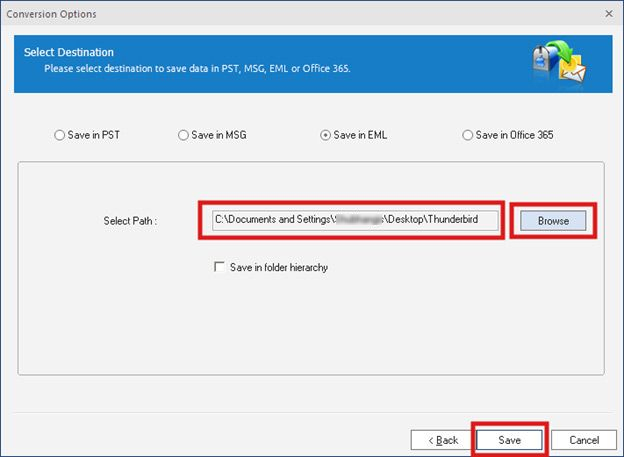
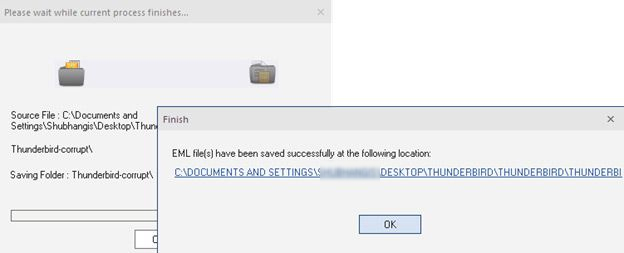
Step 19: Select “Save in EML” option, if you require the converted files to be saved in EML file format. Select the “Browse” option and mention the saving path. Select the “Save in folder hierarchy” checkbox and click “Save”.
Step 20: A message will be displayed on successful completion of the process.
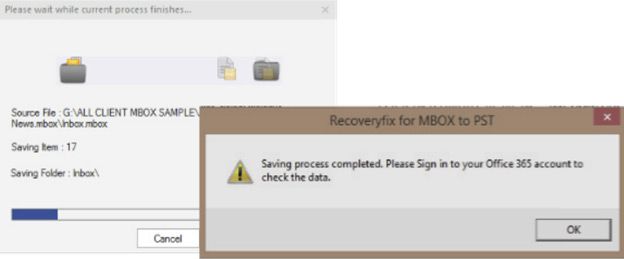
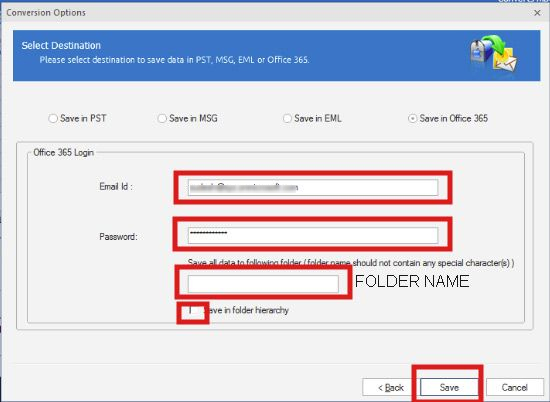
Step 21: For saving the files in Office 365, select “Save in Office 365” option. Enter your Office 365 credentials and mention the name of the folder, where you want to save the files, select the “Save in hierarchy” checkbox and click “Save” button.
Step 22: A message will appear on screen on successful saving of files at Office 365.