How to recover corrupt Outlook Data File (OST)?

Updated On - October 19, 2022
Outlook Data Files are of two types – OST (Offline Storage Table) and PST (Personal Storage Table). OST files allow you to access MS Outlook mailbox items during unavailability of internet (when MS Outlook is not connected to the Exchange Server). Whatever changes you make during offline mode, get synchronized automatically whenever internet connectivity is back.
Talking about data corruption, OST files get corrupted easily. And, OST corruption can lead to data loss if not fixed immediately. Before knowing about fixing OST corruption issues, you should know the most common reasons for the same.
OST corruption is most likely to occur due to:
- Bad sectors on your system’s hard disk where OST files are stored
- Data synchronization issues between OST files and Exchange Server
- Failure of data storage devices
- Network connection issues
- Improper Outlook termination or upgradation to a higher version
- Virus attack, abrupt system shutdown or sudden power failure, etc.
Outlook mailbox cannot be accessed during OST corruption. Depending upon the cause of corruption, different error messages are likely to appear on your computer screen if you try to access mailbox items during OST corruption. Here are the most common error messages you might get while trying to open corrupt OST files:
- “Unable to expand the folder. The set of folders could not be opened. Errors could have been detected in the file xxxx.ost. Quit all mail-enabled applications, and then use the Inbox Repair Tool.”
- “Cannot open particular Outlook items when offline”
- “Cannot open your default email folders. The file xxxx.ost is not an offline folder file.”
How to fix OST corruption?
Error messages is good enough to make you worry about your data. However, there is no need to get worried. OST file corruption can be fixed easily. You can either use native Inbox Repair Tool (Scanost.exe) or a professional OST to PST Converter tool to fix OST corruption issues. First, try using native tool.
Inbox Repair Tool (Scanpst.exe/Scanost.exe)
Microsoft provides Inbox Repair Tool along with its MS Office suite. Also known as Scanost.exe tool, it’s capable of fixing minor OST corruption issues. It’s absolutely free. To use it, follow the below given steps:
- Open – drive:\Program Files\Microsoft Office\OFFICE (version)
- Double-click Scanpst.exe/Scanost.exe to open it
- Type the name of the file you want to repair or Browse it.
- Select Repair checkbox and click on Start Scan.
- The scanning process begins.
Once it’s over, open Outlook and go to Folder List. Repaired OST files can be seen inside the folder named Recovered Folders List. And if not, you need to use a professional software.
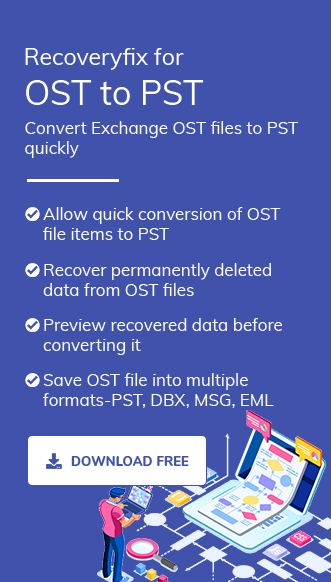
Inbox Repair tool is incapable of repairing severely corrupt OST files. And, there is no guarantee of complete and accurate data recovery. Thus, using a professional OST recovery tool is the best way to recover corrupt OST files. Recoveryfix for OST to PST, is a prominent tool to recover corrupt OST files. It swiftly fixes all OST corruption issues regardless of the cause of the corruption and recovers entire Outlook mailbox data.

It uses its two robust scanning modes – Standard mode and Advance mode to scan corrupt OST files. You can save the recovered data in different formats such as PST, EML and MSG. The software also lets you save email messages in HTML, RTF and Plain Text format. The software comes with LIVE update feature (automatically updates the software with the latest version). And, it’s compatible with most of the versions of MS Outlook including 2013, Outlook Express 5.0 and above and MS Exchange Server including 2013. The too is incredibly easy to operate because of its user-friendly interface.
How to Recover Outlook Data File OST
Recover Corrupt Outlook OST file data using a professional tool
Follow below steps one-by-one:
- Open RecoveryFix OST to PST software tool.
Below is tool’s home screen, there two steps,
Step 1 – to select the corrupt OST file.
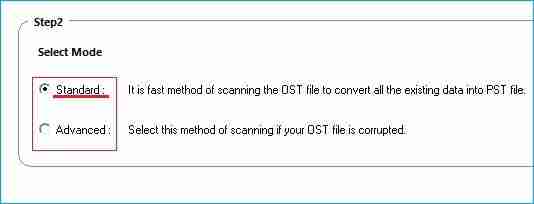
Step 2 – to select the recovery mode.
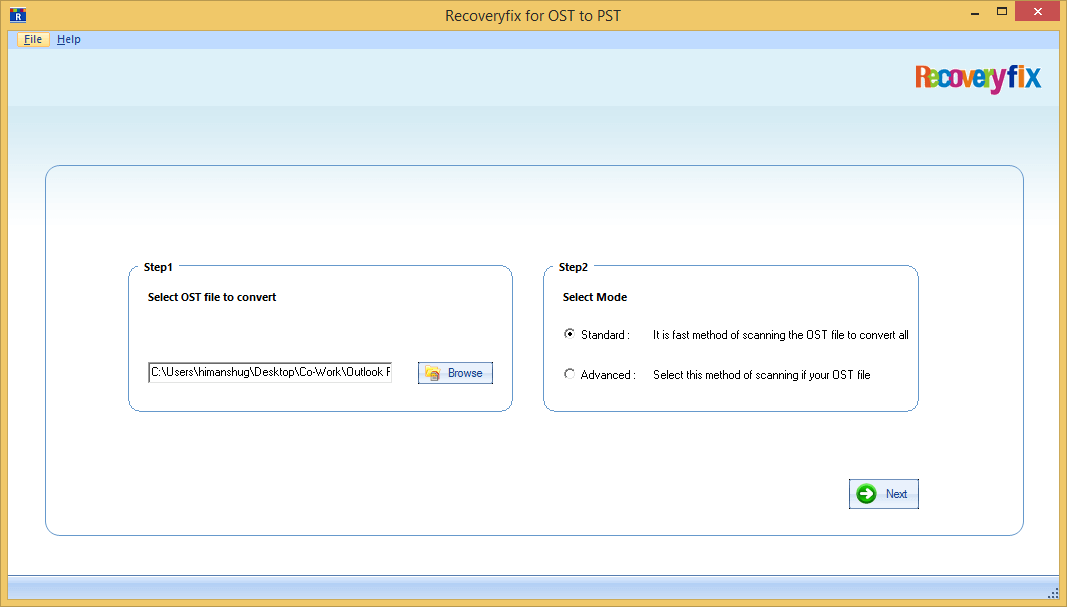
- Select the corrupt Outlook OST file.
- Select the Recovery Mode, select Standard Mode.
- Click Next,
- The tool will scan the corrupt or damaged Outlook OST file.
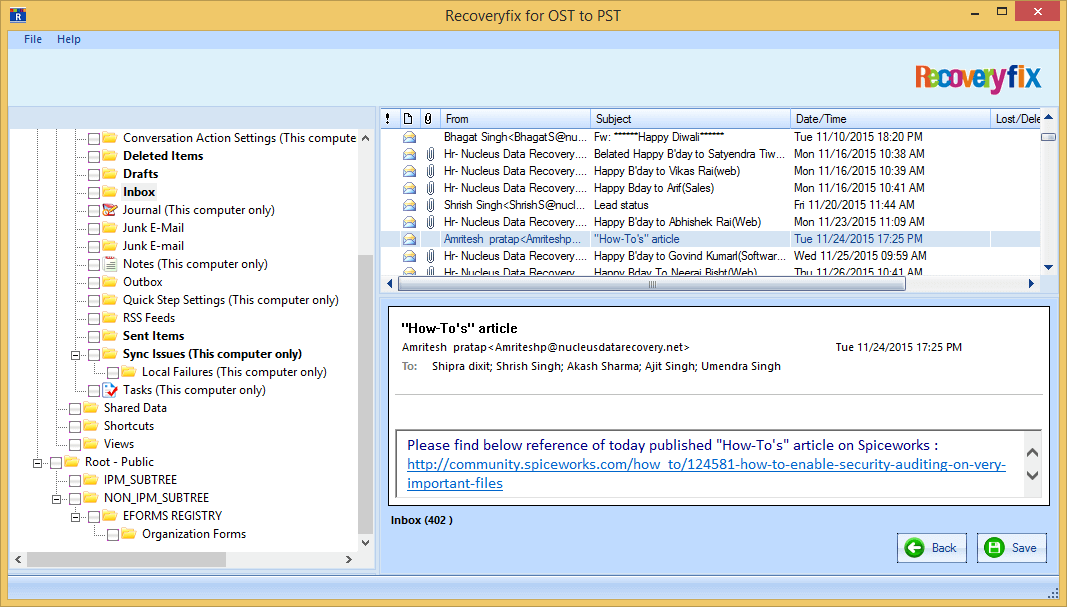
- Upon the scan process completion, tool’s interface would refresh and load three different sections which are
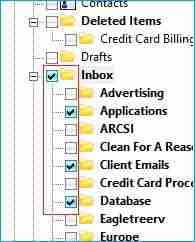
file tree structure view – in the left, folder view – at the top, message view – at the bottom, - Select all the folder(s) as per your requirement or select the master (root) check box, as shown below, to recover mailbox file(s) & folder(s),
- Once you’re done with folder(s) selection, click Save.
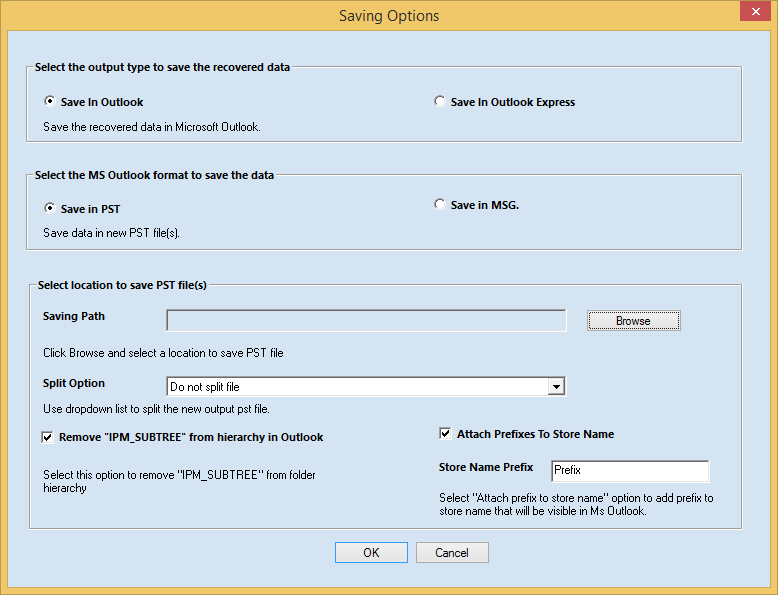
- In the Saving Options Screen.
- Click Ok, when you’ve finalized the save settings.
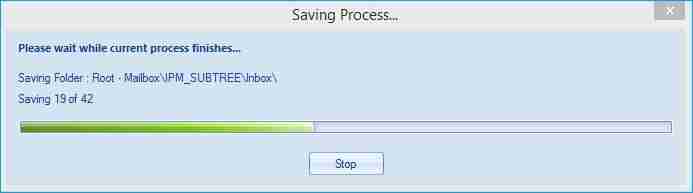
- Total Time required for Saving Process depends on the actual size of Outlook OST data file,
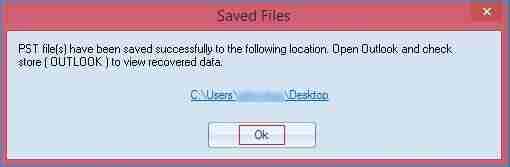
- Finally, click OK.
Note: Recovery Mode selection depends upon the level of corruption, for serious file corruption you should select Advanced Mode.
Note: Time for scan completion depends on the total size of the OST file.

Note:
In the file tree structure view, you can expand or collapse any folder – empty or containing file(s) and select as per the requirement.
Clicking on the specific folder(s) would list the folder contents – items.
Clicking on specific emails – messages, you can view the email, this feature is Live Preview.
You can select between saving the file to Outlook or Outlook Express and choose between keeping the recovered data in PST file or MSG file format and lastly picking the file location/path to save it.
Note: If you wish then you can remove IPM_SUBTREE from the hierarchy in Outlook, and in case if you don’t possess enough technical knowledge then leave the option as it is.
Check/Uncheck the Attach Prefixes to Store Name.
Note: You can stop the saving process anytime if you’ve done something wrong during the whole process.
Read Related Blog